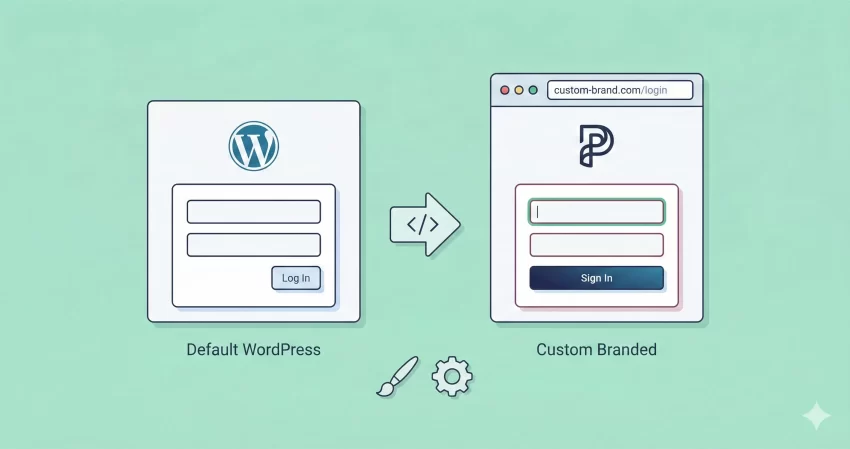
Let’s face it: the default WordPress login screen is boring. It works, sure, but seeing that generic WordPress logo every time you or your clients log in feels like a missed opportunity. If you are building a professional website, the experience shouldn’t stop at the frontend.
When you customize WordPress login page, you aren’t just changing colors; you are extending your brand identity. Whether you are running a membership site, an eCommerce store, or handing over a site to a client, a branded login screen screams professionalism.
In this guide, I will walk you through exactly how to customize WordPress login page functionality and aesthetics without relying on heavy plugins. We will change the logo, update the URL, and give the whole page a facelift using clean, lightweight code.
Why You Should Customize WordPress Login Page
Before we dive into the code, you might be wondering if it’s worth the effort. Why bother editing a page that only a few people see?
- Brand Consistency: For membership sites or online stores, the login page is a high-traffic area. Keeping the user within your brand’s visual language builds trust.
- Client Experience: If you are a developer, handing over a site where the client sees their logo instead of the WordPress logo makes the product feel bespoke and premium.
- Security Obscurity: While not a firewall, changing the look can deter script-kiddies who look for the default styles to launch brute force attacks.
To effectively customize WordPress login page, we will be adding code snippets to your theme’s functions.php file. I highly recommend using a Child Theme or a site-specific plugin to ensure your changes aren’t lost during theme updates.
Step 1: Changing the Login Logo
The first and most impactful step to customize WordPress login page is replacing the WordPress logo with your own. By default, WordPress uses CSS to display its logo as a background image. We need to override that.
First, upload your custom logo to your WordPress Media Library. Ideally, this should be a transparent PNG around 80×80 pixels or wider (up to 320px).
Copy the URL of your uploaded image and use the following snippet:
/**
 * Change the default login logo.
 */
function pnet_login_logo() {
    ?>
    < style type="text/css" >
        #login h1 a, .login h1 a {
            background-image: url(<?php echo get_stylesheet_directory_uri(); ?>/images/my-logo.png);
            height: 65px;
            width: 320px;
            background-size: contain;
            background-repeat: no-repeat;
            padding-bottom: 30px;
        }
    </style>
    <?php
}
add_action( 'login_enqueue_scripts', 'pnet_login_logo' );
Note: Replace the URL inside background-image with the actual link to your logo file.
This simple function hooks into login_enqueue_scripts and injects internal CSS. This is the cleanest way to customize WordPress login page logos without editing core files.
Step 2: Changing the Logo URL and Title
If you click your new logo right now, you will notice a problem: it still redirects to WordPress.org, and the hover text says “Powered by WordPress.” To fully customize WordPress login page, we need to fix this so the logo points to your homepage.
We will use two specific filters for this: login_headerurl and login_headertext.
/**
 * Change the login logo link URL to the site homepage.
 */
function pnet_login_logo_url() {
    return home_url();
}
add_filter( 'login_headerurl', 'pnet_login_logo_url' );

/**
 * Change the login logo hover title text.
 */
function pnet_login_logo_url_title() {
    return get_bloginfo( 'name' );
}
add_filter( 'login_headertext', 'pnet_login_logo_url_title' );
With these two snippets, your login page is now functionally branded. When users click the logo, they are taken to your home page, which is standard UX behavior. This small detail is crucial when you customize WordPress login page for clients who might be confused by a link to WordPress.org.
Step 3: Styling the Login Form and Background
Now that the branding assets are in place, let’s look at styling. The default grey background is functional but uninspiring. To truly customize WordPress login page, we want to change the background color, the button styles, and maybe the form container itself.
You can add this CSS directly in the function we created in Step 1, or create a separate stylesheet. For simplicity, let’s keep it in a snippet but expand our CSS.
Here is a snippet that changes the background to a modern dark blue, styles the button to match, and softens the form shadow:
/**
 * Enqueue custom stylesheet for the login page.
 */
function pnet_custom_login_stylesheet() {
    wp_enqueue_style( 'custom-login', get_stylesheet_directory_uri() . '/css/style-login.css' );
}
add_action( 'login_enqueue_scripts', 'pnet_custom_login_stylesheet' );
Alternatively, if you prefer inline styles for a quick fix:
function pnet_login_styles() { ?>
    < style type="text/css">
        /* Change Page Background */
        body.login {
            background-color: #f0f4f8;
        }

        /* Style the Form Container */
        .login form {
            background: #ffffff;
            border-radius: 10px;
            box_shadow: 0px 4px 15px rgba(0,0,0,0.1);
            border: none;
        }

        /* Style the Submit Button */
        .wp-core-ui .button-primary {
            background: #007cba;
            border-color: #007cba;
            text-shadow: none;
            box-shadow: none;
            border-radius: 5px;
            transition: all 0.3s ease;
        }

        .wp-core-ui .button-primary:hover {
            background: #005a87;
        }
    </style>
<?php }
add_action( 'login_enqueue_scripts', 'pnet_login_styles' );
By adding these styles, you completely transform the visual hierarchy. When you customize WordPress login page styles, pay attention to the submit button—make sure it matches your website’s primary call-to-action color.
You might also like:
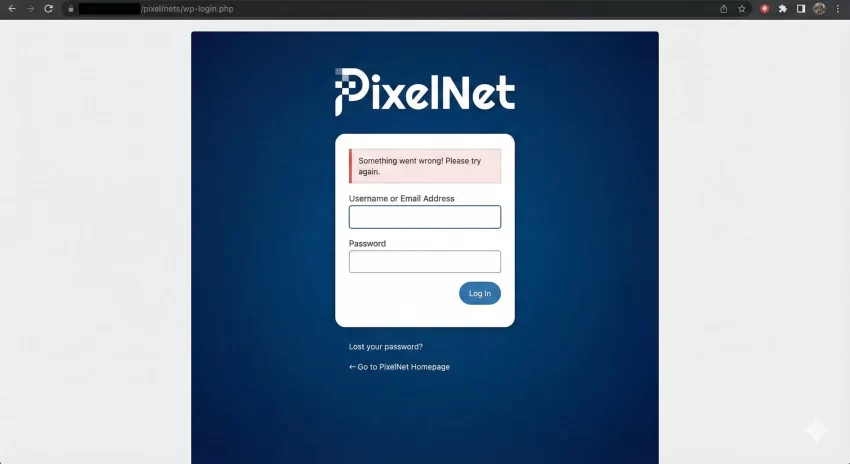
Step 4: Customizing Error Messages
One often overlooked aspect when you customize WordPress login page is the error messages. By default, if someone types a wrong password, WordPress tells them “The password you entered for the username X is incorrect.”
From a security standpoint, this is bad practice because it confirms the username exists. Let’s make this generic.
/**
 * Obscure login error messages for security.
 */
function pnet_login_errors() {
    return 'Something went wrong! Please try again.';
}
add_filter( 'login_errors', 'pnet_login_errors' );
Troubleshooting Common Issues
Sometimes, things don’t go as planned. Here are a few tips if your changes aren’t showing up:
- Cache: If you use caching plugins (like WP Rocket or LiteSpeed), purge the cache after adding these snippets.
- CSS Specificity: If your styles aren’t applying, try adding !important to your CSS rules or check if another plugin is conflicting.
- Path Issues: Ensure
get_stylesheet_directory_uri()is pointing to the correct folder where your logo image resides.
Conclusion
Learning to customize WordPress login page is a fundamental skill for any WordPress developer. It elevates the perceived value of your work and provides a seamless user experience. You don’t need a bloated plugin to achieve a professional look; a few lines of code in your functions.php file are all it takes.
By following this guide, you have replaced the logo, fixed the URL, styled the form, and even improved security. Go ahead and implement these snippets on your site today!
Do you have a specific design in mind for your login page? Let me know in the comments below, and I can help you with the specific CSS!