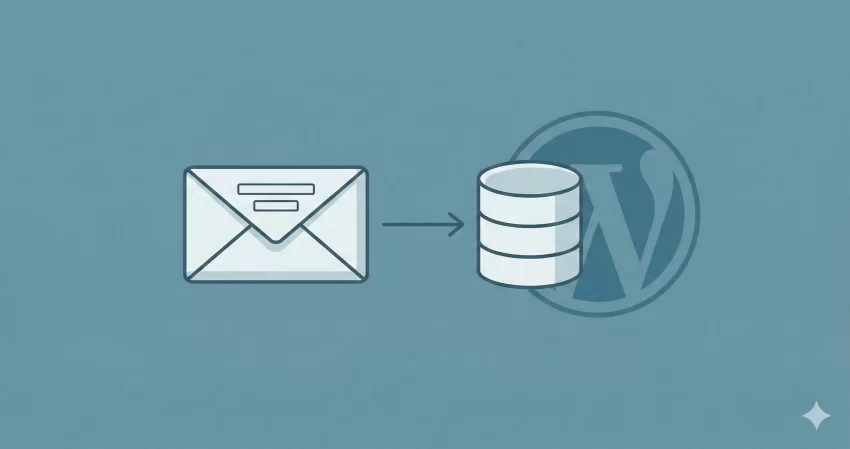
Every WordPress developer using Contact Form 7 eventually hits a critical limitation: by default, the plugin sends an email and immediately discards the data. If your SMTP fails, the server drops the connection, or an email goes to spam, that valuable lead is gone forever. The most robust solution is to store cf7 form submissions directly into your WordPress database. In this comprehensive technical guide, we will walk through building a lightweight, highly-optimized custom solution to securely capture this data and render it within a custom administrative dashboard.
When you store cf7 form submissions locally, you create a fail-safe repository for all client inquiries. This is especially crucial for high-traffic sites where database bloat and performance are concerns. By avoiding heavy third-party plugins and writing our own clean PHP architecture, we ensure server costs remain low while maintaining absolute control over our data storage and retrieval processes.
- PHP 8.0 or higher active on your server environment.
- WordPress 6.4+ installed and running.
- Contact Form 7 plugin installed and activated.
- Administrator access to your WordPress dashboard.
- FTP/SFTP access or a local development environment to edit your theme’s
functions.phpor custom plugin files. - A recent backup of your WordPress database before executing custom SQL queries.
Setting Up the Database Architecture
To efficiently store cf7 form submissions, we need a dedicated custom table in the WordPress database. Relying on the default wp_posts and wp_postmeta tables for form entries is a common anti-pattern that leads to severe database bloat and degraded query performance over time. Creating a custom table ensures our queries remain lightning-fast and our primary content tables stay clean.
We will achieve this by utilizing the core WordPress database manipulation functions. This ensures our table is created seamlessly upon activation or theme initialization, adhering to the site’s specific database prefix.
Understanding WPDB and dbDelta
WordPress provides a highly secure global object called $wpdb for interacting with the database. To create or update tables, we use the dbDelta function. This function examines the current table structure, compares it to the desired SQL structure, and makes necessary alterations without dropping the table. It is the safest way to manage custom schemas.
When you prepare to store cf7 form submissions, your schema must account for variable data lengths. A standard submission requires an ID, a timestamp, the form ID, the sender’s name, email, and the raw message payload. Structuring these correctly with appropriate VARCHAR and TEXT limits prevents index corruption and maximizes read/write speeds.
Writing the Custom Table Schema
Below is the precise PHP code required to generate our custom table. You should ideally place this in a custom functionality plugin, or carefully within your active theme’s functions.php file hooked to after_setup_theme.
Backup Required
function pnet_create_cf7_custom_table() {
    global $wpdb;
    $table_name = $wpdb->prefix . 'pnet_cf7_entries';
    $charset_collate = $wpdb->get_charset_collate();

    $sql = "CREATE TABLE $table_name (
        id mediumint(9) NOT NULL AUTO_INCREMENT,
        time datetime DEFAULT '0000-00-00 00:00:00' NOT NULL,
        form_id mediumint(9) NOT NULL,
        sender_name varchar(100) NOT NULL,
        sender_email varchar(100) NOT NULL,
        message_data text NOT NULL,
        PRIMARY KEY  (id),
        KEY form_id (form_id)
    ) $charset_collate;";

    require_once( ABSPATH . 'wp-admin/includes/upgrade.php' );
    dbDelta( $sql );
}
add_action( 'after_setup_theme', 'pnet_create_cf7_custom_table' );
This code establishes an auto-incrementing primary key, timestamps for chronological sorting, and an indexed form_id column to speed up queries when filtering entries by specific contact forms later in our admin dashboard.
You might also like: How to Create a Stunning WordPress Multi-Step Form : Boost Conversions Instantly
Intercepting Contact Form 7 Data
With our architecture in place, the next phase is to intercept the data payload right before Contact Form 7 attempts to dispatch its email. This ensures that even if the SMTP routing fails, we successfully store cf7 form submissions locally.
Contact Form 7 handles its submission sequence through a series of internal classes and hooks. We must tap into this lifecycle cleanly, extract the sanitized variables, and map them to our newly created database columns.
Utilizing the wpcf7_before_send_mail Hook
The wpcf7_before_send_mail action hook is the most reliable entry point. It fires after the form has passed all internal validation checks but precisely before the wp_mail() function is invoked. By hooking into this action, we gain access to the WPCF7_Submission singleton object, which contains all user inputs.
It is vital to access this instance correctly, as accessing $_POST data directly bypasses CF7’s built-in sanitization and file upload handlers, leaving your application vulnerable to malicious injections.
Extracting and Sanitizing Submission Data
Once we have the submission instance, we retrieve the posted data as an array. Even though CF7 performs initial validation, a strict WordPress developer always sanitizes data before executing a database insert. We will use functions like sanitize_text_field() for strings and sanitize_email() for addresses.
Pro Tip
message_data TEXT column. Executing the Database Insertion
Now we combine the extracted data and use the $wpdb->insert() method to safely execute our SQL query. This method automatically handles escaping, protecting us from SQL injection vulnerabilities.
function pnet_capture_cf7_submission( $contact_form ) {
    $submission = WPCF7_Submission::get_instance();
    if ( ! $submission ) {
        return;
    }

    $posted_data = $submission->get_posted_data();

    // Extract standard fields based on default CF7 tags
    $form_id      = (int) $contact_form->id();
    $sender_name  = isset( $posted_data['your-name'] ) ? sanitize_text_field( $posted_data['your-name'] ) : 'Unknown';
    $sender_email = isset( $posted_data['your-email'] ) ? sanitize_email( $posted_data['your-email'] ) : 'No Email';

    // Convert the entire payload to JSON for the text column
    $message_data = wp_json_encode( $posted_data );

    global $wpdb;
    $table_name = $wpdb->prefix . 'pnet_cf7_entries';

    $wpdb->insert(
        $table_name,
        array(
            'time'         => current_time( 'mysql' ),
            'form_id'      => $form_id,
            'sender_name'  => $sender_name,
            'sender_email' => $sender_email,
            'message_data' => $message_data,
        ),
        array(
            '%s', // time
            '%d', // form_id
            '%s', // sender_name
            '%s', // sender_email
            '%s'  // message_data
        )
    );
}
add_action( 'wpcf7_before_send_mail', 'pnet_capture_cf7_submission', 10, 1 );
You might also like: Easily Remove Unused CSS and JS in WordPress for Blazing Fast Speed
Building the Admin Dashboard Interface
Data is only useful if you can analyze it. Now that we securely store cf7 form submissions, we must construct a backend interface to view this data. This involves creating a custom admin menu page and rendering a structured HTML table to display our MySQL records.
Building a custom interface rather than relying on heavy plugins keeps your WordPress admin fast and reduces the risk of plugin conflicts, ensuring your dashboard remains a streamlined control center.
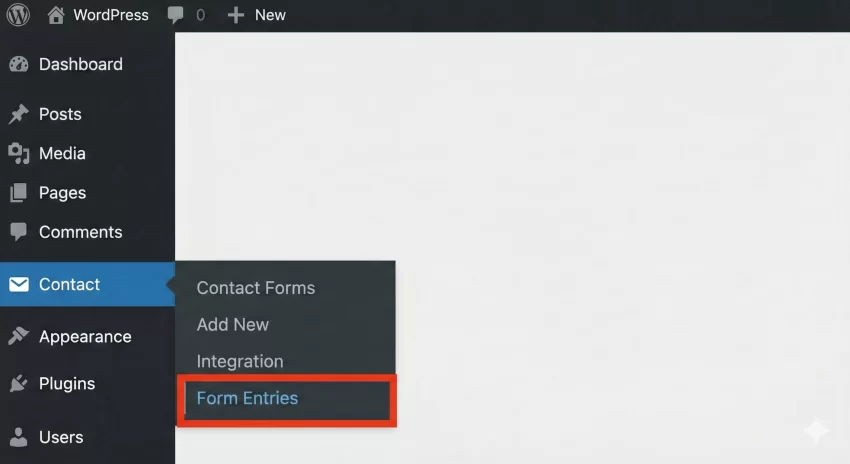
Registering a Custom Admin Menu Page
We use the add_menu_page function tied to the admin_menu hook to create a new navigation item in the WordPress backend. We will restrict access to administrators by requiring the manage_options capability.
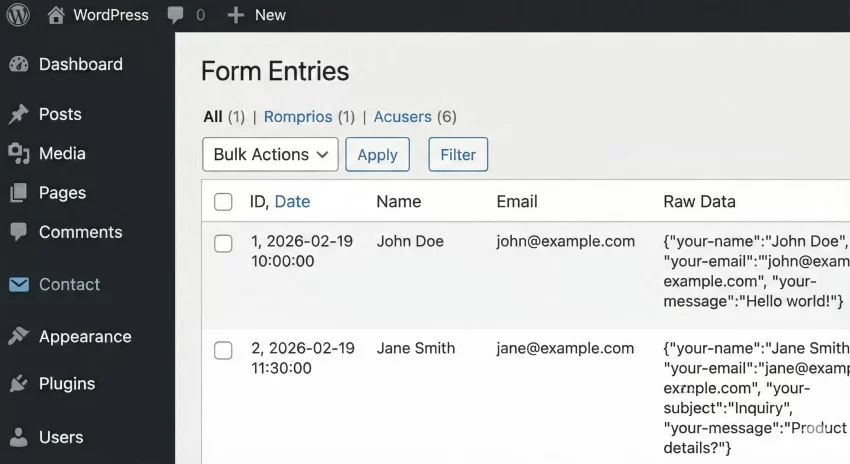
Querying and Rendering the Data Table
The callback function for our menu page will handle querying the custom table using $wpdb->get_results(). We will iterate through the returned objects and output them in a standard WordPress WP_List_Table format (or a simplified HTML table for basic use cases). Security dictates that we must use esc_html() on all outputted strings to prevent Cross-Site Scripting (XSS) within the admin panel.
function pnet_cf7_admin_menu() {
    add_menu_page(
        'CF7 Entries',
        'Form Entries',
        'manage_options',
        'pnet-cf7-entries',
        'pnet_cf7_entries_page',
        'dashicons-database',
        30
    );
}
add_action( 'admin_menu', 'pnet_cf7_admin_menu' );

function pnet_cf7_entries_page() {
    global $wpdb;
    $table_name = $wpdb->prefix . 'pnet_cf7_entries';

    // Query the latest 50 submissions
    $results = $wpdb->get_results( "SELECT * FROM $table_name ORDER BY time DESC LIMIT 50" );

    echo '<div class="wrap">';
    echo '<h1 class="wp-heading-inline">Contact Form Submissions</h1>';

    if ( $results ) {
        echo '<table class="wp-list-table widefat fixed striped table-view-list">';
        echo '<thead><tr><th>ID</th><th>Date</th><th>Name</th><th>Email</th><th>Raw Data</th></tr></thead>';
        echo '<tbody>';

        foreach ( $results as $row ) {
            echo '<tr>';
            echo '<td>' . esc_html( $row->id ) . '</td>';
            echo '<td>' . esc_html( $row->time ) . '</td>';
            echo '<td>' . esc_html( $row->sender_name ) . '</td>';
            echo '<td><a href="mailto:' . esc_attr( $row->sender_email ) . '">' . esc_html( $row->sender_email ) . '</a></td>';

            // Format JSON data for readable display
            $decoded_data = json_decode( $row->message_data, true );
            $clean_output = '';
            if ( is_array( $decoded_data ) ) {
                foreach ( $decoded_data as $key => $val ) {
                    // Skip hidden CF7 fields
                    if ( strpos( $key, '_wp' ) === false ) {
                        $val_str = is_array($val) ? implode(', ', $val) : $val;
                        $clean_output .= '<strong>' . esc_html( $key ) . ':</strong> ' . esc_html( $val_str ) . '<br>';
                    }
                }
            }

            echo '<td>' . wp_kses_post( $clean_output ) . '</td>';
            echo '</tr>';
        }

        echo '</tbody></table>';
    } else {
        echo '<p>No entries found yet.</p>';
    }
    echo '</div>';
}
Troubleshooting Common Errors
When you build custom systems to store cf7 form submissions, you may encounter a few specific developmental hurdles. Here are the most common issues and how to resolve them efficiently.
Why is my database table not being created?
This is frequently caused by incorrect SQL syntax inside the dbDelta function. dbDelta is incredibly strict. Ensure there are exactly two spaces after PRIMARY KEY, that the dbDelta call is hooked properly to after_setup_theme or plugin activation, and that you have required the upgrade.php file.
Why are my submissions not saving when the form is submitted?
Ensure the wpcf7_before_send_mail hook is firing correctly. If you have page caching plugins active, ensure the form is submitting via AJAX. Furthermore, double-check your form field names. If your CF7 form uses [ text* first-name ] instead of [ text* your-name ], the $posted_data['your-name'] array key will be undefined, resulting in empty database rows.
Why is my admin page displaying a permissions error?
This happens if your user account does not possess the capability defined in add_menu_page(). Ensure you are logged in as an Administrator and that you passed manage_options as the capability parameter.
Summary
Relying solely on SMTP to handle critical user communications is a volatile strategy. By implementing the PHP architecture outlined above, you have successfully bypassed this vulnerability. You learned how to safely generate a custom MySQL table, intercept the internal Contact Form 7 submission hooks, and render a dedicated management dashboard inside WordPress.
With this setup, you effectively store cf7 form submissions in a secure, scalable, and highly performant manner. This foundational code not only protects your lead generation efforts but also serves as an excellent stepping stone for building more advanced data management tools, exporting functions, and custom CRM integrations directly within your WordPress environment.
You might also like: Stop Email Failures: The Ultimate WordPress SMTP Configuration Guide