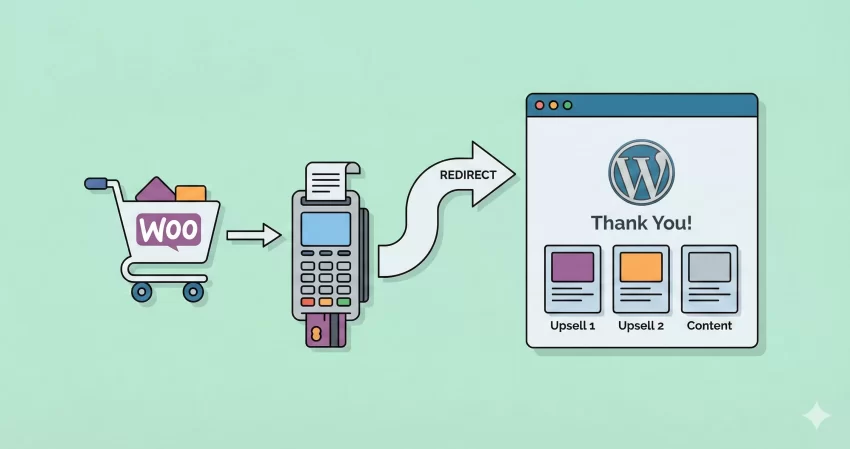
Are you looking for a reliable way to implement a WooCommerce redirect after checkout to a custom landing page? You have come to the right place. By default, WooCommerce sends your customers to a standard “Order Received” endpoint. While functional, this default page often lacks the engagement triggers necessary to turn a one-time buyer into a loyal brand advocate. Customizing this flow is a powerful strategy to display upsells, gather feedback, or simply provide a superior onboarding experience.
In this comprehensive guide, we will dive deep into the code to show you exactly how to handle a WooCommerce redirect after checkout programmatically. We will bypass the need for bloated plugins and give you full control over your customer’s post-purchase journey. Whether you want to redirect all users, target specific products, or filter by user roles, this guide covers it all.
Why You Need a Custom WooCommerce Redirect After Checkout
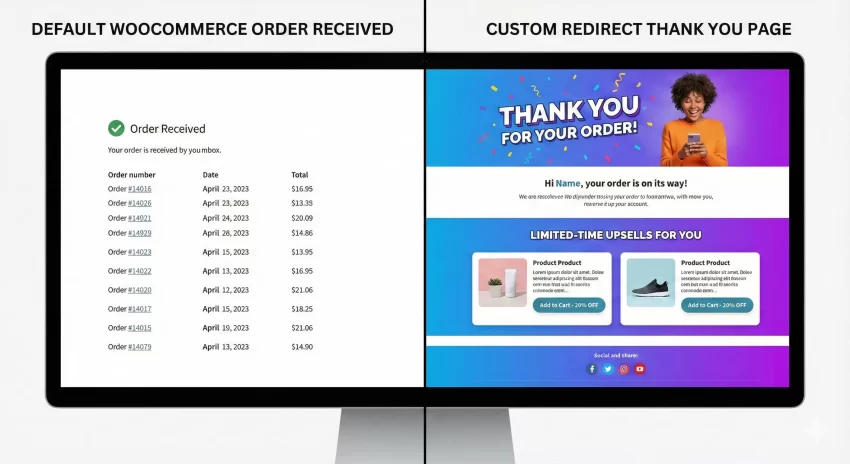
Before we jump into the code, it is essential to understand the value of changing the default behavior. A standard “Thank You” page is a dead-end; it confirms the order and nothing more. However, a strategically planned WooCommerce redirect after checkout opens up a world of marketing possibilities.
Here is why savvy store owners and developers prioritize this customization:
- Increased Average Order Value (AOV): Redirecting to a custom page allows you to display exclusive “one-time offers” or related product upsells immediately after a purchase is secured.
- Better Onboarding: For digital products or courses, a WooCommerce redirect after checkout can take users directly to a “Start Here” guide or a membership dashboard, reducing support tickets.
- Enhanced Social Proof: You can design a custom page that encourages users to share their purchase on social media or leave a review while the excitement is high.
- Detailed Analytics: Sometimes, tracking conversions on standard dynamic endpoints is tricky. A distinct URL makes setting up goals in Google Analytics significantly easier.
Implementing a WooCommerce redirect after checkout is not just a cosmetic change; it is a conversion optimization tactic. Now, let’s look at how to build it.
Prerequisites and Safety Measures
Since we will be adding custom code to your WordPress site, it is crucial to follow best practices to ensure your site remains stable.
- Backup Your Site: Always take a full backup of your database and files before editing PHP files.
- Use a Child Theme: Never add custom code directly to your parent theme’s
functions.phpfile. Updates to the theme will wipe your changes. Always use a child theme or a site-specific plugin. - Access to File Editor: You will need access to your theme’s
functions.phpfile via FTP or the WordPress dashboard.
You might also like:
Method 1: The Global Redirect (Redirect All Users)
The cleanest way to implement a WooCommerce redirect after checkout is by using the woocommerce_get_return_url filter. This filter allows us to modify the URL that the payment gateway uses to return the customer to the shop after payment processing.
This method is preferred over using the template_redirect hook because it interacts directly with the WooCommerce order flow, ensuring that the order status is properly handled before the user is moved.
Here is the code snippet to redirect all successful orders to a single custom URL.
/**
 * Global WooCommerce Redirect After Checkout
 * Redirects all users to a specific custom page.
 */
add_filter( 'woocommerce_get_return_url', 'pnet_global_checkout_redirect', 10, 2 );

function pnet_global_checkout_redirect( $return_url, $order ) {
    // Define your custom URL here
    $custom_url = home_url( '/custom-thank-you/' );

    // You can add logic here to ensure the order is actually paid
    if ( $order->get_status() !== 'failed' ) {
        return $custom_url;
    }

    // Fallback to default if something is wrong
    return $return_url;
}
In the code above, we define a function prefixed with pnet_ to avoid conflicts. We use the WordPress home_url() function to ensure the link structure remains valid even if you change your domain later. This effectively handles the WooCommerce redirect after checkout for every single customer.
Tip: How to Display WooCommerce Sale Percentage on Products: 3 Easy Steps
Method 2: Redirect Based on Specific Products
Often, you do not want a global redirect. Perhaps you are selling a specific consultation service that requires a calendar booking immediately after purchase, while your physical products just need a standard receipt.
To handle a conditional WooCommerce redirect after checkout based on the items in the cart, we need to loop through the order items inside our function. This is a common requirement for membership sites or hybrid stores selling both physical and digital goods.
The logic below checks if a specific product ID exists in the order. If it does, the WooCommerce redirect after checkout triggers a specific page.
/**
 * Conditional WooCommerce Redirect After Checkout
 * Redirects based on a specific product ID in the order.
 */
add_filter( 'woocommerce_get_return_url', 'pnet_product_specific_redirect', 10, 2 );

function pnet_product_specific_redirect( $return_url, $order ) {
    // The ID of the product that triggers the redirect
    $target_product_id = 152;
    $custom_url = home_url( '/onboarding-course-welcome/' );

    // Check if order allows us to access items
    if ( ! $order ) {
        return $return_url;
    }

    // Loop through order items
    foreach ( $order->get_items() as $item ) {
        if ( $item->get_product_id() == $target_product_id ) {
            return $custom_url;
        }
    }

    // Default return if product not found
    return $return_url;
}
This snippet gives you granular control. By simply changing the $target_product_id, you can create highly relevant post-purchase flows. This targeted approach to the WooCommerce redirect after checkout process significantly improves user experience.
Method 3: Redirect Based on Payment Gateway
Another advanced scenario involves redirecting users based on how they paid. For example, you might want to send users who paid via “Cash on Delivery” (COD) to a page with instructions on preparing exact change, while PayPal users go to a standard confirmation page.
This version of the WooCommerce redirect after checkout checks the payment method title or ID associated with the order object.
/**
 * Payment Gateway Based WooCommerce Redirect After Checkout
 * Redirect COD users to a specific instructions page.
 */
add_filter( 'woocommerce_get_return_url', 'pnet_gateway_specific_redirect', 10, 2 );

function pnet_gateway_specific_redirect( $return_url, $order ) {

    // Check the payment method
    // 'cod' is usually the ID for Cash on Delivery
    if ( $order->get_payment_method() === 'cod' ) {
        return home_url( '/cod-instructions/' );
    }

    // 'bacs' is usually Direct Bank Transfer
    if ( $order->get_payment_method() === 'bacs' ) {
        return home_url( '/bank-transfer-details/' );
    }

    return $return_url;
}
Using the get_payment_method() function helps you segment your audience efficiently. This ensures that the WooCommerce redirect after checkout provides context-aware information to the buyer.
You might also like:

Method 4: Using JavaScript (The Fallback Method)
Sometimes, server-side redirects can be interfered with by other plugins or aggressive caching layers. In such cases, a JavaScript-based WooCommerce redirect after checkout can serve as a robust fallback. This method hooks into the actual “Thank You” page content and triggers a browser-level redirect.
While effective, use this sparingly, as it loads the thank you page briefly before moving the user.
/**
 * JS Fallback for WooCommerce Redirect After Checkout
 * Hooks into the thank you page content.
 */
add_action( 'woocommerce_thankyou', 'pnet_js_redirect_fallback' );

function pnet_js_redirect_fallback( $order_id ) {
    if ( ! $order_id ) return;

    $order = wc_get_order( $order_id );
    $custom_url = home_url( '/thank-you-special/' );

    if ( ! $order->has_status( 'failed' ) ) {
        ?>
        <script type="text/javascript">
            window.location = '<?php echo $custom_url; ?>';
        < /script>
        <?php
    }
}
Troubleshooting Common Issues
Even with valid code, implementing a WooCommerce redirect after checkout can sometimes fail. Here are common pitfalls and how to fix them:
1. Order Status Issues
WooCommerce might not trigger the redirect if the order fails or stays in “Pending Payment.” Ensure your logic checks that the order is “Processing” or “Completed.” The code snippets provided above include basic validation to prevent redirecting failed orders.
2. Plugin Conflicts
SEO plugins or other WooCommerce extensions (like Subscription plugins) often hook into the same filters. If your WooCommerce redirect after checkout is not working, try increasing the priority of your function. For example, change 10 to 99 in the add_filter line:
add_filter( 'woocommerce_get_return_url', 'pnet_global_checkout_redirect', 99, 2 );
3. Caching
Aggressive page caching on the checkout or order received endpoints can prevent PHP functions from executing dynamically. Ensure your caching plugin excludes the Checkout and Order Received pages. This is critical for a smooth WooCommerce redirect after checkout.
Why Not Use a Plugin?
You might be wondering, “Is there a plugin for this?” Yes, there are plugins like “Custom Thank You Pages” that handle WooCommerce redirect after checkout. However, for developers and performance enthusiasts, code is often better.
Plugins add weight to your database and can introduce security vulnerabilities if not updated. A simple 10-line code snippet in your child theme is lightweight, free, and completely customizable. Furthermore, understanding the underlying code allows you to debug issues much faster than relying on third-party support.
If you are interested in learning more about how WordPress handles redirects internally, you can check the documentation for wp_redirect() on the WordPress Developer Resources. While we used WooCommerce specific filters here, understanding the core redirect function is valuable for any WordPress developer.
Final Thoughts
Mastering the WooCommerce redirect after checkout flow gives you a significant advantage in e-commerce. It transforms a transactional moment into a relational one. Whether you choose a global redirect, a product-specific journey, or a payment-based logic, the code provided here gives you the foundation to build a sophisticated post-purchase experience.
Remember to test your WooCommerce redirect after checkout thoroughly in a staging environment before pushing it to your live site. Simulate different payment methods and cart combinations to ensure every customer lands exactly where they should.
By taking control of this final step in the sales funnel, you are not just coding; you are engineering a better user experience that drives retention and revenue.