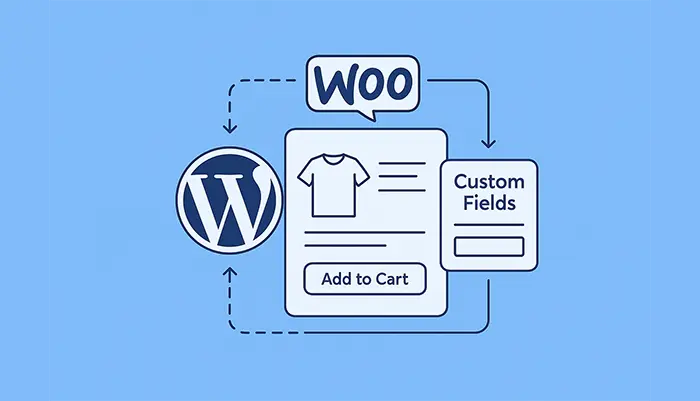
If you’re building advanced product pages, dynamic pricing logic, or storing extra buyer information, mastering WooCommerce Product Custom Fields becomes essential. These custom fields help developers extend product functionality, personalize checkout experiences, and store important details inside the final order—without relying on bulky plugins.
In this guide, you will learn how to programmatically add custom fields to WooCommerce product pages, display them across cart, checkout, and order details, and store them properly in the database.
Let’s dive in!
Why Add WooCommerce Product Custom Fields?
Custom fields give you the freedom to:
- Collect additional product-specific data
- Display user-selected values throughout the checkout process
- Add personalization options (engraving text, color selection, warranty, etc.)
- Save selected values into order line items
- Use the data later for fulfillment, email notifications, CRM syncing, etc.
Whether you’re building a simple custom label field or a fully dynamic configuration system, WooCommerce provides all the hooks you need to add the WooCommerce Product Custom Fields.
Step 1: Add Custom Fields to WooCommerce Product Edit Page
You first need to display new fields inside the Product Data → General tab.
// Add custom field to product backend
add_action( 'woocommerce_product_options_general_product_data', 'pnet_add_custom_product_field' );
function pnet_add_custom_product_field() {
    woocommerce_wp_text_input( array(
        'id'          => 'pnet_custom_label',
        'label'       => 'Custom Label Text',
        'description' => 'Enter a custom label value to display on the product frontend.',
        'desc_tip'    => true,
    ));
}
Save the field when the product is updated:
add_action( 'woocommerce_admin_process_product_object', 'pnet_save_custom_product_field' );
function pnet_save_custom_product_field( $product ) {
    if ( isset( $_POST['pnet_custom_label'] ) ) {
        $product->update_meta_data( 'pnet_custom_label', sanitize_text_field( $_POST['pnet_custom_label'] ) );
    }
}
Step 2: Display Custom Field on Product Page (Frontend)
Now let’s show the stored data on the single product page.
add_action( 'woocommerce_before_add_to_cart_button', 'pnet_display_custom_field_on_frontend' );
function pnet_display_custom_field_on_frontend() {
    global $product;
    $label = $product->get_meta( 'pnet_custom_label' );

    if ( $label ) {
        echo '<p class="pnet-custom-label"><strong>Product Label:</strong> ' . esc_html( $label ) . '</p>';
    }
}
This appears right above the Add to Cart button.
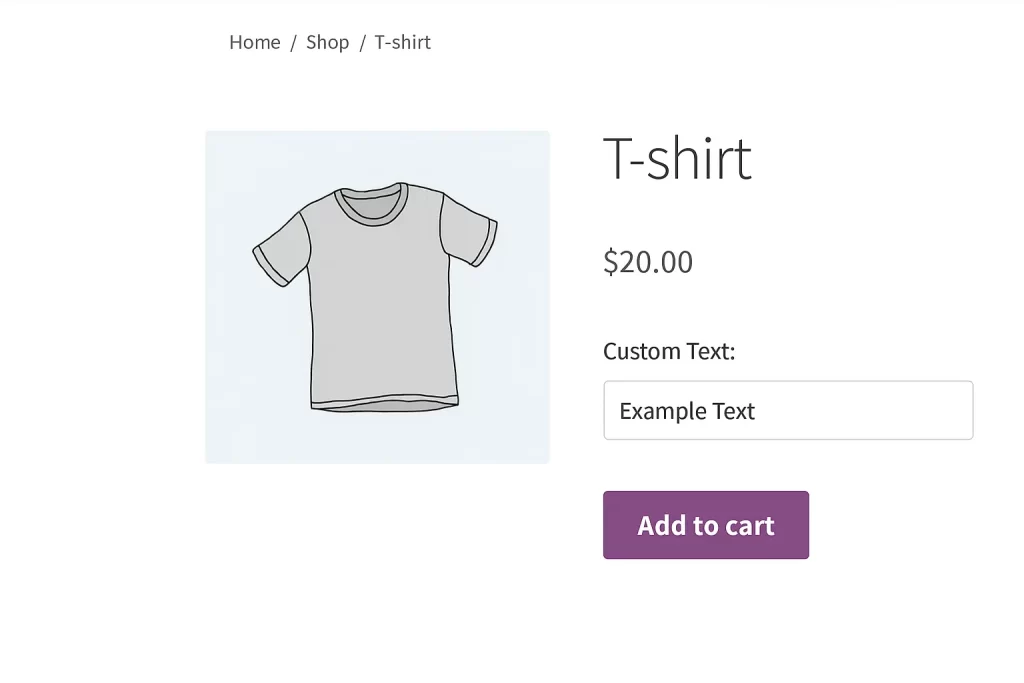
Step 3: Allow Customers to Enter a Custom Value (Optional)
If you want customers to input a custom value:
add_action( 'woocommerce_before_add_to_cart_button', 'pnet_custom_user_input_field' );
function pnet_custom_user_input_field() {
    echo '<div class="pnet-user-input">';
    woocommerce_form_field( 'pnet_user_note', array(
        'type'  => 'text',
        'label' => 'Your Custom Note',
        'required' => false
    ), '' );
    echo '</div>';
}
Step 4: Save Customer Input to Cart Item
add_filter( 'woocommerce_add_cart_item_data', 'pnet_add_cart_item_data', 10, 2 );
function pnet_add_cart_item_data( $cart_item_data, $product_id ) {

    if ( isset( $_POST['pnet_user_note'] ) ) {
        $cart_item_data['pnet_user_note'] = sanitize_text_field( $_POST['pnet_user_note'] );
    }

    return $cart_item_data;
}
Step 5: Display Custom Field in Cart & Checkout
add_filter( 'woocommerce_get_item_data', 'pnet_display_data_in_cart', 10, 2 );
function pnet_display_data_in_cart( $item_data, $cart_item ) {

    if ( isset( $cart_item['pnet_user_note'] ) ) {
        $item_data[] = array(
            'name'  => 'Custom Note',
            'value' => esc_html( $cart_item['pnet_user_note'] )
        );
    }

    return $item_data;
}
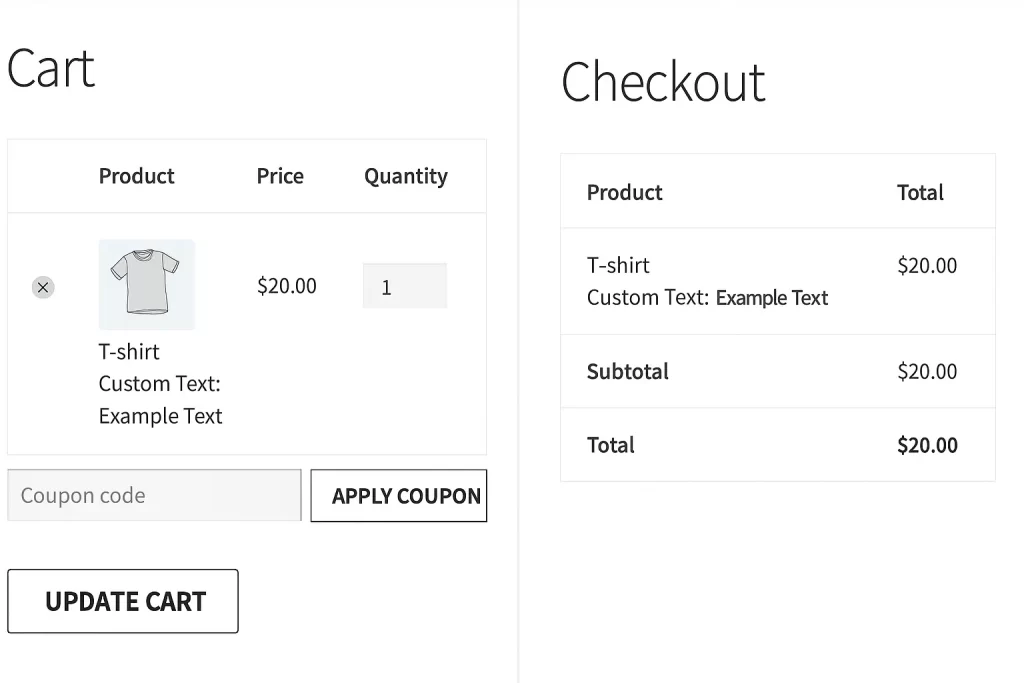
Step 6: Save Custom Data to Order Line Item
add_action( 'woocommerce_checkout_create_order_line_item', 'pnet_save_order_item_meta', 10, 4 );
function pnet_save_order_item_meta( $item, $cart_item_key, $values, $order ) {

    if ( isset( $values['pnet_user_note'] ) ) {
        $item->add_meta_data( 'Custom Note', $values['pnet_user_note'] );
    }

    $product = wc_get_product( $item->get_product_id() );
    $label = $product->get_meta( 'pnet_custom_label' );

    if ( $label ) {
        $item->add_meta_data( 'Product Label', $label );
    }
}
This ensures the custom data appears in:
- Order confirmation email
- Order admin dashboard
- Packing slips / invoicing plugins
Final Thoughts
Adding WooCommerce Product Custom Fields programmatically is one of the most powerful ways to extend product functionality and create personalized shopping experiences. Whether you’re building configurable products, collecting custom messages, or adding backend-only metadata, WooCommerce makes the process smooth and flexible through its hooks and product meta system.
With the examples above—and your own imagination—you can build highly advanced custom workflows tailored to any type of business.


