
Running an online store is a constant battle for attention. When a customer lands on your shop page, you have milliseconds to convince them that your deal is too good to miss. One of the most effective psychological triggers you can pull is showing the exact value of a deal. While showing a crossed-out regular price is standard, explicitly displaying the WooCommerce discount percentage (e.g., “You Save 20%”) can significantly increase your conversion rates.
By default, WooCommerce does a great job of showing sale prices, but it often leaves the math to the customer. Why force your visitors to calculate how much they are saving? In this comprehensive guide, we will walk you through how to automatically calculate and display the WooCommerce discount percentage on your product loops and single product pages. Whether you are a developer looking for a clean solution or a store owner wanting to boost sales, this guide covers it all.
Why displaying the Discount Percentage Matters
Before we dive into the code, let’s talk about the “Why”. The concept of “Anchoring” in consumer psychology suggests that customers rely heavily on the first piece of information offered (the anchor) when making decisions. In e-commerce, the “Regular Price” is the anchor.
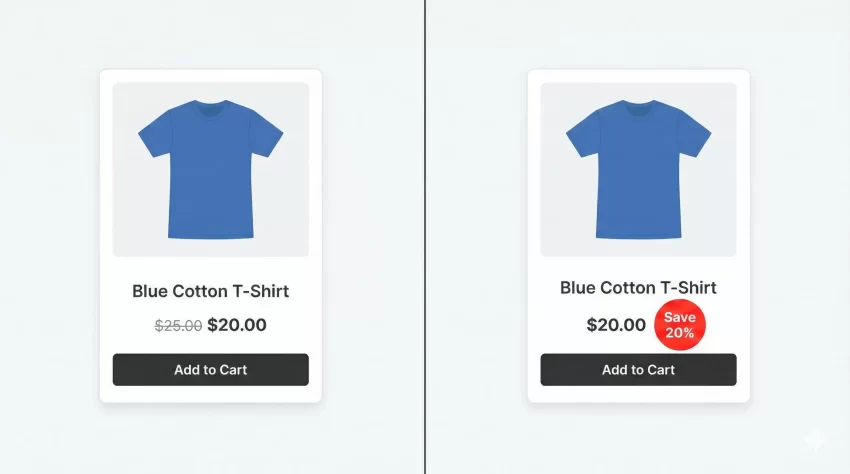
When you display the WooCommerce discount percentage alongside that anchor, you are not just showing a lower price; you are quantifying the win for the customer. Seeing “Save 50%” is often more compelling than seeing a price drop from $20 to $10, even though the math is identical. It creates urgency and visualizes value instantly.
The Technical Approach: Hooks and Filters
To implement this, we won’t be editing the core WooCommerce files (which is a cardinal sin in WordPress development). Instead, we will use hooks and filters. Specifically, we have two main options:
- Filter the Price HTML: This modifies the actual price string wherever it appears.
- Action Hooks: This allows us to insert a separate “badge” or text block before or after the product title/price.
For this guide, we will focus on the Action Hook method, as it gives us more flexibility to style the “You Save” text independently of the main price. We will use the WooCommerce Product Class methods to retrieve raw prices and perform our calculations.
You might also like:

Step 1: The Basic Logic
The math is simple: ((Regular Price - Sale Price) / Regular Price) * 100. However, handling this in WooCommerce requires checking a few conditions first:
- Is the product actually on sale?
- Is it a simple product or a variable product?
- Does the product have a regular price set?
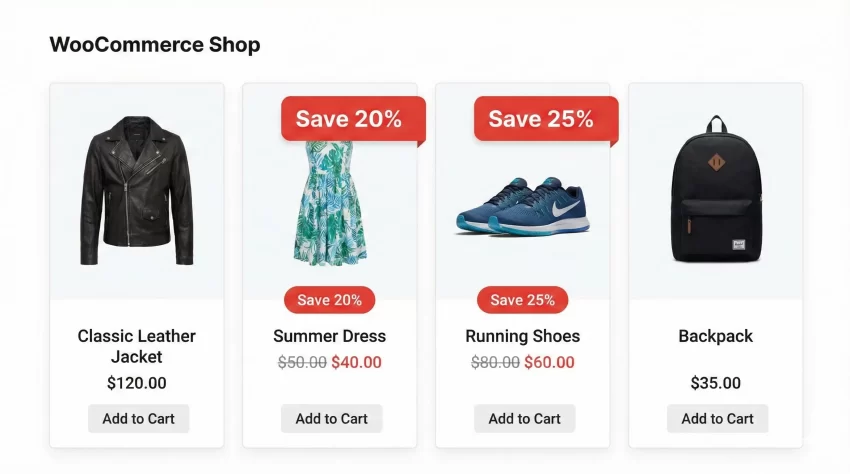
We will create a custom function prefixed with pnet_ to avoid conflicts. This function will hook into woocommerce_before_shop_loop_item_title to show the badge on the shop page (archive), and woocommerce_single_product_summary for the individual product page.
Step 2: displaying Percentage on Simple Products
Let’s start with Simple Products. These are products with a single price and no variations (like size or color). Add the following code to your theme’s functions.php file or a site-specific plugin.
/**
 * Display "You Save X%" on Simple Products
 */
function pnet_show_sale_percentage() {
    global $product;

    // Check if product is on sale and is a simple product
    if ( $product->is_on_sale() && $product->is_type( 'simple' ) ) {

        $regular_price = (float) $product->get_regular_price();
        $sale_price    = (float) $product->get_sale_price();

        // Avoid division by zero
        if ( $regular_price > 0 ) {
            $percentage = round( ( ( $regular_price - $sale_price ) / $regular_price ) * 100 );

            echo '<div class="pnet-save-badge">You Save ' . $percentage . '%</div>';
        }
    }
}

// Hook into the shop loop (Category pages)
add_action( 'woocommerce_before_shop_loop_item_title', 'pnet_show_sale_percentage', 25 );

// Hook into the single product page
add_action( 'woocommerce_single_product_summary', 'pnet_show_sale_percentage', 15 );
In the code above, we first ensure the global $product object is available. We then strictly check if the product is on sale. If it is, we grab the raw float values of the prices to perform math. The round() function ensures we don’t get ugly decimals like “You Save 25.3333%”.
Tip: WooCommerce Redirect After Checkout: An Easy Guide to Boost Retention
Step 3: Handling Variable Products
Variable products are trickier. A T-shirt might be 10% off for the “Small” size but 20% off for the “Large” size. When calculating the WooCommerce discount percentage for variable products, the best practice is usually to show the maximum possible saving to entice the click.
Here is the updated function that handles both Simple and Variable products:
/**
 * Display "You Save X%" on Simple AND Variable Products
 */
function pnet_show_sale_percentage_advanced() {
    global $product;

    if ( ! $product->is_on_sale() ) {
        return;
    }

    $max_percentage = 0;

    if ( $product->is_type( 'simple' ) ) {
        $regular_price = (float) $product->get_regular_price();
        $sale_price    = (float) $product->get_sale_price();

        if ( $regular_price > 0 ) {
            $max_percentage = round( ( ( $regular_price - $sale_price ) / $regular_price ) * 100 );
        }
    }
    elseif ( $product->is_type( 'variable' ) ) {
        $available_variations = $product->get_available_variations();

        foreach ( $available_variations as $variation ) {
            $variation_obj = new WC_Product_Variation( $variation['variation_id'] );
            $regular_price = (float) $variation_obj->get_regular_price();
            $sale_price    = (float) $variation_obj->get_sale_price();

            if ( $regular_price > 0 && $variation_obj->is_on_sale() ) {
                $percentage = round( ( ( $regular_price - $sale_price ) / $regular_price ) * 100 );

                // We want to show the highest possible discount
                if ( $percentage > $max_percentage ) {
                    $max_percentage = $percentage;
                }
            }
        }
    }

    if ( $max_percentage > 0 ) {
        echo '<div class="pnet-save-badge">Save up to ' . $max_percentage . '%</div>';
    }
}

// Remove the previous action if you added it, and add this new one
add_action( 'woocommerce_before_shop_loop_item_title', 'pnet_show_sale_percentage_advanced', 25 );
add_action( 'woocommerce_single_product_summary', 'pnet_show_sale_percentage_advanced', 15 );
This script loops through all available variations of a product. It calculates the percentage for each variation and stores the highest one. Note that we changed the text to “Save up to” for variable products to remain legally accurate.
You might also like:

Step 4: Styling the Badge
Now that we have the data outputting to the page, it likely looks like plain text. To make the WooCommerce discount percentage pop, we need some CSS. You can add this to your theme’s style.css file or the Customizer.
.pnet-save-badge {
    background-color: #e74c3c; /* Red for urgency */
    color: #ffffff;
    padding: 5px 10px;
    font-size: 14px;
    font-weight: bold;
    border-radius: 3px;
    display: inline-block;
    margin-bottom: 10px;
    text-transform: uppercase;
    box-shadow: 0 2px 5px rgba(0,0,0,0.1);
}

/* Optional: Absolute positioning over the image */
/* Uncomment below if you want it over the product image */
/*
.woocommerce ul.products li.product .pnet-save-badge {
    position: absolute;
    top: 10px;
    right: 10px;
    z-index: 9;
}
*/
Where to Place the Code?
If you are new to WordPress development, you might be wondering where these snippets go. You have two primary choices:
- Child Theme functions.php: This is the standard way. Ensure you are using a child theme so your changes aren’t lost when the parent theme updates.
- Code Snippets Plugin: A safer alternative for beginners. It allows you to add PHP code via the WordPress dashboard without editing files directly.
Regardless of the method, always backup your site before adding custom PHP. A missing semicolon can take down your site (though recovery is usually easy via FTP).
Advanced Customization: Conditional Loading
Sometimes you might not want to show the WooCommerce discount percentage if the saving is very small. For example, “Save 1%” might look like a mistake or an insult to the buyer. We can modify our function to only display the badge if the saving is greater than a certain threshold, say 10%.
Modify the display condition in your PHP function like this:
// Only show if the percentage is greater than or equal to 10
if ( $max_percentage >= 10 ) {
    echo '<div class="pnet-save-badge">Save ' . $max_percentage . '%</div>';
}
Conclusion
Calculating and displaying the WooCommerce discount percentage is a powerful, low-effort way to optimize your store for conversions. By moving away from static sale prices and embracing dynamic, percentage-based savings, you communicate value much faster to your browsing customers.
Remember, the goal of your product page is to reduce friction. Doing the math for your customer is one less hurdle between them and the “Add to Cart” button. Try implementing the pnet_show_sale_percentage function today and monitor your analytics to see the impact.
If you found this guide helpful or have a unique setup that requires a different hook, let me know in the comments below!