If you build websites for clients, you know the drill. You hand over a shiny new site, and two weeks later, you get an email: “How do I change that photo again?” or “I forgot how to contact support.”
The WordPress dashboard is the first thing your clients see when they log in, yet it’s often cluttered with confusing notices from plugins and generic “Welcome to WordPress” boxes. As a developer, you have the power to change that.
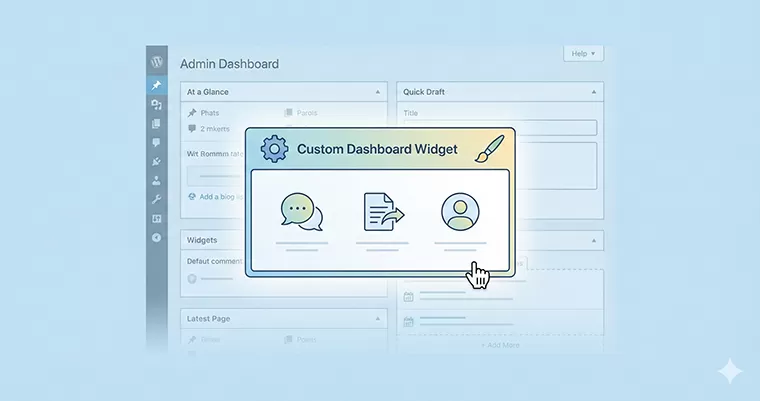
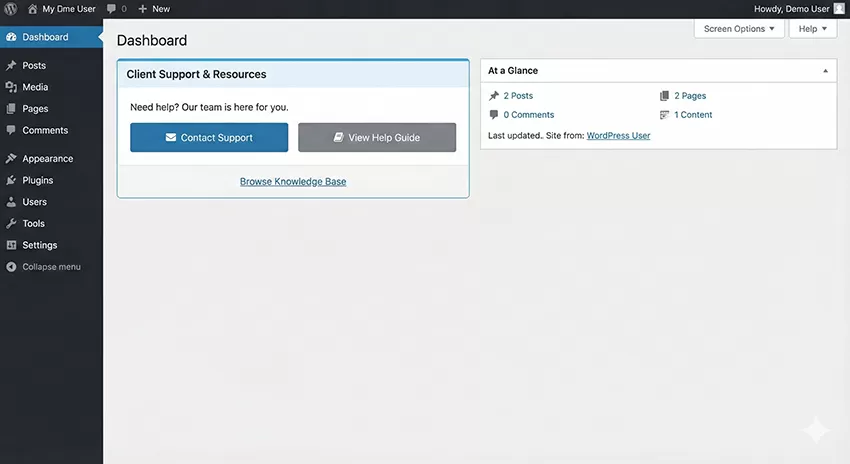
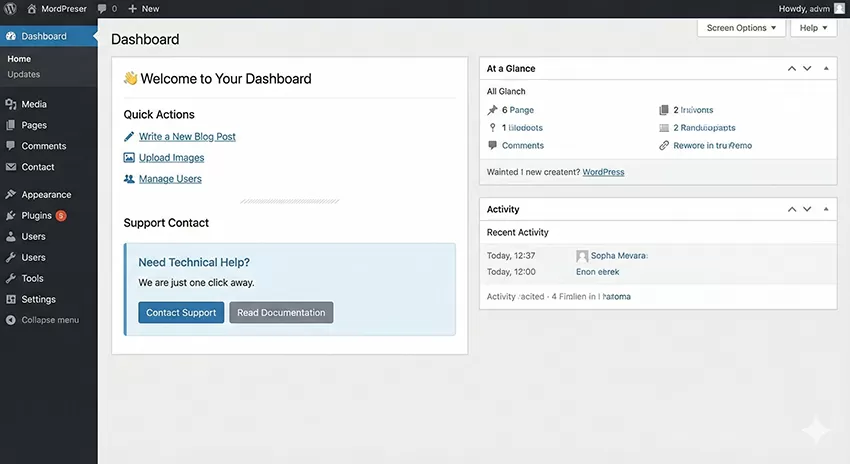
By adding a WordPress custom dashboard widget, you can transform that wasted real estate into a helpful support panel, a list of video tutorials, or a direct line of communication to you.
In this guide, I will show you exactly how to code a custom widget from scratch. We’ll build a “Client Support Station” that looks professional, functions perfectly, and keeps your clients happy.
Why You Need a WordPress Custom Dashboard Widget
Before we dive into the code, let’s look at why this matters. A default WordPress installation is designed for everyone, which means it’s optimized for no one in particular.
Creating a WordPress custom dashboard widget allows you to:
- Reduce Support Tickets: Place FAQs and “How-To” links right where clients log in.
- Reinforce Your Brand: Keep your agency or freelance name visible.
- Improve User Experience: Guide clients to the features they actually use, ignoring the noise.
Let’s get your code editor ready.
Step 1: Registering the Widget
To create a WordPress custom dashboard widget, we need to hook into the wp_dashboard_setup action from dashboard widgets API. This tells WordPress, “Hey, when you’re building the dashboard, add my box to the stack.”
We will use the wp_add_dashboard_widget() function. Open your theme’s functions.php file (or your custom plugin file) and add the following code.
Note: We are using the prefix
pnet_for all functions to ensure uniqueness and compatibility.
/**
 * Register the Client Support Dashboard Widget
 */
function pnet_register_dashboard_widgets() {
    wp_add_dashboard_widget(
        'pnet_client_support_widget',       // Widget Slug (ID)
        'Welcome to Your Dashboard',     // Widget Title
        'pnet_widget_content_callback'      // Callback function for content
    );
}
add_action( 'wp_dashboard_setup', 'pnet_register_dashboard_widgets' );
Understanding the Parameters
- Widget Slug: A unique ID for your widget (
pnet_client_support_widget). - Widget Title: The text that appears in the header bar of the widget.
- Callback Function: The name of the function that outputs the actual HTML content.
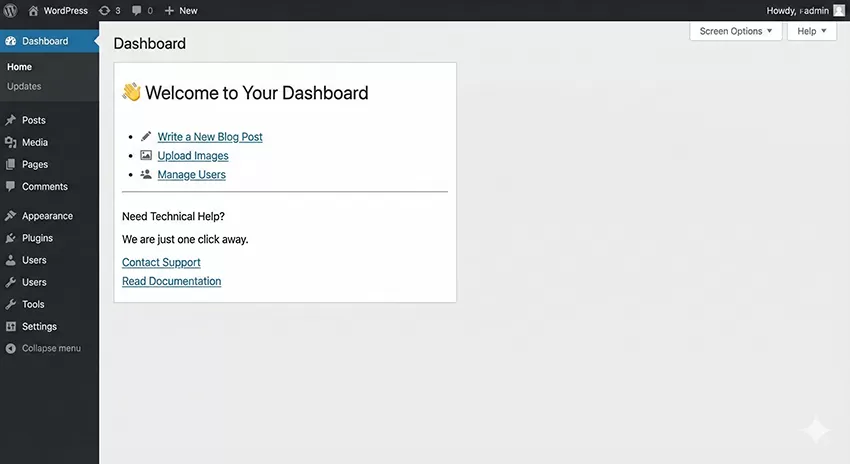
Step 2: Designing the Content
Now that we have registered the WordPress custom dashboard widget, we need to put something inside it. This is handled by the callback function we defined above: pnet_widget_content_callback.
This is where standard HTML and PHP come into play. For this example, we’ll create a section for “Quick Actions” and a “Support Contact” area.
/**
 * Output content for the custom dashboard widget
 */
function pnet_widget_content_callback() {
    ?>
    <div class="pnet-widget-container">

Hello! This is your website management hub. If you need to update content, here are your quick links:

        <ul class="pnet-quick-links">
            <li>
                <a href="<?php echo admin_url('post-new.php'); ?>">
                    <span class="dashicons dashicons-edit"></span> Write a New Blog Post
                </a>
            </li>
            <li>
                <a href="<?php echo admin_url('upload.php'); ?>">
                    <span class="dashicons dashicons-format-image"></span> Upload Images
                </a>
            </li>
            <li>
                <a href="<?php echo admin_url('users.php'); ?>">
                    <span class="dashicons dashicons-admin-users"></span> Manage Users
                </a>
            </li>
        </ul>

        <hr>

        <div class="pnet-support-box">
            <h4>Need Technical Help?</h4>

We are just one click away.
            <a href="mailto:support@pixelnet.in" class="button button-primary">Contact Support</a>
            <a href="https://pixelnet.in/docs" target="_blank" class="button button-secondary">Read Documentation</a>
        </div>
    </div>
    <?php
}
Notice how we used admin_url()? This ensures that no matter where the site is installed (local, staging, or production), the links inside your WordPress custom dashboard widget always work.
You might also like:
Step 3: Styling Your Widget
A raw HTML list looks a bit boring. To make our WordPress custom dashboard widget look like a native part of the admin interface, we need to add some CSS.
We can inject CSS directly into the admin head. In a production environment, you might enqueue a separate stylesheet, but for a lightweight widget, inline styles work perfectly.
/**
 * Add custom CSS for the dashboard widget
 */
function pnet_dashboard_widget_styles() {
    ?>
    <style>
        /* Container Spacing */
        #pnet_client_support_widget .inside {
            margin: 0;
            padding: 0;
        }
        .pnet-widget-container {
            padding: 20px;
        }

        /* List Styling */
        .pnet-quick-links {
            list-style: none;
            padding: 0;
            margin: 15px 0;
        }
        .pnet-quick-links li {
            margin-bottom: 10px;
        }
        .pnet-quick-links a {
            text-decoration: none;
            font-weight: 600;
            font-size: 14px;
            color: #2271b1;
            display: flex;
            align-items: center;
        }
        .pnet-quick-links .dashicons {
            margin-right: 8px;
            color: #555;
        }

        /* Support Box Styling */
        .pnet-support-box {
            background: #f0f6fc;
            padding: 15px;
            border-radius: 4px;
            border-left: 4px solid #72aee6;
        }
        .pnet-support-box h4 {
            margin-top: 0;
            margin-bottom: 10px;
        }
        .pnet-support-box .button {
            margin-right: 5px;
            margin-top: 10px;
        }
    </style>
    <?php
}
add_action( 'admin_head', 'pnet_dashboard_widget_styles' );
This CSS targets our specific container classes. We used #pnet_client_support_widget to target the widget wrapper specifically. This ensures we don’t accidentally style other parts of the dashboard.
Step 4: Limiting Visibility (Admins vs. Clients)
Sometimes, you might want to create a WordPress custom dashboard widget that is only visible to Editors or Authors, while hiding it from Administrators (since you already know how to use the site).
Alternatively, you might want to hide the “Contact Support” button from lower-level users.
Here is how you can restrict the widget logic based on user capabilities:
function pnet_register_dashboard_widgets_conditional() {
    // Only show if the user is NOT an administrator
    if ( ! current_user_can( 'manage_options' ) ) {
        wp_add_dashboard_widget(
            'pnet_client_instructions',
            'Client Instructions',
            'pnet_widget_content_callback'
        );
    }
}
add_action( 'wp_dashboard_setup', 'pnet_register_dashboard_widgets_conditional' );
This simple check ensures that your WordPress custom dashboard widget appears exactly for the right people.
Advanced Tip: Forcing Your Widget to the Top
One common frustration with the WordPress custom dashboard widget API is that new widgets are often pushed to the bottom of the screen. Clients might not even see them if they have to scroll past “Site Health” and “Activity.”
To force your widget to the top, we have to manipulate the global $wp_meta_boxes array.
/**
 * Force the custom widget to the top of the dashboard
 */
function pnet_force_widget_to_top() {
    global $wp_meta_boxes;

    // Get the regular dashboard widgets
    $normal_dashboard = $wp_meta_boxes['dashboard']['normal']['core'];

    // Backup our custom widget
    $my_widget_backup = array( 'pnet_client_support_widget' => $normal_dashboard['pnet_client_support_widget'] );

    // Remove it from the list
    unset( $normal_dashboard['pnet_client_support_widget'] );

    // Merge it back at the beginning
    $sorted_dashboard = array_merge( $my_widget_backup, $normal_dashboard );

    // Save it back to the global array
    $wp_meta_boxes['dashboard']['normal']['core'] = $sorted_dashboard;
}
add_action( 'wp_dashboard_setup', 'pnet_force_widget_to_top' );
Note: This code should be added inside the same hook or run with a lower priority to ensure the widget exists before moving it.
You might also like:

Removing Default Clutter
While adding a WordPress custom dashboard widget adds value, removing the default clutter multiplies it. A clean dashboard helps the client focus on your custom instructions.
You can remove default widgets using remove_meta_box().
function pnet_remove_default_widgets() {
    remove_meta_box( 'dashboard_primary', 'dashboard', 'side' );   // WordPress Events and News
    remove_meta_box( 'dashboard_quick_press', 'dashboard', 'side' ); // Quick Draft
    remove_meta_box( 'dashboard_activity', 'dashboard', 'normal' ); // Activity
}
add_action( 'wp_dashboard_setup', 'pnet_remove_default_widgets', 999 );
Combining removal with your WordPress custom dashboard widget creates a curated, high-end feel for your deliverables.
Conclusion
The difference between a generic website and a professional solution often lies in the details. A WordPress custom dashboard widget is a small detail that carries a lot of weight. It shows you care about the client’s experience after the launch.
By following this guide, you have learned how to:
- Register a new widget using
wp_add_dashboard_widget. - Create useful content with HTML and PHP.
- Style the widget to match the WordPress UI.
- Position it for maximum visibility.
Go ahead and paste this code into your starter theme or custom plugin. Your clients will thank you for it!