Are you tired of relying on heavy plugins just to add a simple portfolio or movie review section to your website? If you are a developer or an aspiring coder, learning how to register a WordPress Custom Post Type programmatically is a superpower you need to unlock today. Not only does it keep your site lightweight, but it also gives you ultimate control over your data structure.
In this guide, we will walk through the exact code you need to build a robust WordPress Custom Post Type without installing a single third-party plugin. We will cover everything from the basic arguments to ensuring your new content shows up perfectly in the admin dashboard.
What is a WordPress Custom Post Type?
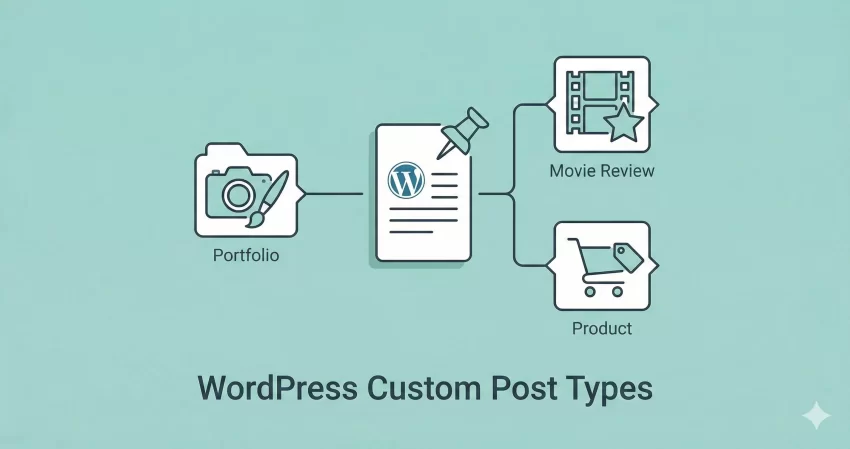
By default, WordPress comes with a few standard content types: Posts and Pages. However, most modern websites need more than that. A WordPress Custom Post Type (CPT) allows you to separate different types of content. For example, if you run a book review site, you don’t want your “Books” mixed in with your regular blog “Posts.”
Creating a CPT helps organize your backend and allows you to display specific content differently on the frontend.
Why Create CPTs Programmatically?
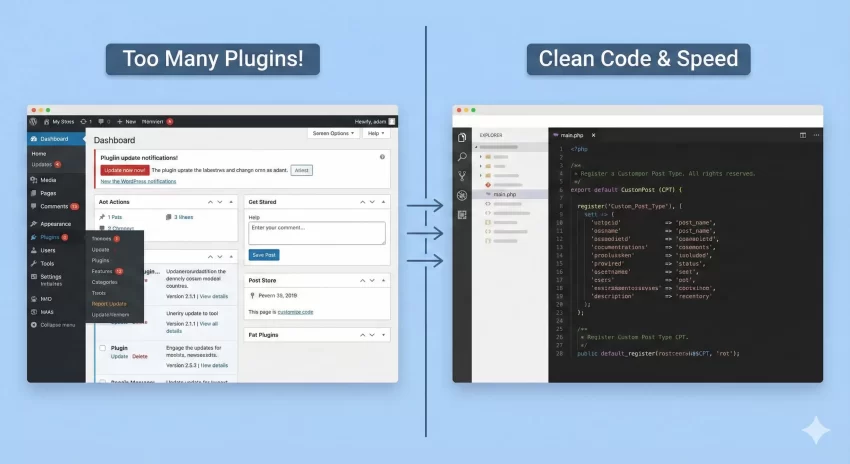
You might be wondering, “Why not just use a plugin like CPT UI?” While plugins are great for absolute beginners, they add an extra layer of code to your site. By coding your WordPress Custom Post Type manually, you achieve:
- Better Performance: No overhead from unused plugin settings.
- Portability: You can bundle your CPT into your theme or a custom site-specific plugin.
- Security: Fewer plugins mean fewer potential vulnerabilities.
You might also like:
Step-by-Step: Registering Your CPT
To register a WordPress Custom Post Type, we use the register_post_type() function. This is a powerful WordPress core function that tells the CMS, “Hey, I have a new type of content, please treat it accordingly.”
You can add the following code to your theme’s functions.php file, but a better practice is to create a site-specific plugin so your data remains even if you switch themes.
1. The Setup
We will create a CPT called “Projects” (useful for portfolios). We will use the prefix pnet_ for our functions to avoid conflicts with other plugins.
2. The Complete Code
Copy and paste the following snippet. We have commented on the code so you understand exactly what each line does.
/**
 * Register a custom post type called "Projects".
 *
 * @see https://developer.wordpress.org/reference/functions/register_post_type/
 */
function pnet_register_project_cpt() {

    // Set UI labels for the Custom Post Type
    $labels = array(
        'name'                => _x( 'Projects', 'Post Type General Name', 'text_domain' ),
        'singular_name'       => _x( 'Project', 'Post Type Singular Name', 'text_domain' ),
        'menu_name'           => __( 'Projects', 'text_domain' ),
        'parent_item_colon'   => __( 'Parent Project', 'text_domain' ),
        'all_items'           => __( 'All Projects', 'text_domain' ),
        'view_item'           => __( 'View Project', 'text_domain' ),
        'add_new_item'        => __( 'Add New Project', 'text_domain' ),
        'add_new'             => __( 'Add New', 'text_domain' ),
        'edit_item'           => __( 'Edit Project', 'text_domain' ),
        'update_item'         => __( 'Update Project', 'text_domain' ),
        'search_items'        => __( 'Search Project', 'text_domain' ),
        'not_found'           => __( 'Not Found', 'text_domain' ),
        'not_found_in_trash'  => __( 'Not found in Trash', 'text_domain' ),
    );

    // Set other options for the Custom Post Type
    $args = array(
        'label'               => __( 'projects', 'text_domain' ),
        'description'         => __( 'Project news and reviews', 'text_domain' ),
        'labels'              => $labels,
        // Features this CPT supports in Post Editor
        'supports'            => array( 'title', 'editor', 'excerpt', 'author', 'thumbnail', 'comments', 'revisions', 'custom-fields', ),
        // You can associate this CPT with a taxonomy or custom taxonomy.
        'taxonomies'          => array( 'genres' ),
        /* A hierarchical CPT is like Pages (can have parents and children). A non-hierarchical CPT is like Posts. */
        'hierarchical'        => false,
        'public'              => true,
        'show_ui'             => true,
        'show_in_menu'        => true,
        'show_in_nav_menus'   => true,
        'show_in_admin_bar'   => true,
        'menu_position'       => 5,
        'can_export'          => true,
        'has_archive'         => true,
        'exclude_from_search' => false,
        'publicly_queryable'  => true,
        'capability_type'     => 'post',
        'show_in_rest'        => true, // This enables the Gutenberg Block Editor
        'menu_icon'           => 'dashicons-portfolio', // Dashicon class for the menu icon
    );

    // Registering your Custom Post Type
    register_post_type( 'projects', $args );

}

/* Hook into the 'init' action so that the function
* Containing our post type registration is not
* unnecessarily executed.
*/
add_action( 'init', 'pnet_register_project_cpt', 0 );
You might also like:

Breaking Down the Arguments
When you register a WordPress Custom Post Type, the $args array is where the magic happens. Here are the critical lines you must pay attention to:
- ‘public’ => true: This makes your post type visible on the site.
- ‘has_archive’ => true: This allows you to have a page (usually yourdomain.com/projects) that lists all your projects.
- ‘show_in_rest’ => true: This is crucial for modern development. Setting this to true enables the Gutenberg Block Editor for your CPT. If you leave it false, you will be stuck with the Classic Editor.
- ‘menu_icon’: You can choose any icon from the WordPress Dashicons library to give your menu a professional look.
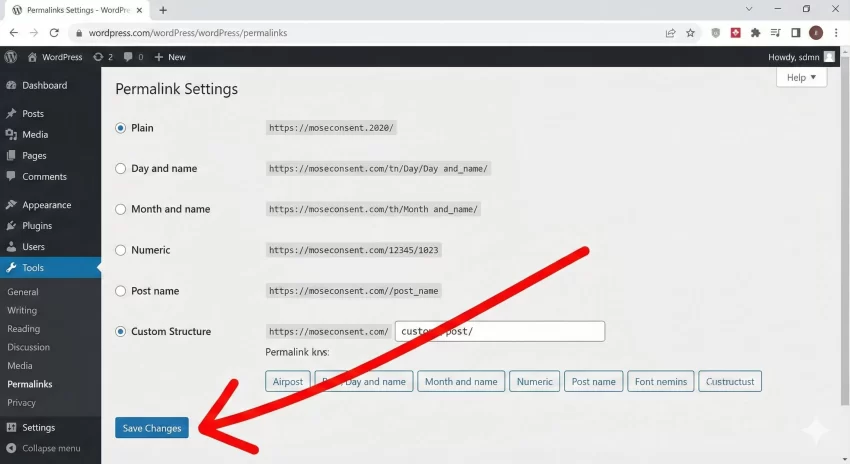
Don’t Forget to Flush Permalinks!
This is the number one mistake beginners make. After adding the code above, if you try to view a single project, you might get a “404 Page Not Found” error. This happens because WordPress hasn’t updated its permalink structure to recognize the new WordPress Custom Post Type.
To fix this:
- Go to your WordPress Dashboard.
- Navigate to Settings > Permalinks.
- Click the “Save Changes” button. You don’t need to change anything; just clicking save resets the structure.
Displaying Your Custom Post Type
Once you have successfully registered your WordPress Custom Post Type, you can create new entries just like standard posts. To display them on the frontend, WordPress uses a template hierarchy.
If you want a custom look for your single project pages, you can create a file in your theme folder named single-projects.php. WordPress will automatically use this file to display individual posts from your “projects” CPT. Similarly, archive-projects.php will control the main list page.
Conclusion
You have now successfully added a fully functional WordPress Custom Post Type to your site without bloating it with unnecessary plugins. This method ensures your site stays fast, secure, and professional.
Mastering the register_post_type function is a fundamental skill for any WordPress developer. Try experimenting with the arguments—change the icons, enable different support features, and see how flexible WordPress really is.