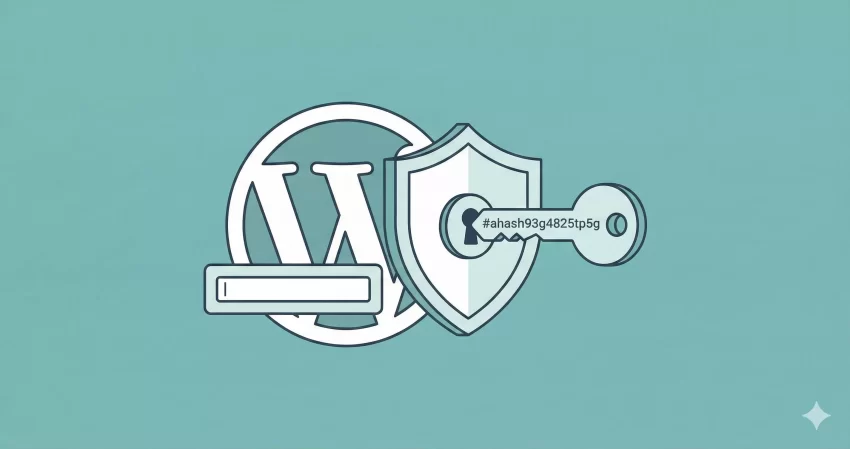
Security is the backbone of any reliable website, yet many developers inadvertently leave their custom forms wide open to Cross-Site Request Forgery (CSRF) attacks. If you are building a plugin or a theme, understanding how to validate requests is not optional—it is mandatory. The solution lies in mastering WordPress nonce verification.
In this guide, we will solve the problem of insecure form submissions by implementing a robust verification layer. By the end of this tutorial, you will know exactly how to generate, send, and verify nonces to ensure that every action performed on your site is intentional and authorized. We will cover the theory, the implementation, and the common pitfalls surrounding WordPress nonce verification.
Intermediate
Prerequisites
Before diving into the code, ensure you have the following ready:
- PHP 7.4 or higher: While WordPress runs on older versions, modern security practices rely on updated PHP environments.
- Access to your Theme or Plugin files: You will need to edit
functions.phpor your custom plugin file. - A Backup of your site: Always backup your database and files before implementing security changes.
- A Local Development Environment: Tools like LocalWP or XAMPP are recommended for testing WordPress nonce verification logic safely.
Step 1: Understanding the Role of Nonces in WordPress
Before writing code, we must understand what a “nonce” actually is. In cryptography, it stands for “Number used ONCE.” However, in the WordPress ecosystem, a nonce is slightly different. It is a security token that is valid for a specific time window (usually 12 to 24 hours) and is unique to the current user and the specific action they are performing. This mechanism is the primary defense against CSRF attacks.
What happens without Nonce Verification?
Without proper WordPress nonce verification, a malicious actor could trick a logged-in administrator into clicking a link that performs a destructive action—such as deleting a post or changing site settings—without the administrator’s knowledge. The site sees a request coming from the admin’s browser and assumes it is legitimate. A nonce acts as a secret handshake, proving that the user intended to perform that specific action right now.
Did You Know?
To implement this, you need to link the generation of the token on the frontend with the verification of that token on the backend. This handshake is the core of WordPress security.
You might also like:
Step 2: Generating the Nonce in Your Form
The first step in the WordPress nonce verification lifecycle is creating the token and embedding it into your HTML form. WordPress provides helper functions to make this seamless. Instead of manually generating a hash, you utilize the core API to create a hidden input field that carries the security token.
Using wp_nonce_field()
The most common method for adding a nonce to a form is wp_nonce_field(). This function outputs the necessary hidden HTML inputs directly. It requires two main arguments: the $action (what is being authorized) and the $name (the key used in the $_POST array).
Below is an example of how to construct a secure form. Note that we define a specific action name, pnet_save_custom_settings, which we will need later for the verification step.
/**
* Render a custom settings form with a Nonce.
*/
function pnet_render_secure_form() {
?>
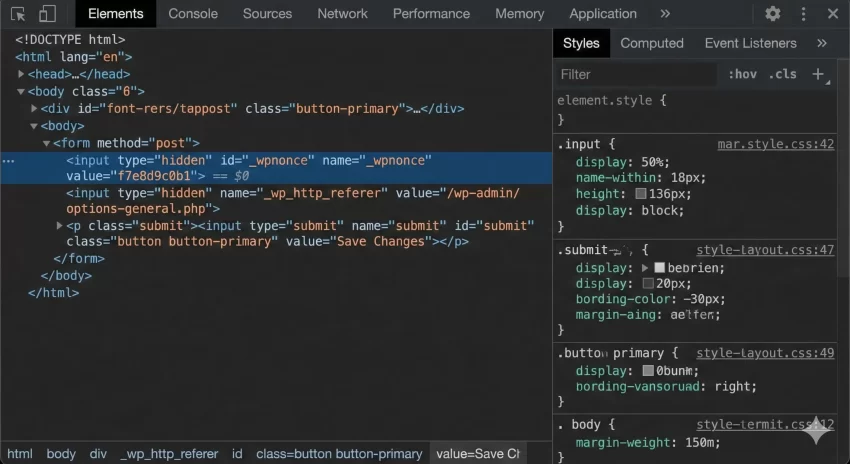
<form method="post" action="">
<?php
// usage: wp_nonce_field( $action, $name );
wp_nonce_field( 'pnet_save_custom_settings', 'pnet_nonce_check' );
?>
<label for="pnet_user_data">Enter Data:</label>
<input type="text" id="pnet_user_data" name="pnet_user_data" value="" />
<input type="submit" value="Save Settings" />
</form>
<?php
}
Why Action Context Matters
You might be tempted to use a generic string like ‘my_nonce’ for all your forms. This is a bad practice. For robust WordPress nonce verification, the action string should be specific to the task. If you use the same nonce action for deleting a post and updating a profile, and a hacker obtains that nonce, they could potentially trigger either action. By making the action string unique (e.g., delete_post_15), you ensure the token is only valid for that specific context.
Must Read: Effortlessly Add AJAX Infinite Scroll in WordPress: The Ultimate Guide
Step 3: Implementing Backend Verification Logic
Generating the field is only half the battle; the server must validate it upon submission. If you skip this step, your form looks secure but functions insecurely. This is where the actual WordPress nonce verification takes place.
Using wp_verify_nonce()
When the form submits data to your PHP handler (usually in functions.php or a plugin file), you must intercept the request and check the token before processing any data. The function wp_verify_nonce() checks if the token matches the action and the user.
Here is how to wire up the backend logic:
/**
 * Handle the form submission securely.
 */
function pnet_handle_form_submission() {
    // 1. Check if the form was actually submitted
    if ( ! isset( $_POST['pnet_user_data'] ) ) {
        return;
    }

    // 2. Perform WordPress nonce verification
    // We check if our custom nonce field is set, and then verify it.
    if ( ! isset( $_POST['pnet_nonce_check'] ) || ! wp_verify_nonce( $_POST['pnet_nonce_check'], 'pnet_save_custom_settings' ) ) {

        // Security failure: Stop execution immediately.
        // wp_die() provides a standard WordPress error screen.
        wp_die( 'Security check failed: Invalid Nonce.' );
    }

    // 3. Sanitization (Always sanitize after verification)
    $clean_data = sanitize_text_field( $_POST['pnet_user_data'] );

    // 4. Process the data (Save to DB, send email, etc.)
    update_option( 'pnet_custom_option', $clean_data );

    echo '<div class="updated"><p>Settings saved securely!</p></div>';
}
add_action( 'init', 'pnet_handle_form_submission' );
Critical Security Warning
$_POST data or perform database operations before the WordPress nonce verification check passes. If you process data before the check, the security layer is useless. Understanding the Return Values
The wp_verify_nonce() function returns one of three values:
1: The nonce is valid and was generated 0-12 hours ago.2: The nonce is valid but was generated 12-24 hours ago.false: The nonce is invalid or expired.
For most standard implementations of WordPress nonce verification, you simply need to check if the result is false. The distinction between 1 and 2 is rarely used in standard form processing but can be useful for refreshing tokens in highly sensitive applications.
You might also like:

Bonus: Handling Nonces in AJAX Requests
Modern WordPress development often relies on AJAX for a smoother user experience. WordPress nonce verification in AJAX is slightly different because you typically use check_ajax_referer() instead of manually calling verification functions, although both methods work.
The Javascript Setup
First, you must localize your script to make the nonce available to JavaScript.
function pnet_enqueue_scripts() {
    wp_enqueue_script( 'pnet-ajax-script', get_template_directory_uri() . '/js/script.js', array('jquery'), '1.0', true );

    // Create the nonce and pass it to JS object
    wp_localize_script( 'pnet-ajax-script', 'pnet_ajax_obj', array(
        'ajax_url' => admin_url( 'admin-ajax.php' ),
        'nonce'    => wp_create_nonce( 'pnet_ajax_action_string' )
    ));
}
add_action( 'wp_enqueue_scripts', 'pnet_enqueue_scripts' );
The PHP Handler
In your AJAX handler, simply call check_ajax_referer(). This function automatically checks the nonce and kills the script if the check fails, simplifying the WordPress nonce verification code significantly.
function pnet_process_ajax_request() {
    // Verifies the nonce sent in the $_REQUEST['security'] key (default)
    // or you can specify the key.
    check_ajax_referer( 'pnet_ajax_action_string', 'security' );

    // If we reached here, the nonce is valid.
    $data = isset( $_POST['data'] ) ? sanitize_text_field( $_POST['data'] ) : '';

    wp_send_json_success( array( 'message' => 'Data received: ' . $data ) );
}
add_action( 'wp_ajax_pnet_action', 'pnet_process_ajax_request' );
Common Errors and Troubleshooting
Even seasoned developers encounter issues with WordPress nonce verification. Here are the most common problems and how to solve them.
1. “Are you sure you want to do this?” Error
This is the classic WordPress error message when a nonce check fails. It usually means:
- You forgot to include
wp_nonce_field()in your form. - The
$actionstring in your verification function does not match the one used in creation. - You are checking the wrong
$_POSTkey.
2. Caching Issues
If you are using a page caching plugin (like WP Rocket or W3 Total Cache), the nonce might be cached. Since nonces are user-specific and time-sensitive, serving a cached nonce to a different user or an expired nonce to the same user will cause the WordPress nonce verification to fail.
Solution for Caching
3. User Capability Conflicts
Sometimes the nonce is valid, but the user doesn’t have permission. Always combine nonce checks with capability checks (e.g., current_user_can()) to ensure complete security. A valid nonce proves intent, not permission.
Summary
Implementing WordPress nonce verification is a non-negotiable step in plugin and theme development. We have covered how to identify the need for security tokens, how to generate them using wp_nonce_field(), and how to rigorously validate them using wp_verify_nonce(). By following these 3 simple steps, you ensure that your custom forms are protected against CSRF attacks, keeping your site and your users safe.
Remember to always test your forms in a private window to simulate different users and ensure your nonces aren’t being cached. Security is an ongoing process, but mastering WordPress nonce verification is a massive leap forward for your development skills.