If you’re looking to extend your store’s payment options, creating a WooCommerce Custom Payment Gateway is one of the most powerful ways to deliver a seamless checkout experience. Whether you’re integrating a local payment provider, adding a manual offline mode, or testing a prototype gateway, WooCommerce makes it surprisingly flexible.
In this detailed guide, I’ll walk you through the full coding process, step by step — from registering the gateway to processing payments. Even if you’ve never built a custom gateway before, you’ll find this approach simple, clean, and scalable.
Why Create a WooCommerce Custom Payment Gateway?
There are many reasons developers add a custom payment method to WooCommerce:
- Support a regional or niche payment provider
- Add custom logic such as approvals, OTP steps, or manual verification
- Build a gateway for internal business workflows
- Integrate with APIs that don’t have an official WooCommerce plugin
The best part? WooCommerce provides a structured architecture, so we only need to extend the existing classes.
Step 1: Create the Plugin Structure
Inside /wp-content/plugins/, create a folder with your plugin slug:
/wp-content/plugins/custom-payment-gateway/
Then, create a php file inside it:
/wp-content/plugins/custom-payment-gateway/custom-payment-gateway.php
Now, edit custom-payment-gateway.php and add the plugin header:
<?php
/**
 * Plugin Name: Custom Payment Gateway
 * Description: A simple WooCommerce Custom Payment Gateway example.
 * Version: 1.0
 * Author: Your Name
 */

if ( ! defined( 'ABSPATH' ) ) {
    exit;
}
Step 2: Initialize the Gateway
WooCommerce automatically detects gateways if we hook them properly.
add_filter( 'woocommerce_payment_gateways', 'cpg_add_gateway_class' );
function cpg_add_gateway_class( $gateways ) {
    $gateways[] = 'WC_Custom_Gateway';
    return $gateways;
}

add_action( 'plugins_loaded', 'cpg_init_gateway_class' );
function cpg_init_gateway_class() {

    class WC_Custom_Gateway extends WC_Payment_Gateway {

        public function __construct() {
            $this->id                 = 'custom_gateway';
            $this->method_title       = 'Custom Gateway';
            $this->method_description = 'A sample WooCommerce Custom Payment Gateway.';
            $this->has_fields         = true;

            // Load settings
            $this->init_form_fields();
            $this->init_settings();

            $this->title       = $this->get_option( 'title' );
            $this->description = $this->get_option( 'description' );

            add_action(
                'woocommerce_update_options_payment_gateways_' . $this->id,
                [ $this, 'process_admin_options' ]
            );
        }
Step 3: Add Admin Settings for the Gateway
This allows the merchant to customize the payment method title and description.
public function init_form_fields() {

    $this->form_fields = [
        'enabled' => [
            'title'   => 'Enable/Disable',
            'type'    => 'checkbox',
            'label'   => 'Enable Custom Gateway',
            'default' => 'yes'
        ],
        'title' => [
            'title'       => 'Title',
            'type'        => 'text',
            'default'     => 'Custom Payment',
            'desc_tip'    => true,
        ],
        'description' => [
            'title'       => 'Description',
            'type'        => 'textarea',
            'default'     => 'Pay using our custom method.',
        ],
    ];
}
You might also like:

Step 4: Display Payment Fields on Checkout
You can collect additional information using custom input fields (totally optional).
public function process_payment( $order_id ) {

    $order = wc_get_order( $order_id );

    // Mark order complete or update status
    $order->payment_complete();

    // Reduce stock levels
    wc_reduce_stock_levels( $order_id );

    // Redirect thank you page
    return [
        'result' => 'success',
        'redirect' => $this->get_return_url( $order ),
    ];
}
Step 5: Process the Payment
This is where the order gets triggered as completed or pending.
public function process_payment( $order_id ) {

    $order = wc_get_order( $order_id );

    // Mark order complete or update status
    $order->payment_complete();

    // Reduce stock levels
    wc_reduce_stock_levels( $order_id );

    // Redirect thank you page
    return [
        'result' => 'success',
        'redirect' => $this->get_return_url( $order ),
    ];
}
Close the class WC_Custom_Gateway which extends the parent class WC_Payment_Gateway:
    }
}
Step 6: Activate the Plugin
- Go to WordPress Dashboard > Plugins.
- Activate Custom Payment Gateway.
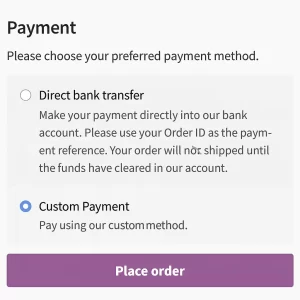
- Visit WooCommerce > Settings > Payments to enable and configure it.
That’s it! You now have a fully functional WooCommerce Custom Payment Gateway added directly into your checkout screen.
Suggestions
Creating a WooCommerce Custom Payment Gateway is an excellent way to expand your store’s flexibility and tailor the checkout flow to your exact business needs. With just a few lines of code and WooCommerce’s well-structured payment API, you can integrate virtually any provider or create your own custom workflow.
If you want to enhance the WooCommerce custom payment gateway further, you can add:
- API integrations: Add support for external payment providers by sending order data to their API and receiving real-time authorization or confirmation responses. This makes your WooCommerce Custom Payment Gateway function like a full-fledged online payment solution.
- Webhook handling: Webhooks allow your gateway to receive notifications from the payment provider (e.g., successful payment, failed payment, refund). This ensures order statuses stay accurate even if the customer closes the browser early.
- Custom icons and branding: You can add a branded icon or logo to your payment method so it looks professional and easily recognizable on the checkout page. This improves user trust and increases conversion rates.
- Status updates and validation: Before marking an order as complete, you can perform extra checks — such as verifying payment signatures, confirming transaction IDs, or validating OTPs. This helps prevent fraud and ensures reliability.
- Advanced payment fields: If your gateway requires more details (like phone number, customer ID, or OTP), you can add custom fields directly to the checkout form. WooCommerce makes it easy to capture and validate this information.