
Every WordPress developer knows that the default “success message” provided by most form plugins is functional, but rarely inspiring. A small green border appearing below a form often goes unnoticed by users, leaving them wondering if their message actually went through. This is where a Contact Form 7 redirect becomes essential.
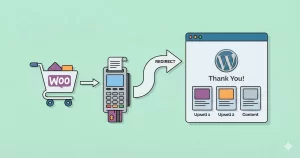
Redirecting users to a dedicated “Thank You” page isn’t just about confirming submission; it is a powerful marketing tool. It allows you to track conversions more accurately, upsell products, or simply provide a better user experience (UX). In the past, Contact Form 7 used the on_sent_ok setting, but that method has long been deprecated. Today, we need to use modern JavaScript DOM events.
In this guide, I will walk you through exactly how to implement a Contact Form 7 redirect using custom code that keeps your site lightweight. We will cover global redirects, conditional redirects based on form IDs, and why this method is superior to using heavy plugins.
Why You Should Use a Custom Redirect Strategy
Before we dive into the code, it is important to understand why we are doing this. As a developer, you might be tempted to just install one of the many “CF7 Add-on” plugins available. While valid for non-coders, adding a plugin for a simple JavaScript function is overkill.
Implementing a Contact Form 7 redirect manually offers several advantages:
- Performance: You avoid the bloat of loading extra CSS and JS files associated with 3rd party plugins.
- Control: You can define complex logic (e.g., redirecting to different pages based on user input) that plugins often lock behind “Pro” versions.
- Reliability: You are relying on native Contact Form 7 DOM events, which are stable and supported.

You might also like:

Method 1: The Global Redirect (Redirect All Forms)
If you have a small site with only one contact form, or if you want every single form on your website to go to the same “Thank You” page, this is the quickest method. We will hook a small JavaScript snippet into the footer of your theme.
We will use the wp_footer action hook. For more technical details on how hooks work, you can refer to the WordPress Developer Reference on add_action.
Add the following code to your theme’s functions.php file or your custom site-specific plugin:
function pnet_global_cf7_redirect() {
    ?>
    < script type="text/javascript">
    document.addEventListener( 'wpcf7mailsent', function( event ) {
        location = 'https://yourdomain.com/thank-you/';
    }, false );
    </ script>
    <?php
}
add_action( 'wp_footer', 'pnet_global_cf7_redirect' );
How This Works
This script listens for the wpcf7mailsent event. This event is triggered by Contact Form 7 specifically when an email has been successfully sent. Once detected, the browser’s location is updated to your specified URL. Because we are targeting the event rather than the submit button click, the redirect only happens after validation passes and the mail is sent.
Method 2: Conditional Redirect (Target Specific Forms)
In most professional setups, you won’t want a “General Inquiry” form and a “Request a Quote” form to go to the same destination. You need a specific Contact Form 7 redirect for each unique form.
To do this, we check the contactFormId property within the event detail. First, you need to find your Form ID. You can see this in the Contact Form 7 shortcode, for example: [contact-form-7 id="123" title="Contact form 1"].
Here is the refined code to handle multiple forms:
function pnet_conditional_cf7_redirect() {
    ?>
    < script type="text/javascript">
    document.addEventListener( 'wpcf7mailsent', function( event ) {
        // Redirect for the General Contact Form (ID: 123)
        if ( '123' == event.detail.contactFormId ) {
            location = 'https://yourdomain.com/thank-you-contact/';
        }
        // Redirect for the Quote Request Form (ID: 456)
        else if ( '456' == event.detail.contactFormId ) {
            location = 'https://yourdomain.com/quote-received/';
        }
    }, false );
    </ script>
    <?php
}
add_action( 'wp_footer', 'pnet_conditional_cf7_redirect' );
This approach gives you granular control. You can add as many else if statements as you need for different forms throughout your website.
Tip: Effortlessly Add Custom Admin Columns WordPress: The Ultimate Guide
Method 3: Pass Data to the Thank You Page
Sometimes a simple Contact Form 7 redirect isn’t enough; you might want to personalize the Thank You page with the user’s name. This requires passing variables through the URL.
Contact Form 7 exposes the submitted inputs in the inputs array of the event detail. Here is how you can grab the “First Name” field (assuming your field name is your-name) and pass it to the redirect URL:
function pnet_pass_data_cf7_redirect() {
    ?>
    < script type="text/javascript">
    document.addEventListener( 'wpcf7mailsent', function( event ) {
        if ( '789' == event.detail.contactFormId ) {
            var inputs = event.detail.inputs;
            var userName = '';

            // Loop through inputs to find 'your-name'
            for ( var i = 0; i < inputs.length; i++ ) {
                if ( 'your-name' == inputs[i].name ) {
                    userName = inputs[i].value;
                    break;
                }
            }

            // Redirect with query parameter
            location = 'https://yourdomain.com/thank-you/?user=' + encodeURIComponent(userName);
        }
    }, false );
    </ script>
    <?php
}
add_action( 'wp_footer', 'pnet_pass_data_cf7_redirect' );
On your Thank You page, you can then use a simple PHP GET request or a shortcode to display “Thank You, John!” based on the URL parameter. This adds a layer of personalization that significantly improves user satisfaction.
[Screenshot Here: Screenshot of the WordPress Dashboard Code Editor showing the PHP code snippet being edited. The syntax highlighting should be visible. In the background, a flat design representation of the DOM event listener structure.]
Common Issues and Troubleshooting
Even with the correct code, sometimes the Contact Form 7 redirect might fail. Here are the most common culprits:
1. Caching Plugins
If you are using aggressive caching (like WP Rocket or W3 Total Cache) or minification, the inline JavaScript might be delayed or broken. Try clearing your cache after adding the code. If the issue persists, exclude the script from minification.
2. AJAX Conflicts
Contact Form 7 relies on AJAX to submit forms without reloading the page. If your theme has JavaScript errors (check your browser console by pressing F12), the AJAX chain might break, meaning the wpcf7mailsent event never fires.
3. DOM Ready Issues
While the event listener method usually works fine in the footer, sometimes it fires before the form is fully initialized if loaded dynamically. Ensuring your script runs inside a jQuery(document).ready() or vanilla JS DOMContentLoaded wrapper can solve this, though the snippets provided above are generally robust enough for standard themes.
You might also like:
The “Don’t Do This” Method: on_sent_ok
If you have been using WordPress for a long time, you might remember a setting panel in Contact Form 7 called “Additional Settings” where you could paste on_sent_ok: ....
Do not use this method.
The developer of Contact Form 7 removed this Contact Form 7 redirect functionality entirely because it posed security risks and encouraged bad coding practices. Any tutorial you find online suggesting this method is outdated. The DOM event listener approach we covered above is the only officially supported way to handle a Contact Form 7 redirect.
Designing an Effective Thank You Page
Once you have the Contact Form 7 redirect working, don’t waste the opportunity. A blank page saying “Thanks” is a dead end. Your Thank You page should include:
- Confirmation: Clearly state that the message was received.
- Timeline: Tell them when to expect a reply (e.g., “We usually reply within 24 hours”).
- Call to Action (CTA): Invite them to read your latest blog posts, join your newsletter, or follow you on social media.
Conclusion
Implementing a Contact Form 7 redirect is a small change that yields significant results for your site’s professional appearance and conversion tracking. By using the custom code snippets provided, you maintain control over your site’s performance without relying on unnecessary plugins.
Whether you need a simple global redirect or complex conditional logic, the wpcf7mailsent event is your best friend. Test the code on a staging environment first, and enjoy the improved user flow on your WordPress site.