Typography is the voice of your design. While the default system fonts are safe and fast, they rarely convey the unique personality of a brand. This is why almost every developer eventually needs to learn how to add custom fonts to WordPress. Whether you are looking for an elegant serif for a lifestyle blog or a bold sans-serif for a tech startup, the right font changes everything.
However, there is a catch. If you do not add custom fonts to WordPress correctly, you risk significantly slowing down your website, hurting your Core Web Vitals, and even violating GDPR regulations. In this guide, we will walk through the professional methods to handle typography without sacrificing performance.
Why the “Right Way” Matters
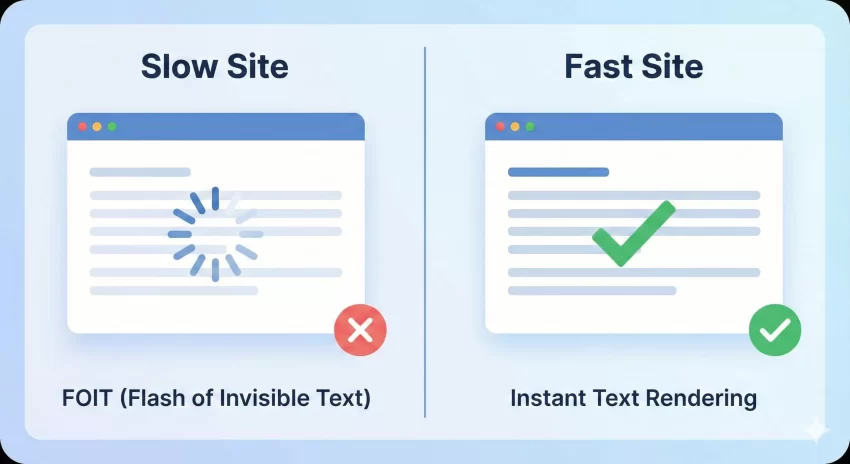
Before we dive into the code, it is important to understand why we can’t just slap a link in the header and call it a day. When you set out to add custom fonts to WordPress, you are essentially asking the user’s browser to download a new asset before it can render text. If this file is heavy or the server is slow, your visitors will experience one of two annoying issues:
- FOIT (Flash of Invisible Text): The text is invisible until the font loads.
- FOUT (Flash of Unstyled Text): The text loads in a default font and then “snaps” into the custom font.
Furthermore, if you rely on external services like Google Fonts without proper optimization, you are adding external DNS lookups that drag down your loading speeds. By following the steps below, we will ensure that when you add custom fonts to WordPress, your site remains blazing fast.
You might also like:

Method 1: Adding Google Fonts (The Optimized Way)
Google Fonts is the most popular repository for web typography. It is free, reliable, and easy to use. However, most tutorials tell you to copy the embed code into your header.php. We are going to do it better. To add custom fonts to WordPress using Google Fonts properly, we should enqueue them in our functions.php file.
Step 1: Select Your Font
Go to Google Fonts and select the styles you need. Be frugal—only select the weights (e.g., 400, 700) you actually plan to use to keep the file size low.
Step 2: The Enqueue Function
Instead of a generic HTML link, we will use the WordPress function wp_enqueue_style. This allows WordPress to manage dependencies and load order. Add the following code to your theme’s functions.php file:
function pnet_enqueue_google_fonts() {
    // Replace this URL with your actual Google Fonts embed URL
    $font_url = 'https://fonts.googleapis.com/css2?family=Inter:wght@400;700&display=swap';

    // Enqueue the font
    wp_enqueue_style( 'pnet-google-fonts', $font_url, array(), null );
}
add_action( 'wp_enqueue_scripts', 'pnet_enqueue_google_fonts' );
Notice the &display=swap at the end of the URL? This is crucial when you add custom fonts to WordPress. It tells the browser to use a fallback font immediately and swap in the custom font once it loads, preventing the “invisible text” issue.
You might also like:
Method 2: Hosting Fonts Locally (Best for Speed & GDPR)
If you want complete control and the best possible performance, you should host the fonts locally on your own server. This eliminates the external DNS lookup to Google’s servers and is fully GDPR compliant because you aren’t sending visitor IP addresses to a third party. This is currently the gold standard when you add custom fonts to WordPress.
Step 1: Download the Web Files
Do not just upload a .ttf file from your computer. Web fonts need specific formats (WOFF and WOFF2) to work across browsers. I recommend using a tool like the Google Webfonts Helper to download the optimized files and generate the CSS for you.
Step 2: Upload to Your Theme
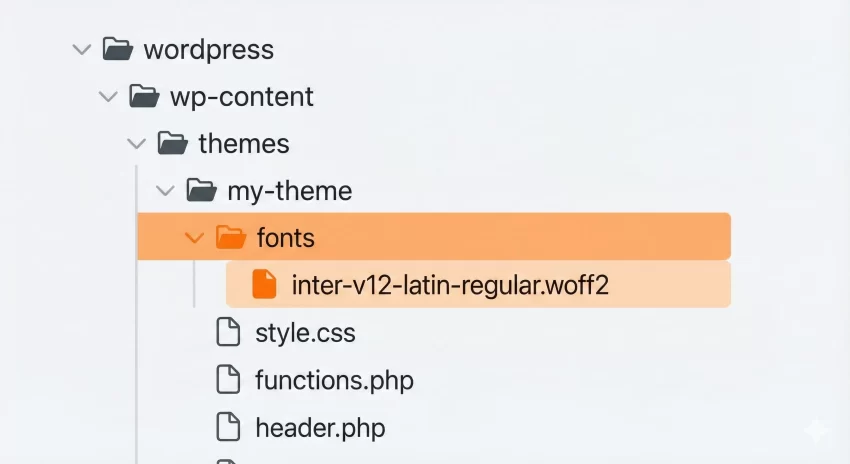
Connect to your site via FTP and navigate to your active theme folder (usually /wp-content/themes/your-theme/). Create a new folder named fonts and upload your .woff2 files there.
Step 3: Add the CSS
Now, we need to tell CSS where to find these files. You can add this to your theme’s style.css file. This is the manual part of the process to add custom fonts to WordPress.
/* inter-regular - latin */
@font-face {
  font-family: 'Inter';
  font-style: normal;
  font-weight: 400;
  font-display: swap;
  src: url('fonts/inter-v12-latin-regular.woff2') format('woff2'), /* Super Modern Browsers */
       url('fonts/inter-v12-latin-regular.woff') format('woff'); /* Modern Browsers */
}

/* inter-700 - latin */
@font-face {
  font-family: 'Inter';
  font-style: normal;
  font-weight: 700;
  font-display: swap;
  src: url('fonts/inter-v12-latin-700.woff2') format('woff2'),
       url('fonts/inter-v12-latin-700.woff') format('woff');
}

body {
    font-family: 'Inter', sans-serif;
}
Tip: Stop the Panic: Quickly Fix WordPress Image Upload Error
Preloading Fonts for Extra Speed
Whether you choose Google or local hosting, you want the browser to know about your font files as soon as possible. Preloading is a technique that forces the browser to fetch the font file early in the page load process. This is a pro tip for anyone looking to add custom fonts to WordPress efficiently.
You can add a preload hint into the <head> of your site using a hook:
function pnet_preload_local_fonts() {
    $font_path = get_template_directory_uri() . '/fonts/inter-v12-latin-regular.woff2';
    echo '<link rel="preload" href="' . esc_url( $font_path ) . '" as="font" type="font/woff2" crossorigin>';
}
add_action( 'wp_head', 'pnet_preload_local_fonts' );
Note: Only preload the font files that are used “above the fold” (like your main body font or heading font). Preloading too many files can actually clog up the network.
Using a Plugin vs. Coding
I understand that not everyone is comfortable editing code files. There are plugins available that help you add custom fonts to WordPress. Plugins like OMGF (Optimize My Google Fonts) can automatically download Google Fonts and serve them locally. While this is convenient, adding another plugin adds overhead to your application logic.
For a developer or a serious site owner, learning how to manually add custom fonts to WordPress is a valuable skill that keeps your installation lean and clean.
Troubleshooting Common Issues
Sometimes, even after you follow the steps to add custom fonts to WordPress, things might not look right. Here are a few things to check:
- CORS Errors: If your font files are hosted on a CDN or a different subdomain, you might see Cross-Origin Resource Sharing errors in the console. Ensure your server headers allow access.
- Cache: Always clear your browser cache and your WordPress caching plugin (like WP Rocket or W3 Total Cache) after making changes to CSS.
- Incorrect File Paths: If you are hosting locally, double-check that the URL in your CSS matches the actual location of the font files.
For more technical details on how WordPress handles styles, you can refer to the official documentation on wp_enqueue_style.
Conclusion
Typography is more than just aesthetics; it is about usability and branding. When you take the time to add custom fonts to WordPress the right way—whether by optimizing Google Fonts or hosting them locally—you ensure a better experience for your visitors. You get the beautiful design you want without the performance penalty you dread.
By following this guide, you have learned how to reduce cumulative layout shifts, improve load times, and ensure your site looks professional on all devices. Go ahead and add custom fonts to WordPress today to give your site the polish it deserves.