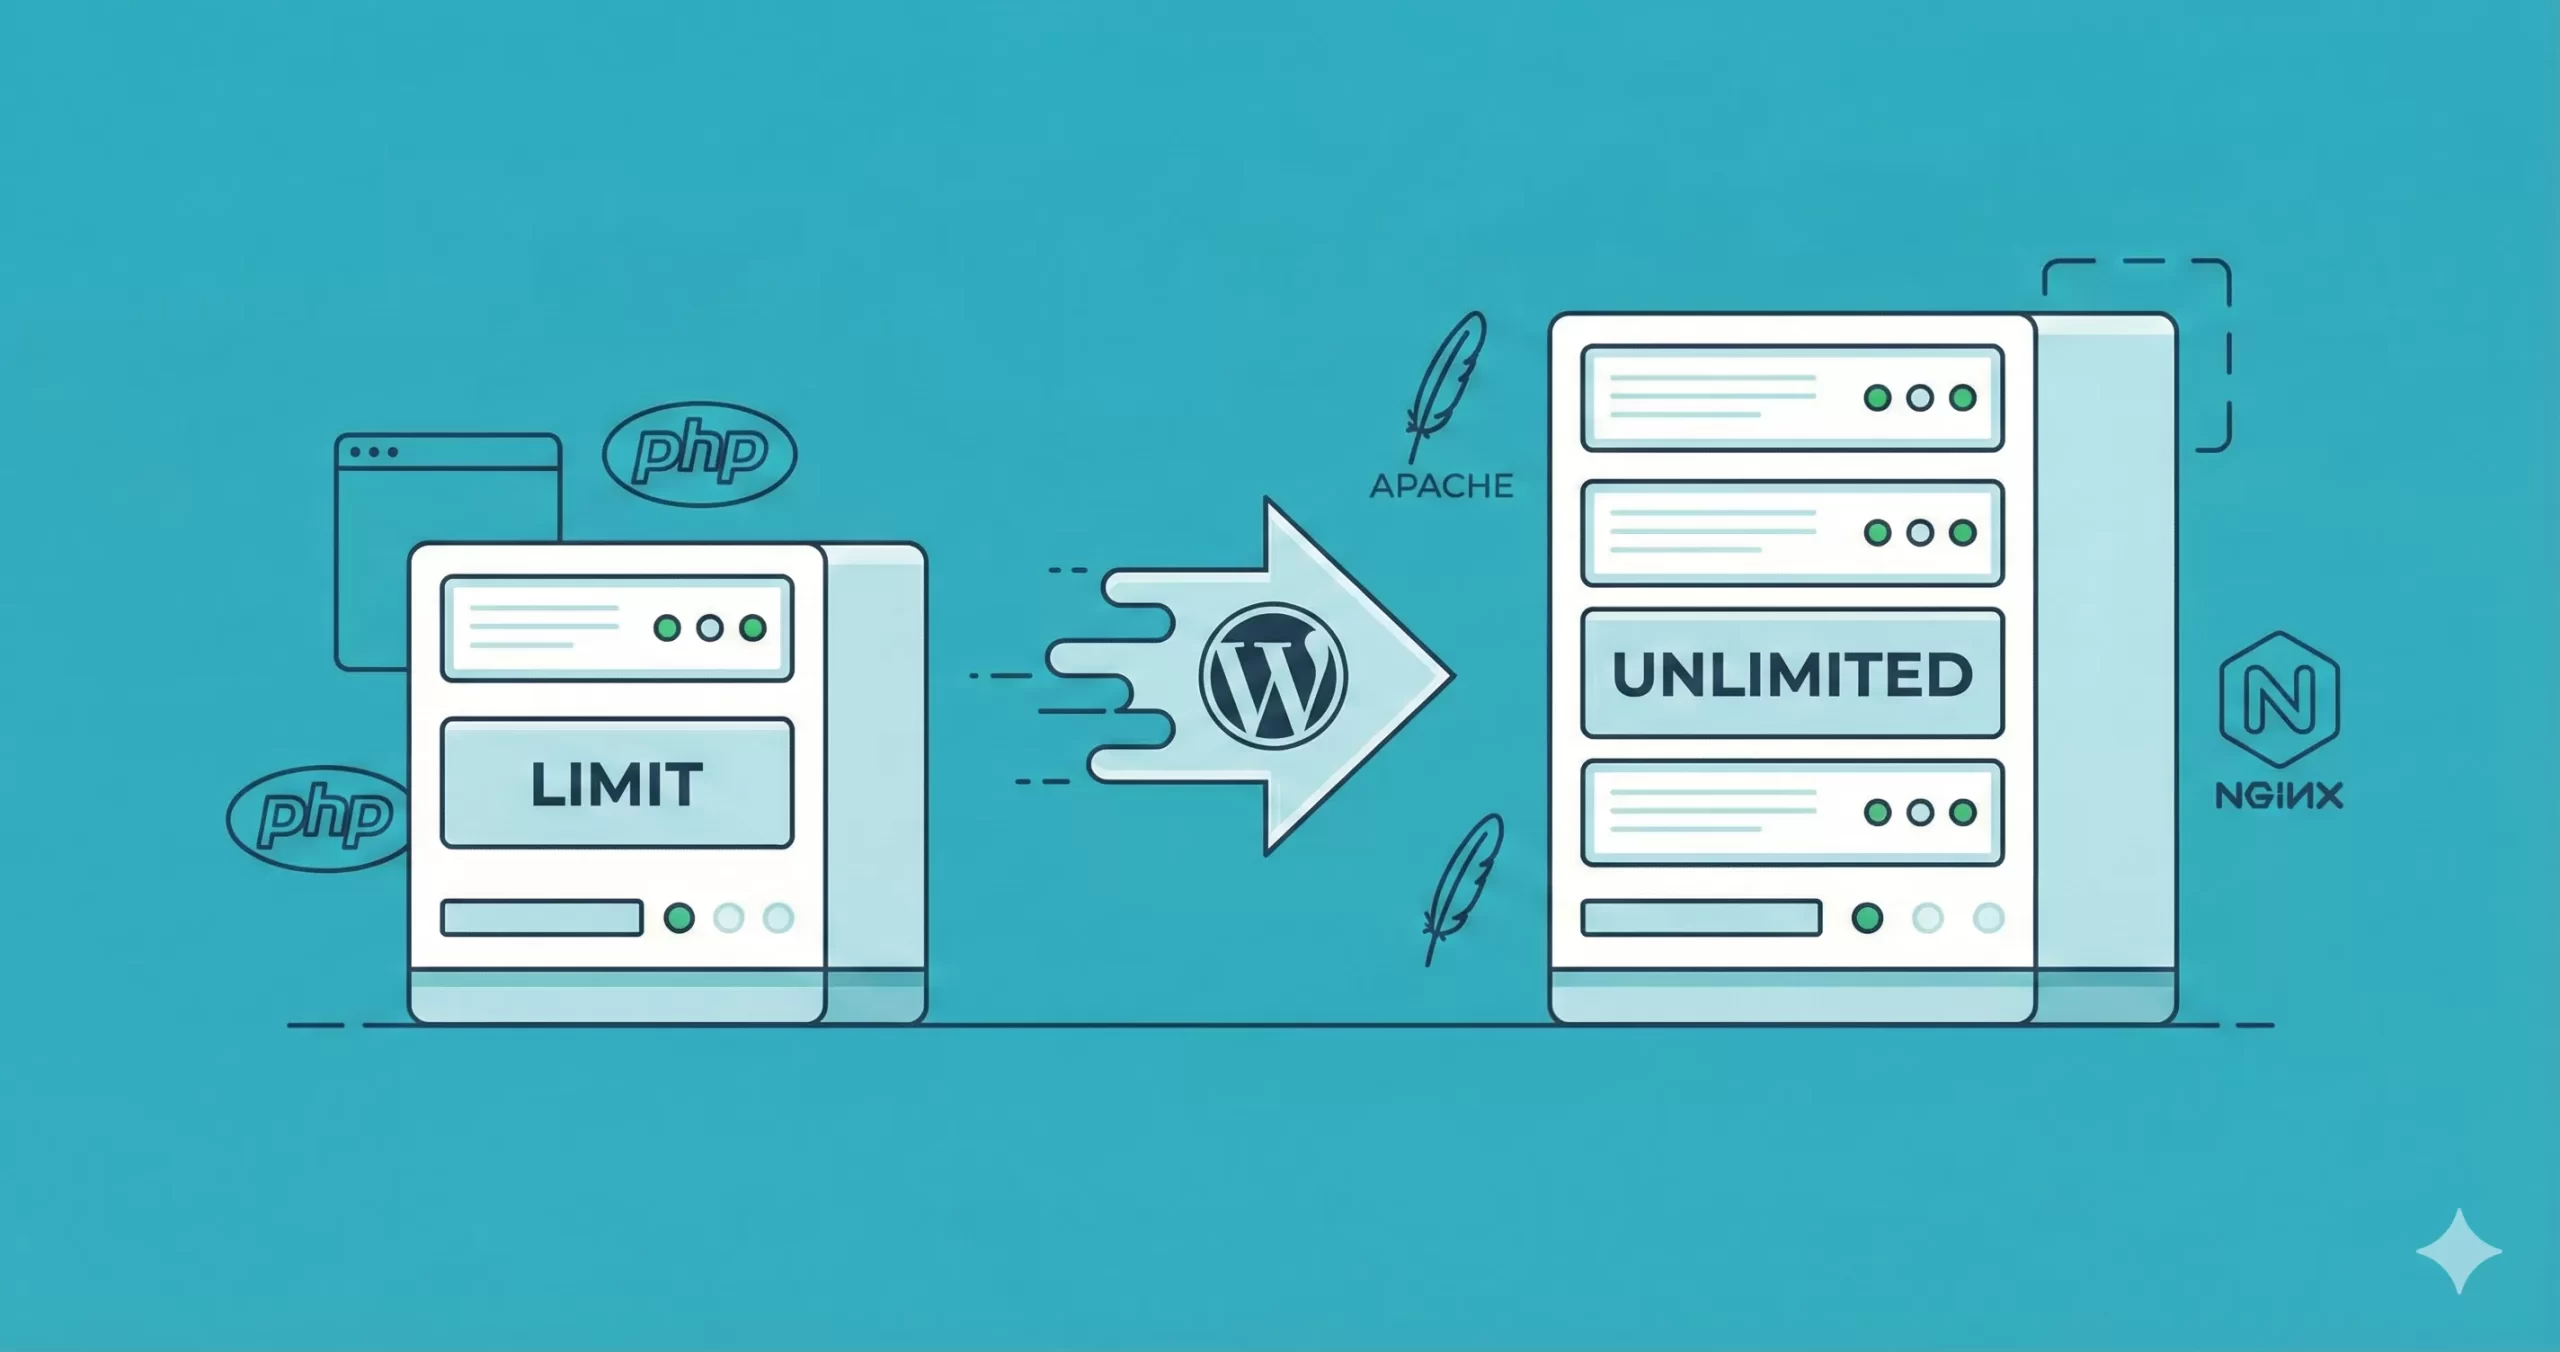
Every WordPress developer has faced the dreaded upload restriction during a site migration. You export your perfectly staged local environment, go to import it on the live server, and hit a brick wall: the upload freezes or rejects the file because it exceeds the maximum allowed size. The All-in-One import limit is one of the most frustrating hurdles in the WordPress deployment workflow, often caused by restrictive default server settings rather than the plugin itself. Fortunately, bypassing this restriction is entirely possible with the right technical configurations.
In this guide, we will walk through the definitive methods to increase the All-in-One import limit for the year 2026. Whether you are managing a high-traffic Virtual Private Server (VPS) or a restrictive shared hosting environment, these solutions will ensure your migration files—no matter how large—upload successfully. We will explore modifying core configuration files, utilizing server-side directives, and implementing specific WordPress filters to override the default All-in-One import limit permanently.
- Administrative Access: You need FTP/SFTP or SSH access to your server, or access to your hosting control panel (cPanel/Plesk).
- PHP 8.0+: Ensure your environment is running a modern version of PHP.
- Text Editor: A code editor like VS Code or Sublime Text for editing configuration files.
- Backup: Always create a full backup of your `.htaccess` and `wp-config.php` files before making changes.
- Permissions: Write permissions (644 or 640) on your core WordPress files.
Step 1: Modifying the .htaccess File
For most WordPress sites running on Apache servers, the most direct way to bypass the All-in-One import limit is by altering the .htaccess file. This hidden file controls directory-level configuration and allows you to override global PHP settings set by your hosting provider. This method is often the most effective for shared hosting environments where you do not have access to the main php.ini file.
By defining new values for upload sizes and execution times directly in this file, you instruct the web server to accept larger data payloads. This is crucial because the All-in-One import limit is frequently triggered not just by file size, but by the server timing out while processing a large request. We will increase both the size limits and the execution time to ensure a stable migration process.
Accessing and Editing .htaccess
Connect to your server via your FTP client (like FileZilla) or use the File Manager in your hosting dashboard. Navigate to the root directory of your WordPress installation (usually public_html). Locate the .htaccess file. If you do not see it, ensure you have enabled “Show Hidden Files” in your client settings. Download a backup copy, then open it for editing.
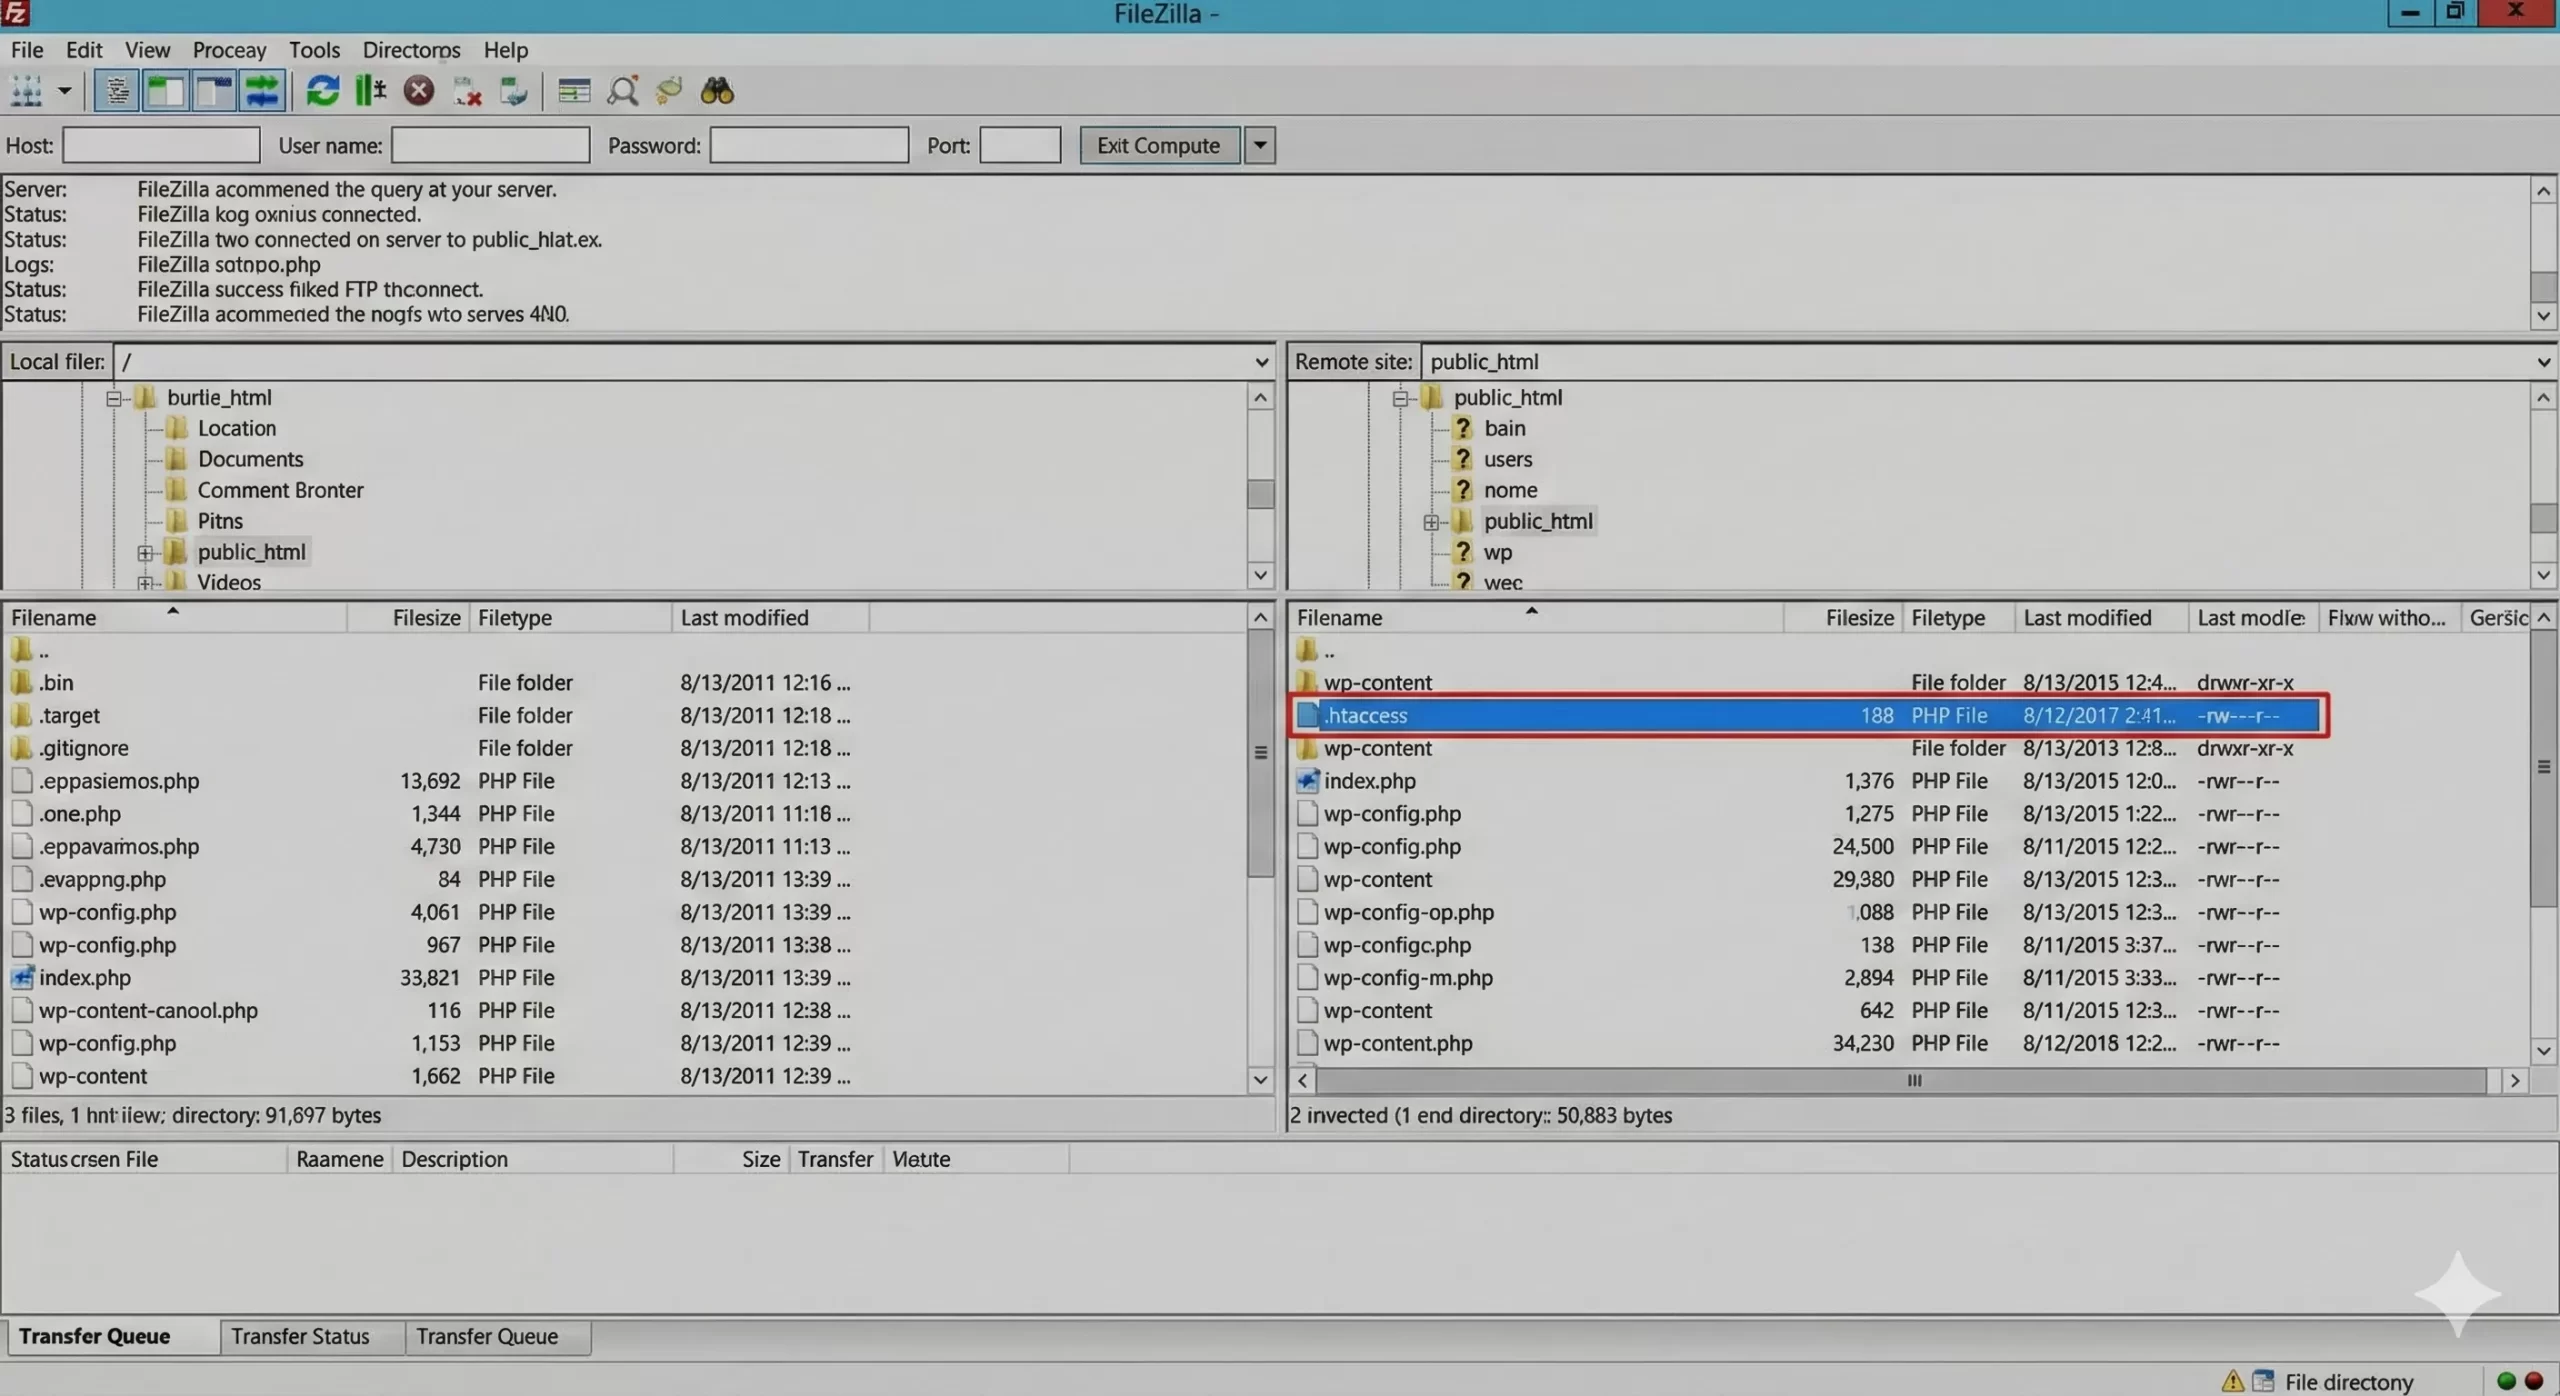
Injecting the Configuration Rules
You need to append specific PHP directives to the bottom of the file (before the `# END WordPress` tag). These directives will explicitly tell the server to increase the All-in-One import limit. Copy and paste the following code block, which sets the limit to 512MB. You can adjust the values (e.g., to 1G) if your migration file is larger.
# Begin Custom Upload Limits
php_value upload_max_filesize 512M
php_value post_max_size 512M
php_value memory_limit 512M
php_value max_execution_time 300
php_value max_input_time 300
# End Custom Upload Limits
Once you have saved and uploaded the file, go back to your WordPress dashboard. Navigate to the All-in-One WP Migration import screen. You should see that the All-in-One import limit text has changed to reflect your new 512MB (or higher) setting. If the server returns a “500 Internal Server Error,” your host may not allow PHP values in .htaccess, in which case you should revert the changes and proceed to Step 2.
You might also like:
Step 2: Configuring the wp-config.php File
If the .htaccess method does not yield results or causes server errors, the next logical step to fix the All-in-One import limit is editing the wp-config.php file. This file is the heart of your WordPress configuration and is processed every time a page loads. While wp-config.php is primarily for database connection details, it can also be used to enforce runtime configuration settings for PHP.
This method is particularly useful for developers who want to keep their configuration changes within the WordPress ecosystem rather than the server configuration. However, note that some restrictive shared hosts may ignore these runtime directives. Despite that, it is a standard practice for increasing the All-in-One import limit during development and staging phases.
Locating wp-config.php
Similar to the previous step, use your FTP client to browse to your website’s root directory. Locate the wp-config.php file. It is critical to be careful here; a syntax error in this file will take your entire site offline. Create a backup named wp-config-backup.php before proceeding.
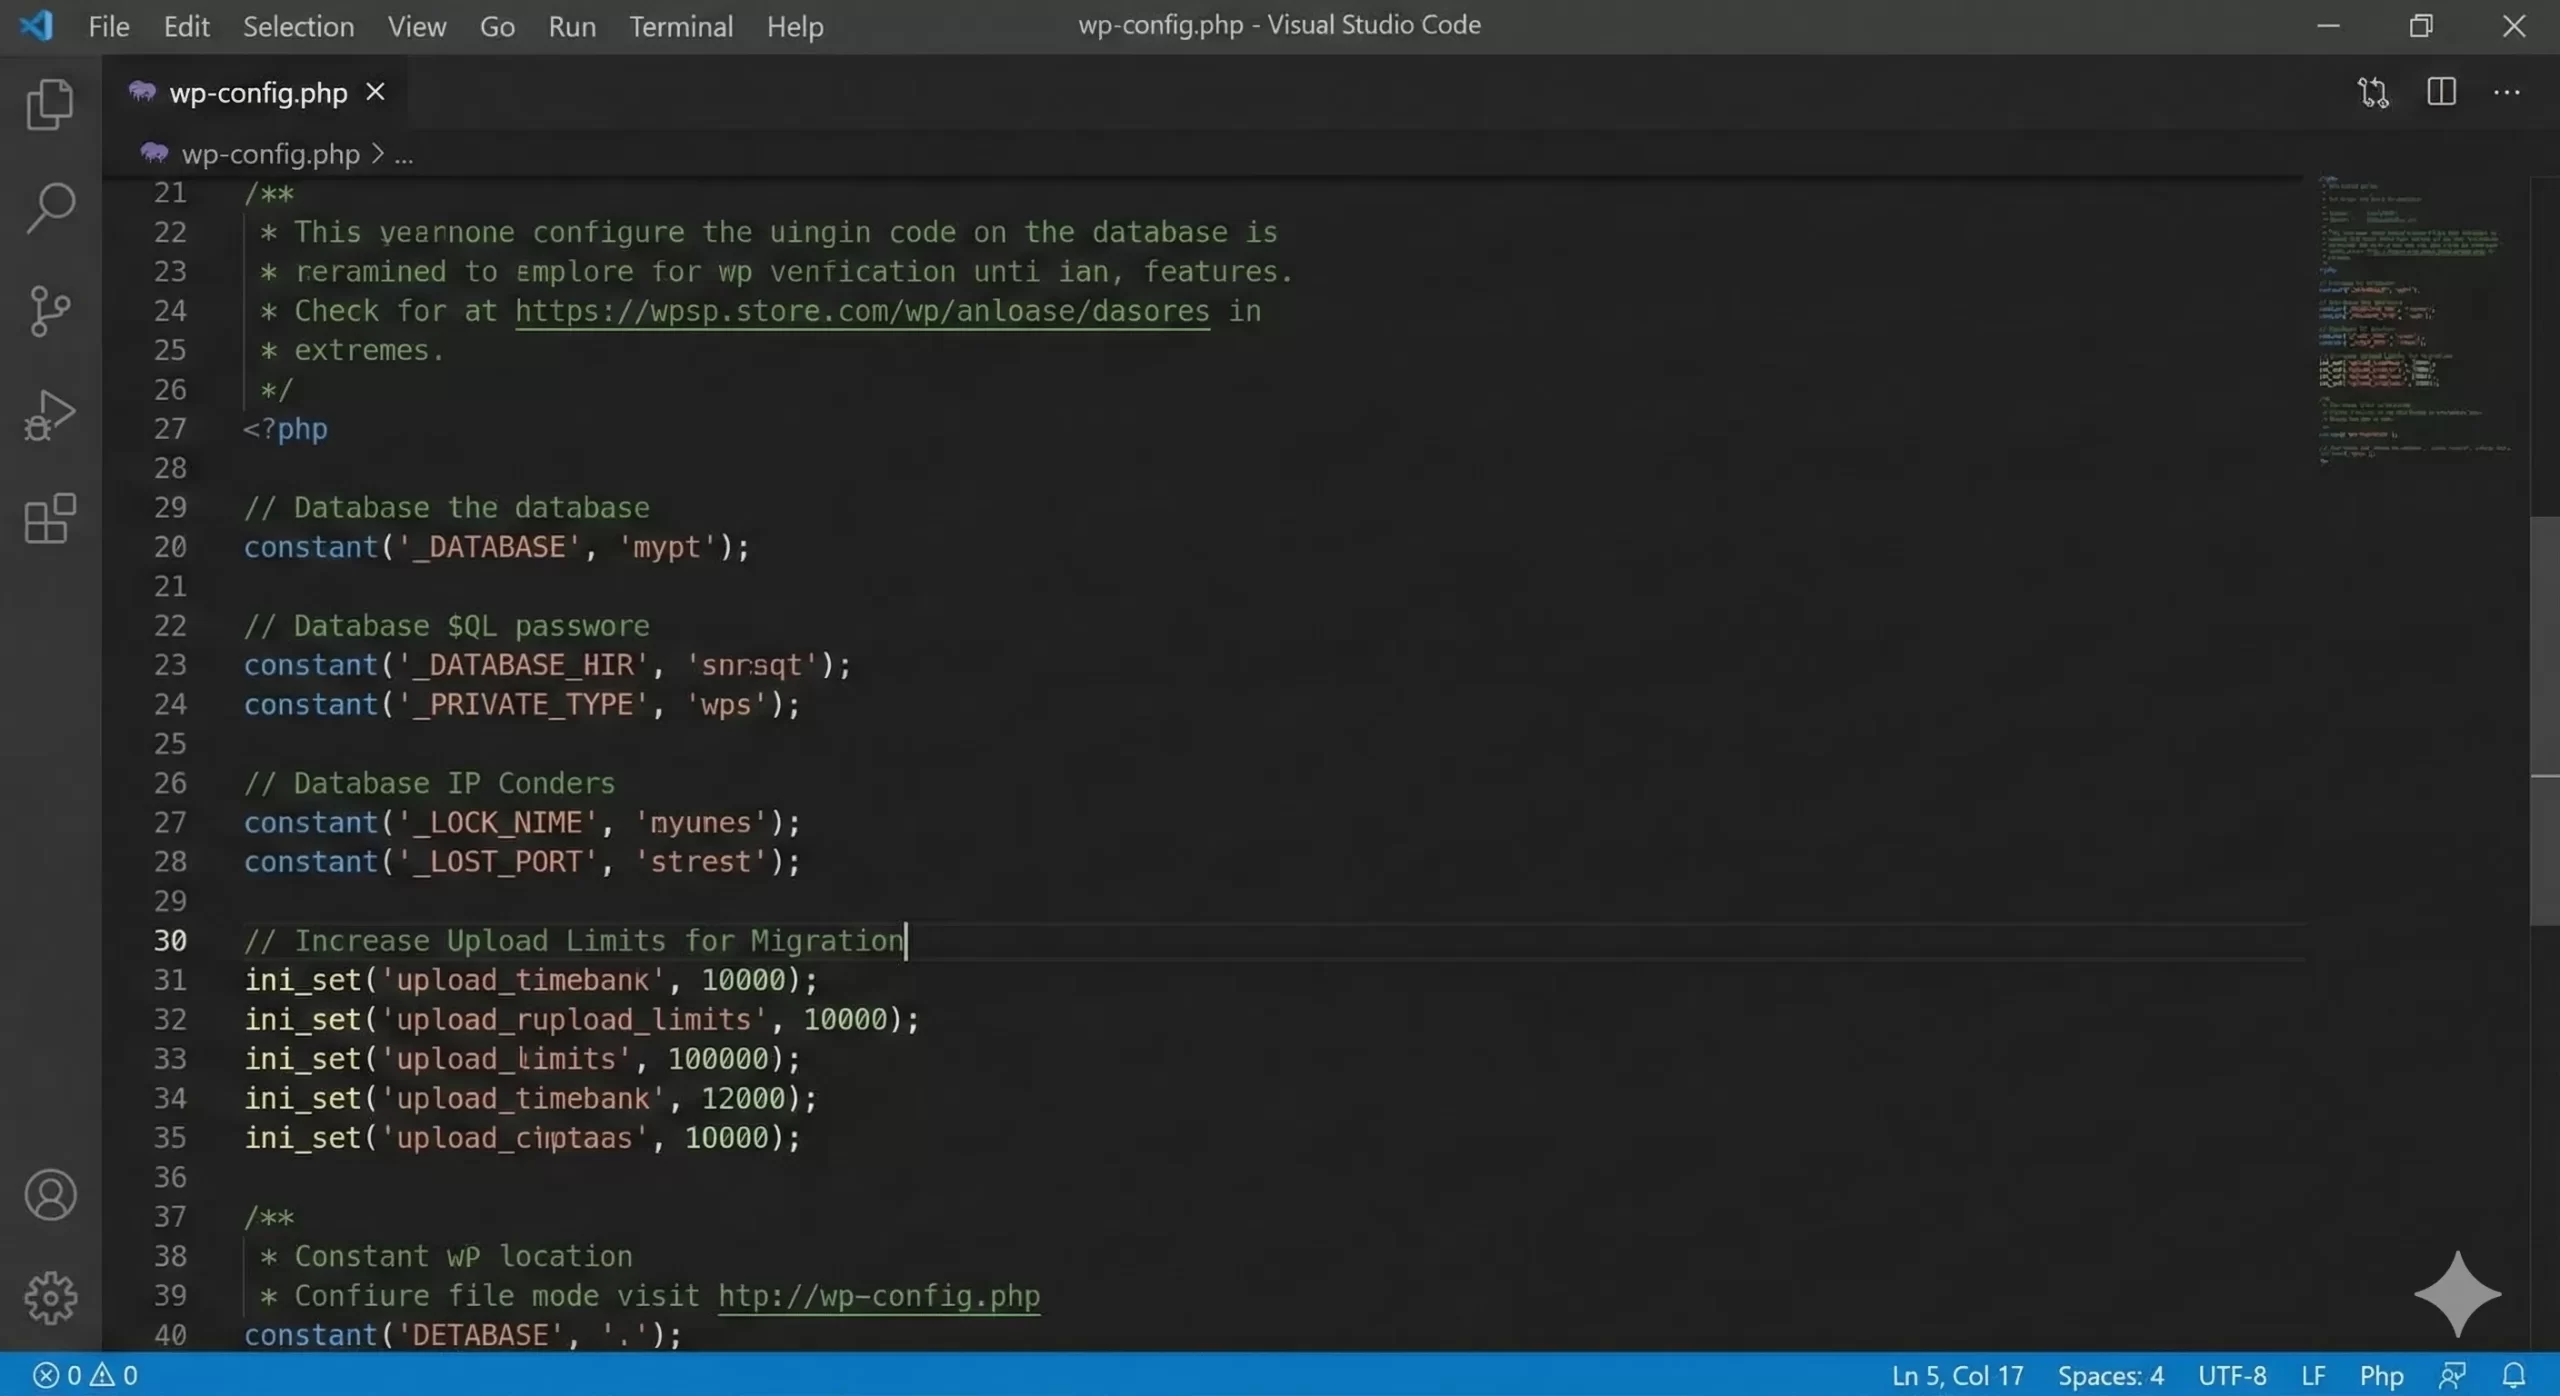
Adding the Size Constants
Open the file and scroll down. You want to look for the line that says /* That's all, stop editing! Happy publishing. */. You must add your code *above* this line. We will use the standard PHP ini_set function to override the default environment settings. This effectively tells the application to request more resources, thereby raising the All-in-One import limit dynamically.
// Increase Upload Limits for Migration
@ini_set( 'upload_max_filesize' , '512M' );
@ini_set( 'post_max_size', '512M');
@ini_set( 'memory_limit', '512M' );
@ini_set( 'max_execution_time', '300' );
@ini_set( 'max_input_time', '300' );
After saving and re-uploading this file, refresh your migration page. Check the maximum upload file size indicator. If the All-in-One import limit has increased, you can proceed with your import. Remember to remove these lines after the migration is complete to keep your environment secure and standard.
Must Read: How to Build a WordPress Custom Category Template: Unlocking Design Freedom
Step 3: Modifying the php.ini File
For those on VPS, dedicated servers, or local environments (like XAMPP/WAMP), editing the php.ini file is the most robust way to permanently solve the All-in-One import limit issue. The php.ini file is the global configuration file for PHP on your server. Changes here affect all applications running on that PHP version, making it the “nuclear option” for lifting restrictions.
Unlike the .htaccess or wp-config.php methods, which attempt to override settings at the directory or runtime level, this method changes the fundamental rules of the server environment. This is often the only solution that works for very large sites (2GB+) where the All-in-One import limit is strictly enforced by the hosting provider’s baseline configuration.
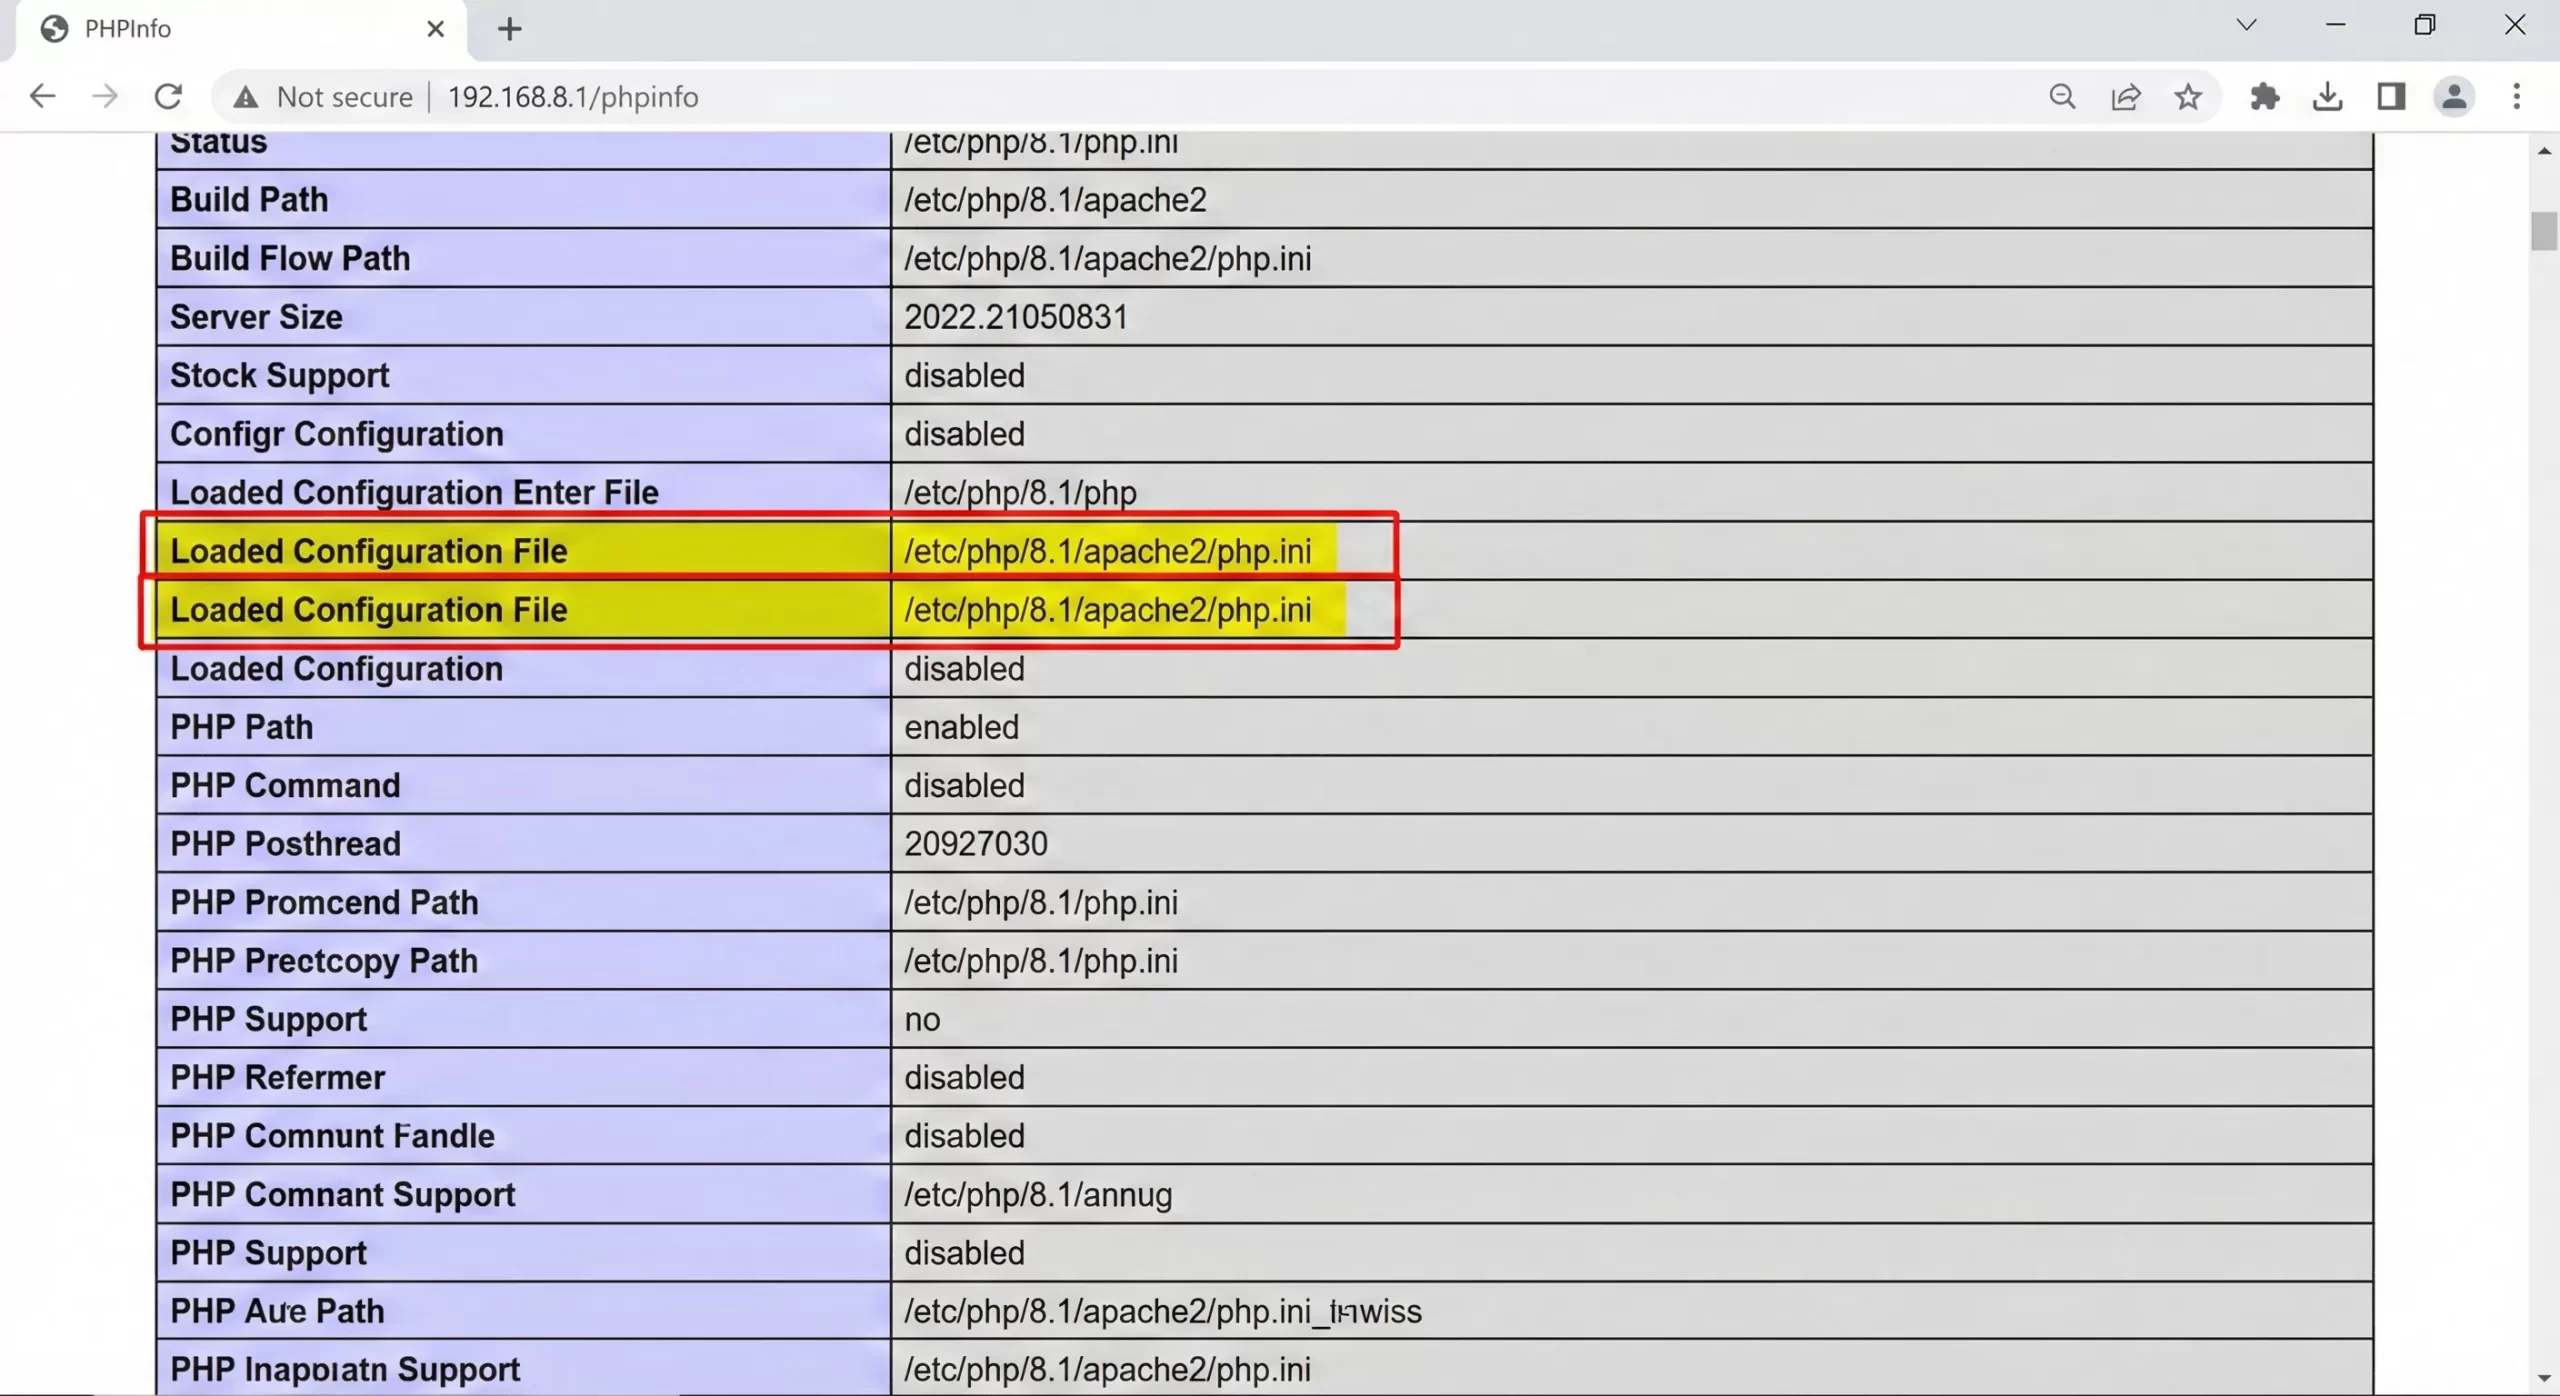
Finding the Correct php.ini
In a shared hosting environment, you might not have access to the main php.ini. However, many hosts allow you to create a file named php.ini or .user.ini in your root directory. In a local environment like XAMPP, this file is located in the php folder. You can verify which file is being loaded by creating a simple PHP info file (<?php phpinfo(); ?>) and looking for the “Loaded Configuration File” path.
Editing Global Directives
Open your php.ini file and search for the specific directives related to file uploads. You will need to find upload_max_filesize, post_max_size, and max_execution_time. If you are creating a new php.ini file in your root directory, simply paste the code below. By setting these values high, you ensure that the All-in-One import limit is no longer a bottleneck for your workflow.
upload_max_filesize = 512M
post_max_size = 512M
memory_limit = 512M
max_execution_time = 300
max_input_time = 300
If you are on a VPS or local server, you must restart your web server (Apache or Nginx) for these changes to take effect. On shared hosting, the changes might be instant or might require a “Kill PHP Processes” command from cPanel. Once applied, the All-in-One import limit displayed in the plugin should match your new values.
Step 4: Using the Plugin’s Filter Hook (Developer Method)
As a developer, you sometimes need a solution that doesn’t rely on server configuration files, especially if you are building a custom solution or distributing a theme setup. The All-in-One WP Migration plugin provides a specific filter hook that allows developers to programmatically filter the upload size limit. This is a cleaner, code-based approach to modifying the All-in-One import limit from within a custom plugin or your theme’s functions.php file.
This method is distinct because it modifies what the *plugin sees* as the limit, attempting to force the interface to accept the file. However, note that if the server strictly blocks larger files at the Nginx/Apache level, this cosmetic change might still result in a failed upload. It works best when combined with the server-side changes mentioned above, acting as a UI bridge to ensure the All-in-One import limit reflects the server’s true capabilities.
Writing the Filter Function
Open your theme’s functions.php file or your custom plugin file. We will define a function with the pnet_ prefix to ensure no namespace collisions occur. This function will return a byte integer representing the new size limit. In the example below, we are setting the limit to 64GB, effectively removing the All-in-One import limit for all practical purposes.
/**
 * Filter to increase All-in-One WP Migration limit.
 *
 * @param int $size Current size limit in bytes.
 * @return int New size limit.
 */
function pnet_increase_import_limit( $size ) {
    // Set limit to 64GB in bytes
    return 64 * 1024 * 1024 * 1024;
}
add_filter( 'ai1wm_import_max_size', 'pnet_increase_import_limit' );
Save the file and check the import page. You should see the upload limit display as 64GB. This confirms that the plugin has accepted your filter. This method is incredibly useful for developers handing off sites to clients, as it reassures the client that the All-in-One import limit will not hinder their ability to restore backups in the future.
You might also like:
Step 5: Editing the Plugin Code (The Last Resort)
In rare scenarios, particularly with older versions of the plugin or specific server configurations where filters are ignored, you might need to manually edit the plugin’s constant file. This is generally discouraged because updating the plugin will wipe your changes, but it is a highly effective temporary fix for the All-in-One import limit.
This involves editing the raw PHP files of the All-in-One WP Migration plugin directly. We will locate the file that defines the maximum file size constant and manually inject a larger value. This bypasses all checks and forces the All-in-One import limit to your desired number.
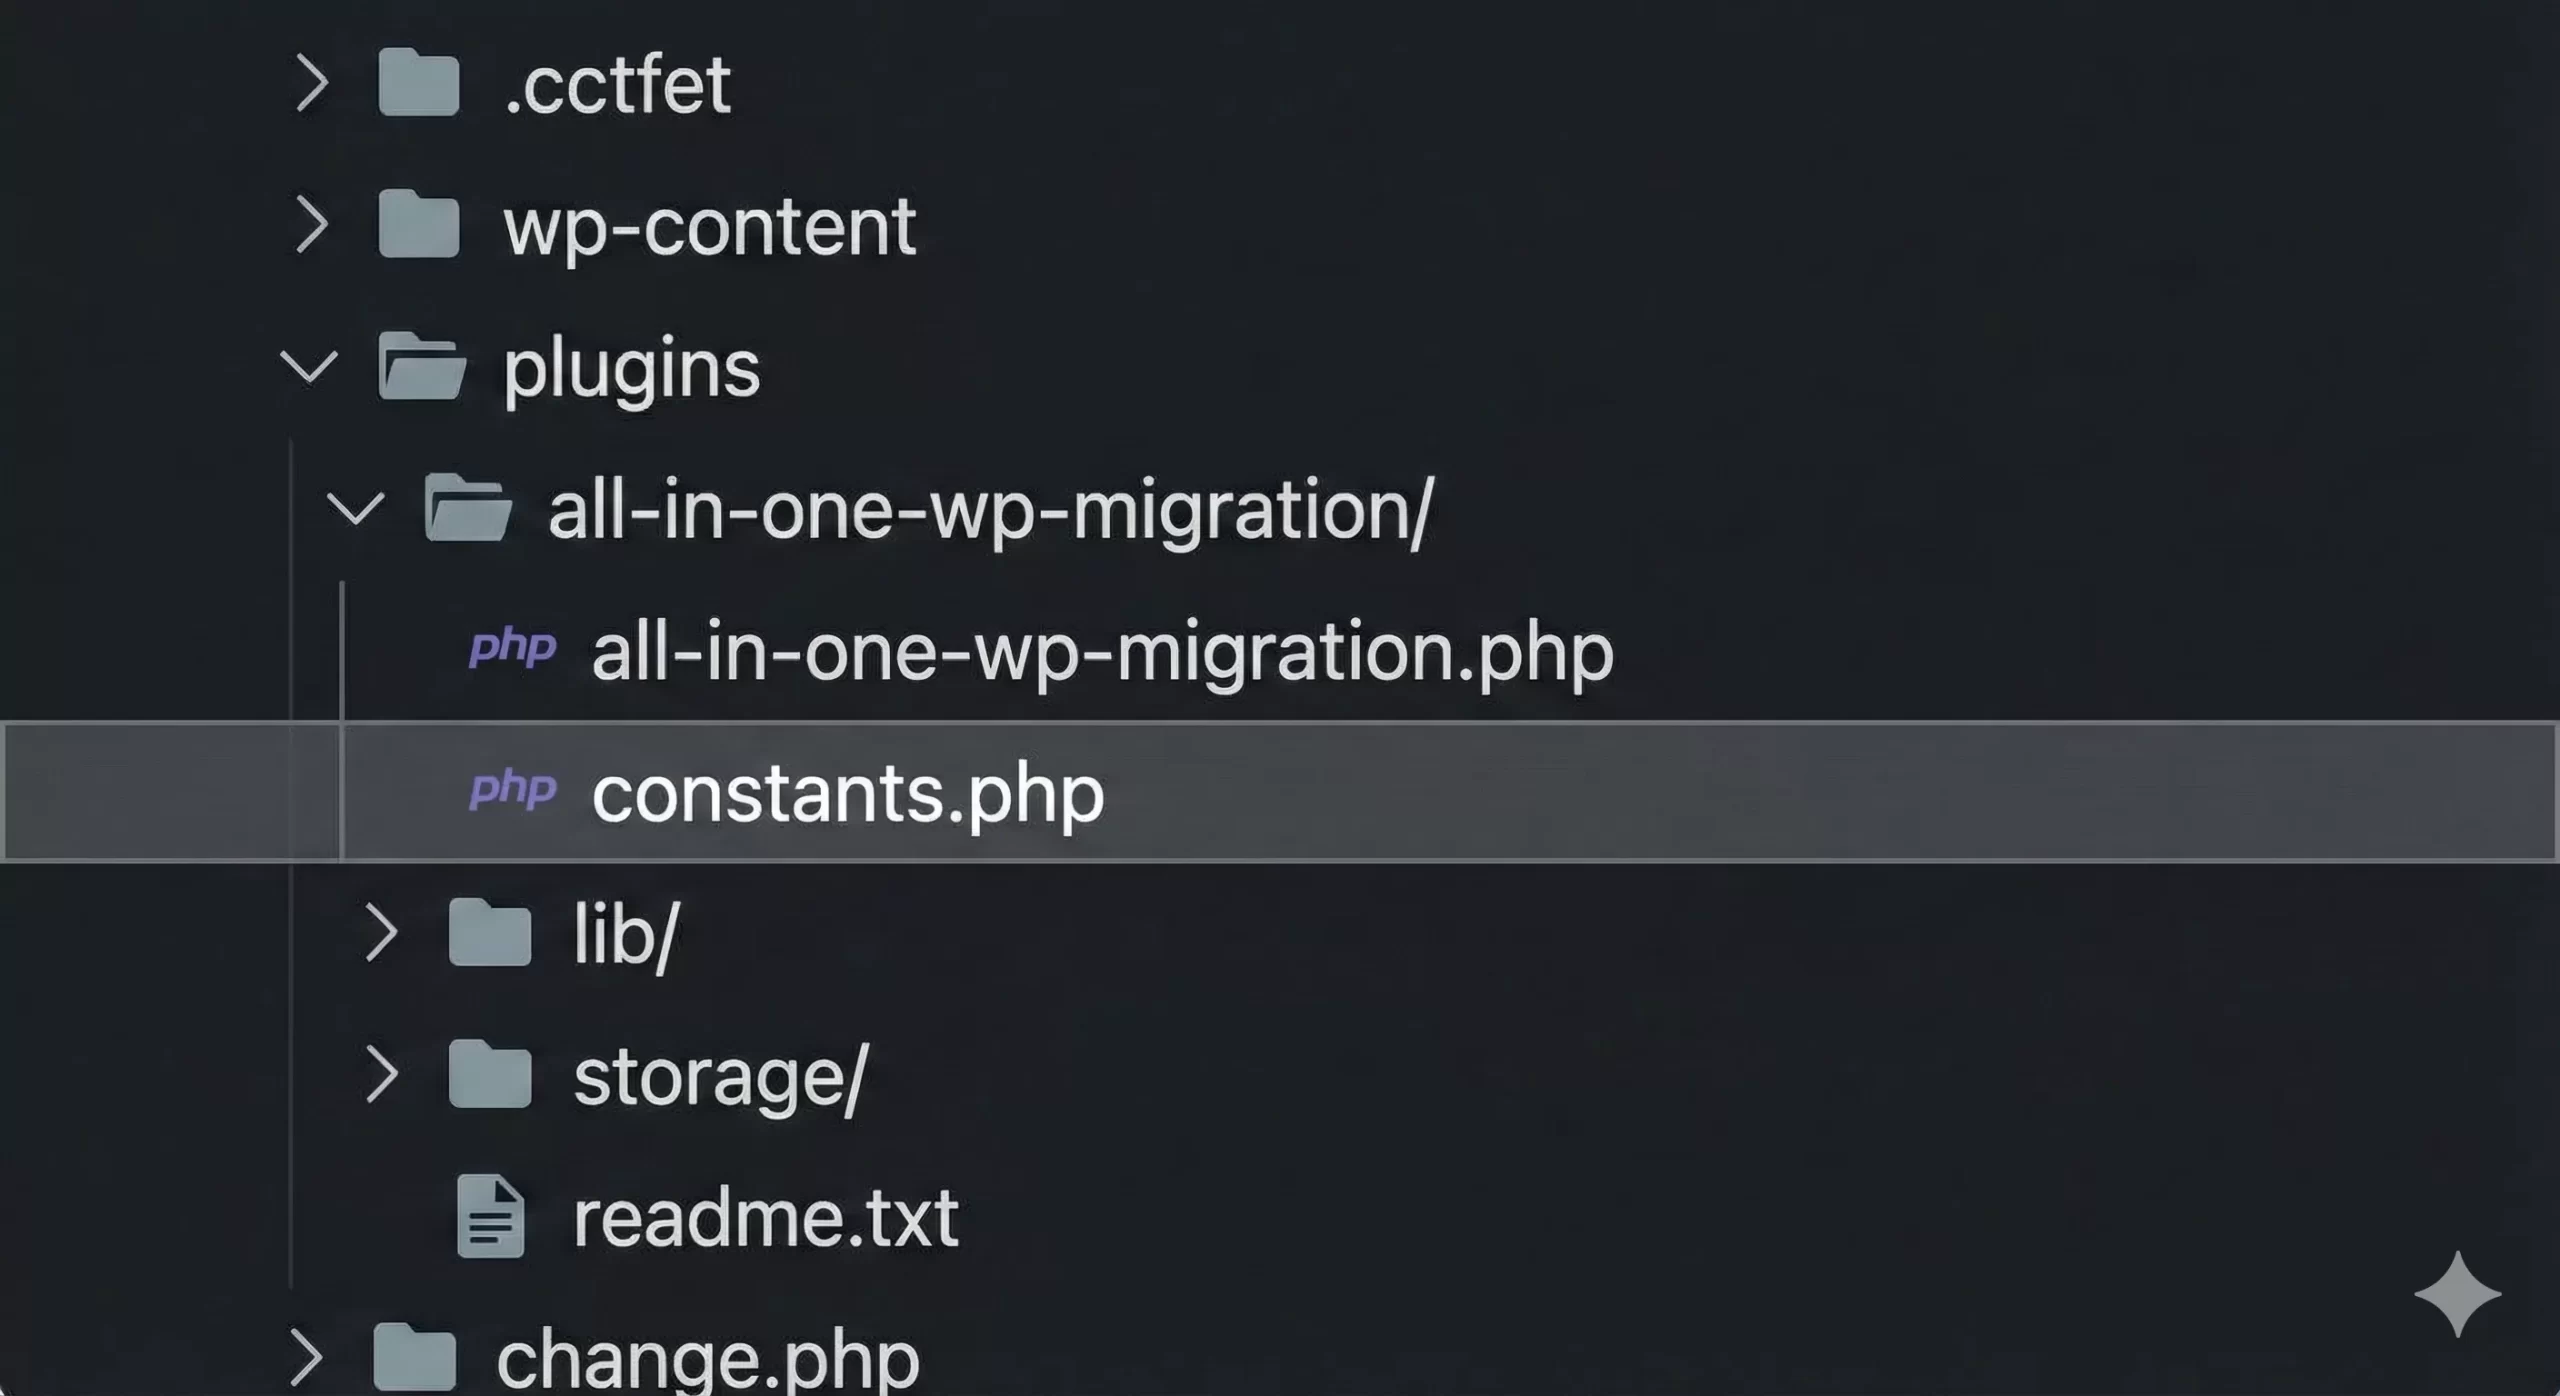
Locating constants.php
Navigate to wp-content/plugins/all-in-one-wp-migration/. Look for a file named constants.php. In some newer versions, this logic might be inside lib/model/class-ai1wm-application.php or similar, but searching for the string “AI1WM_MAX_FILE_SIZE” is usually the key.
Modifying the Max File Size
Open the file and search for the define statement related to the file size. It will likely look like define( 'AI1WM_MAX_FILE_SIZE', 2 << 28 );. You can comment out the existing line and replace it with a hardcoded value. By doing this, you are manually overwriting the logic that calculates the All-in-One import limit based on server settings.
// pnet_ modification to force unlimited upload
// define( 'AI1WM_MAX_FILE_SIZE', 2 << 28 );
define( 'AI1WM_MAX_FILE_SIZE', 536870912 ); // Set to 512MB
Remember, this is a “hack” rather than a sustainable solution. Once your migration is finished, you should reinstall the plugin to ensure you have a clean, unmodified version. This ensures that future security updates are applied correctly and that you don’t rely on a patched core file for the All-in-One import limit.
Troubleshooting Common Errors
Even after applying these fixes, you might encounter issues. The All-in-One import limit is tied deeply to server resources. Here are common errors developers face and how to fix them.
Stuck at 0% or 100%
If the upload starts but hangs at 0% or reaches 100% and never completes, this is usually not a file size issue but a timeout issue. The All-in-One import limit fix allowed the file to start, but the server killed the process. Ensure you have set max_execution_time and max_input_time to at least 300 (5 minutes) in your .htaccess or php.ini file.
HTTP Error 413 Request Entity Too Large
This error comes from the web server (Nginx/Apache), not PHP. It means the server software itself is rejecting the packet size before PHP even touches it. To fix this, you must edit your Nginx nginx.conf and add client_max_body_size 512M;, or adjust the LimitRequestBody in Apache. This is a layer above the standard All-in-One import limit configurations.
“Your file exceeds the maximum upload size for this site”
If you see this message immediately despite your changes, double-check that you are editing the correct php.ini file. Create a phpinfo() file to verify the path. Also, ensure you haven’t made a syntax error in .htaccess, which can silently fail or cause the server to ignore your new All-in-One import limit rules.
Conclusion
Overcoming the All-in-One import limit is a fundamental skill for any WordPress professional. Whether you choose to modify the .htaccess file, tweak the wp-config.php, edit the global php.ini, or use a developer filter hook, the goal is the same: to gain control over your migration environment. By following these steps, you ensure that your deployment workflow remains smooth, professional, and free of arbitrary restrictions. Don’t let a default server setting hold your project back—apply these fixes today and migrate with confidence.