
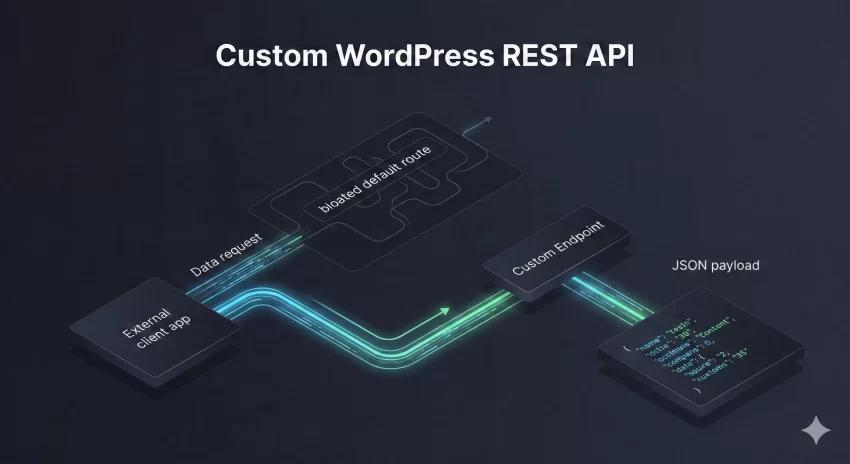
As a developer building modern web applications, headless architectures, or bespoke client portals, you will inevitably hit a wall with default data fetching. Relying on default routes often returns bloated payloads filled with unnecessary data, slowing down your application and exposing potential security vectors. The solution is crafting a custom WordPress API endpoint tailored precisely to your application’s data requirements.
In this comprehensive guide, we will walk through the exact architecture and code required to register a custom WordPress API endpoint from scratch. By the end of this tutorial, you will have a lightweight, highly secure, and optimized route that delivers exactly the data your front-end or external application needs, drastically improving performance.
Prerequisites for Endpoint Development
Before diving into the codebase, ensure your development environment meets the necessary standards to safely interact with the WordPress core routing system.
- PHP 8.0 or higher configured on your local or staging server.
- WordPress 6.0+ installed and running with pretty permalinks enabled.
- A solid understanding of WordPress REST API fundamentals.
- Administrator access and a complete database backup before modifying core functionality.
- A code editor (preferably with a dark theme) and an API testing tool like Postman or Insomnia.
Step 1: Define the Namespace and Route
The foundation of any custom WordPress API endpoint is its namespace and route. The namespace acts as a unique identifier to prevent collisions with other plugins or core routes, while the route dictates the exact URL structure you will query.
Careful planning here is crucial. A well-structured namespace typically includes a vendor or project name followed by an API version number (e.g., vendor/v1). This ensures that if you need to radically change your data structures in the future, you can introduce a v2 namespace without breaking existing applications that rely on v1.
Structuring the Route for a Client Portal
Let us assume we are building a bespoke client portal and need to fetch specific user activity data. We will use the namespace pixelnet/v1 and the route /client-activity/(?P<id>\d+). The (?P<id>\d+) segment is a Regular Expression that captures a dynamic numeric ID from the URL and passes it directly to our callback function as an argument.
Pro Tip: Versioning
You might also like: Restrict Content by User Role in WordPress : 2 Simple Steps
Step 2: Registering the Endpoint Hook
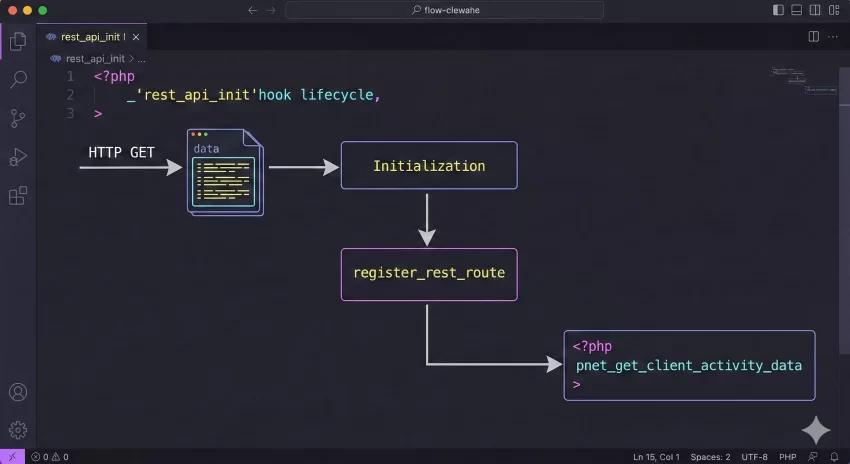
To integrate your custom WordPress API endpoint into the core system, you must attach your registration logic to the rest_api_init action hook. This hook fires precisely when the WordPress REST API is initialized.
Failing to use this specific hook means your routes will either register too early (causing fatal errors) or too late (resulting in 404 Not Found responses). Inside this hooked function, we utilize register_rest_route() to map our HTTP methods to our custom callback functions.
Writing the Registration Code
The register_rest_route() function requires three primary arguments: the namespace, the route string, and an array containing the HTTP methods, callback function, and permission callback.
add_action( 'rest_api_init', 'pnet_register_client_activity_route' );

function pnet_register_client_activity_route() {
    register_rest_route( 'pixelnet/v1', '/client-activity/(?P<id>\d+)', array(
        'methods'             => 'GET',
        'callback'            => 'pnet_get_client_activity_data',
        'permission_callback' => 'pnet_verify_client_permissions',
        'args'                => array(
            'id' => array(
                'validate_callback' => function($param, $request, $key) {
                    return is_numeric( $param );
                }
            ),
        ),
    ) );
}
Step 3: Crafting the Callback Function
The callback function is the operational heart of your custom WordPress API endpoint. This function receives the WP_REST_Request object, processes the incoming parameters, queries the database, and returns the formatted data.
A poorly optimized callback can severely degrade your server’s performance. It is vital to only query the exact fields necessary for your front-end, entirely bypassing the bloated payloads of standard endpoints. Always return data wrapped in a WP_REST_Response object to ensure headers and HTTP status codes are handled correctly.
Querying and Returning Specific Data
In our callback, we will extract the user ID from the request, perform a focused database query, and handle potential errors gracefully using WP_Error.
function pnet_get_client_activity_data( WP_REST_Request $request ) {
    $client_id = $request->get_param( 'id' );

    // Fetch specific data: Avoid pulling the entire user meta object
    $client_data = get_userdata( $client_id );

    if ( empty( $client_data ) ) {
        return new WP_Error(
            'no_client_found',
            'No client exists with the provided ID.',
            array( 'status' => 404 )
        );
    }

    // Build a precise, lightweight payload
    $response_data = array(
        'client_id'   => $client_data->ID,
        'username'    => $client_data->user_login,
        'email'       => $client_data->user_email,
        'portal_role' => current( $client_data->roles ),
        'last_login'  => get_user_meta( $client_id, 'pnet_last_login', true ) ?: 'Never',
    );

    // Return a standardized REST response with a 200 OK status
    return new WP_REST_Response( $response_data, 200 );
}
Performance Warning
Step 4: Implementing Strict Security Protocols
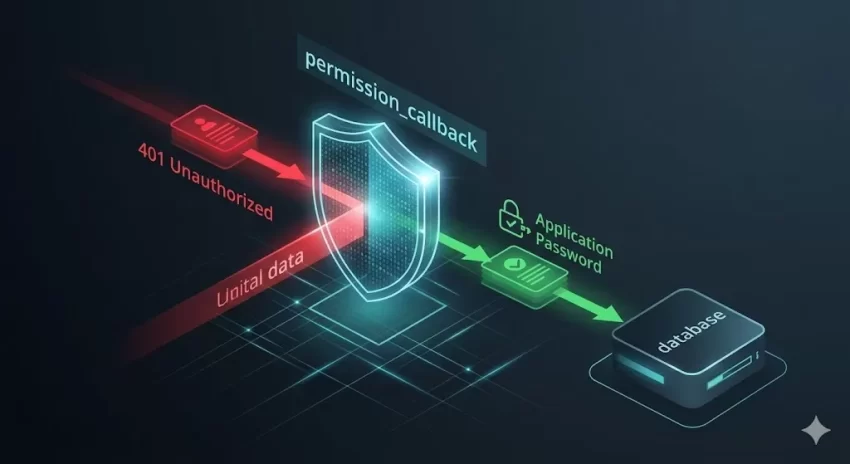
Leaving a custom WordPress API endpoint open to public access is a severe security risk, especially when dealing with user or client data. You must always implement a permission_callback to verify the request’s authenticity before the main callback executes.
If the permission_callback returns false, WordPress automatically halts the request and returns a 401 Unauthorized or 403 Forbidden status code. This ensures your data processing logic is completely insulated from malicious, unauthenticated requests.
Applying the Permission Callback
For our client portal example, we need to ensure that the user making the request is logged in and possesses the necessary capabilities to view client data.
function pnet_verify_client_permissions( WP_REST_Request $request ) {
    // Check if the user is authenticated via standard WP cookies or Application Passwords
    if ( ! is_user_logged_in() ) {
        return new WP_Error(
            'rest_not_logged_in',
            'You are not currently logged in.',
            array( 'status' => 401 )
        );
    }

    // Verify capability to ensure they have administrative or manager rights
    if ( ! current_user_can( 'edit_users' ) ) {
        return new WP_Error(
            'rest_forbidden',
            'You lack the necessary permissions to view client activity.',
            array( 'status' => 403 )
        );
    }

    return true;
}
Troubleshooting Common Errors
Even seasoned developers encounter issues when building a custom WordPress API endpoint. Below are the most frequent roadblocks and their immediate solutions.
Why is my custom endpoint returning a 404 Not Found error?
A 404 error usually occurs because your permalinks are not flushed. Whenever you register a new route, WordPress needs to rebuild its internal rewrite rules. Simply navigate to Settings > Permalinks in your WordPress dashboard and click “Save Changes” without modifying anything. This action flushes the rewrite cache and registers your custom WordPress API endpoint correctly.
Why am I getting a 401 Unauthorized when testing via Postman?
If your permission_callback requires is_user_logged_in(), testing from an external tool like Postman will fail because Postman does not share your browser’s authentication cookies. To test an authenticated custom WordPress API endpoint externally, you must generate an Application Password via your WordPress user profile and pass it using Basic Auth in your API client.
Why does my route return a “rest_no_route” code?
This happens when the namespace or route string in your request URL does not exactly match what you defined in register_rest_route(). Double-check for trailing slashes, typos in the namespace, or mismatched regex patterns in your URL parameters.
You might also like: How To Create a Custom Elementor Widget: The Ultimate Guide
Summary
Transitioning away from bloated default routes is a massive leap forward in application performance. By systematically defining your namespace, mapping routes during the rest_api_init hook, structuring efficient callback functions, and enforcing strict permission protocols, you create an optimized data pipeline. Whether you are building headless front-ends, custom analytical tools, or external portals, mastering the creation of a custom WordPress API endpoint is an essential skill that guarantees secure, lightning-fast data delivery.