Are you building a membership site or a client portal and struggling to find a lightweight, secure way to manage visibility? Many developers default to bloated plugins, but learning how to manually restrict content wordpress is a crucial skill for maintaining site performance and security. Whether you are creating a simple “Members Only” area or a complex tiered system, relying on heavy third-party dependencies can often lead to “plugin bloat” and slower load times.
In this technical guide, we will solve this problem by building a custom, code-based solution to control access. By the end of this tutorial, you will have a lightweight, functional system to restrict content wordpress effectively without relying on paid subscriptions or external SaaS tools. We will cover shortcodes, page redirects, and content filtering hooks.
- PHP 8.0+: Ensure your server is running a modern version of PHP for security and performance.
- Administrator Access: You will need full access to your WordPress dashboard and file system (FTP/SFTP).
- Child Theme or Custom Plugin: Never edit your parent theme’s
functions.phpdirectly. - Site Backup: Always create a full backup before adding custom code to production environments.
- Code Editor: VS Code or Sublime Text is recommended for editing PHP files.
Step 1: Understanding WordPress Access Control Logic
Before writing code, it is vital to understand the native functions WordPress provides for user capability checks. To restrict content wordpress securely, we rely primarily on the is_user_logged_in() function and the current_user_can() function. These are the building blocks of any membership system.
The core logic involves intercepting the user’s request before the content is rendered. If we wait until the footer loads to hide content via CSS, the data is still present in the HTML source code, which is a major security flaw. True restriction happens at the server level, preventing the sensitive data from ever being sent to the browser. This approach ensures that when you restrict content wordpress, it is truly secure against tech-savvy users who might inspect the page source.
The Role of Roles and Capabilities
WordPress uses a role-based access control (RBAC) system. When you decide to restrict content, you aren’t just checking if a user exists; you are often checking if they have the specific ‘capability’ to view that content. This granularity allows you to create tiers—like ‘Bronze’, ‘Silver’, and ‘Gold’—simply by mapping capabilities to custom roles.
You might also like:

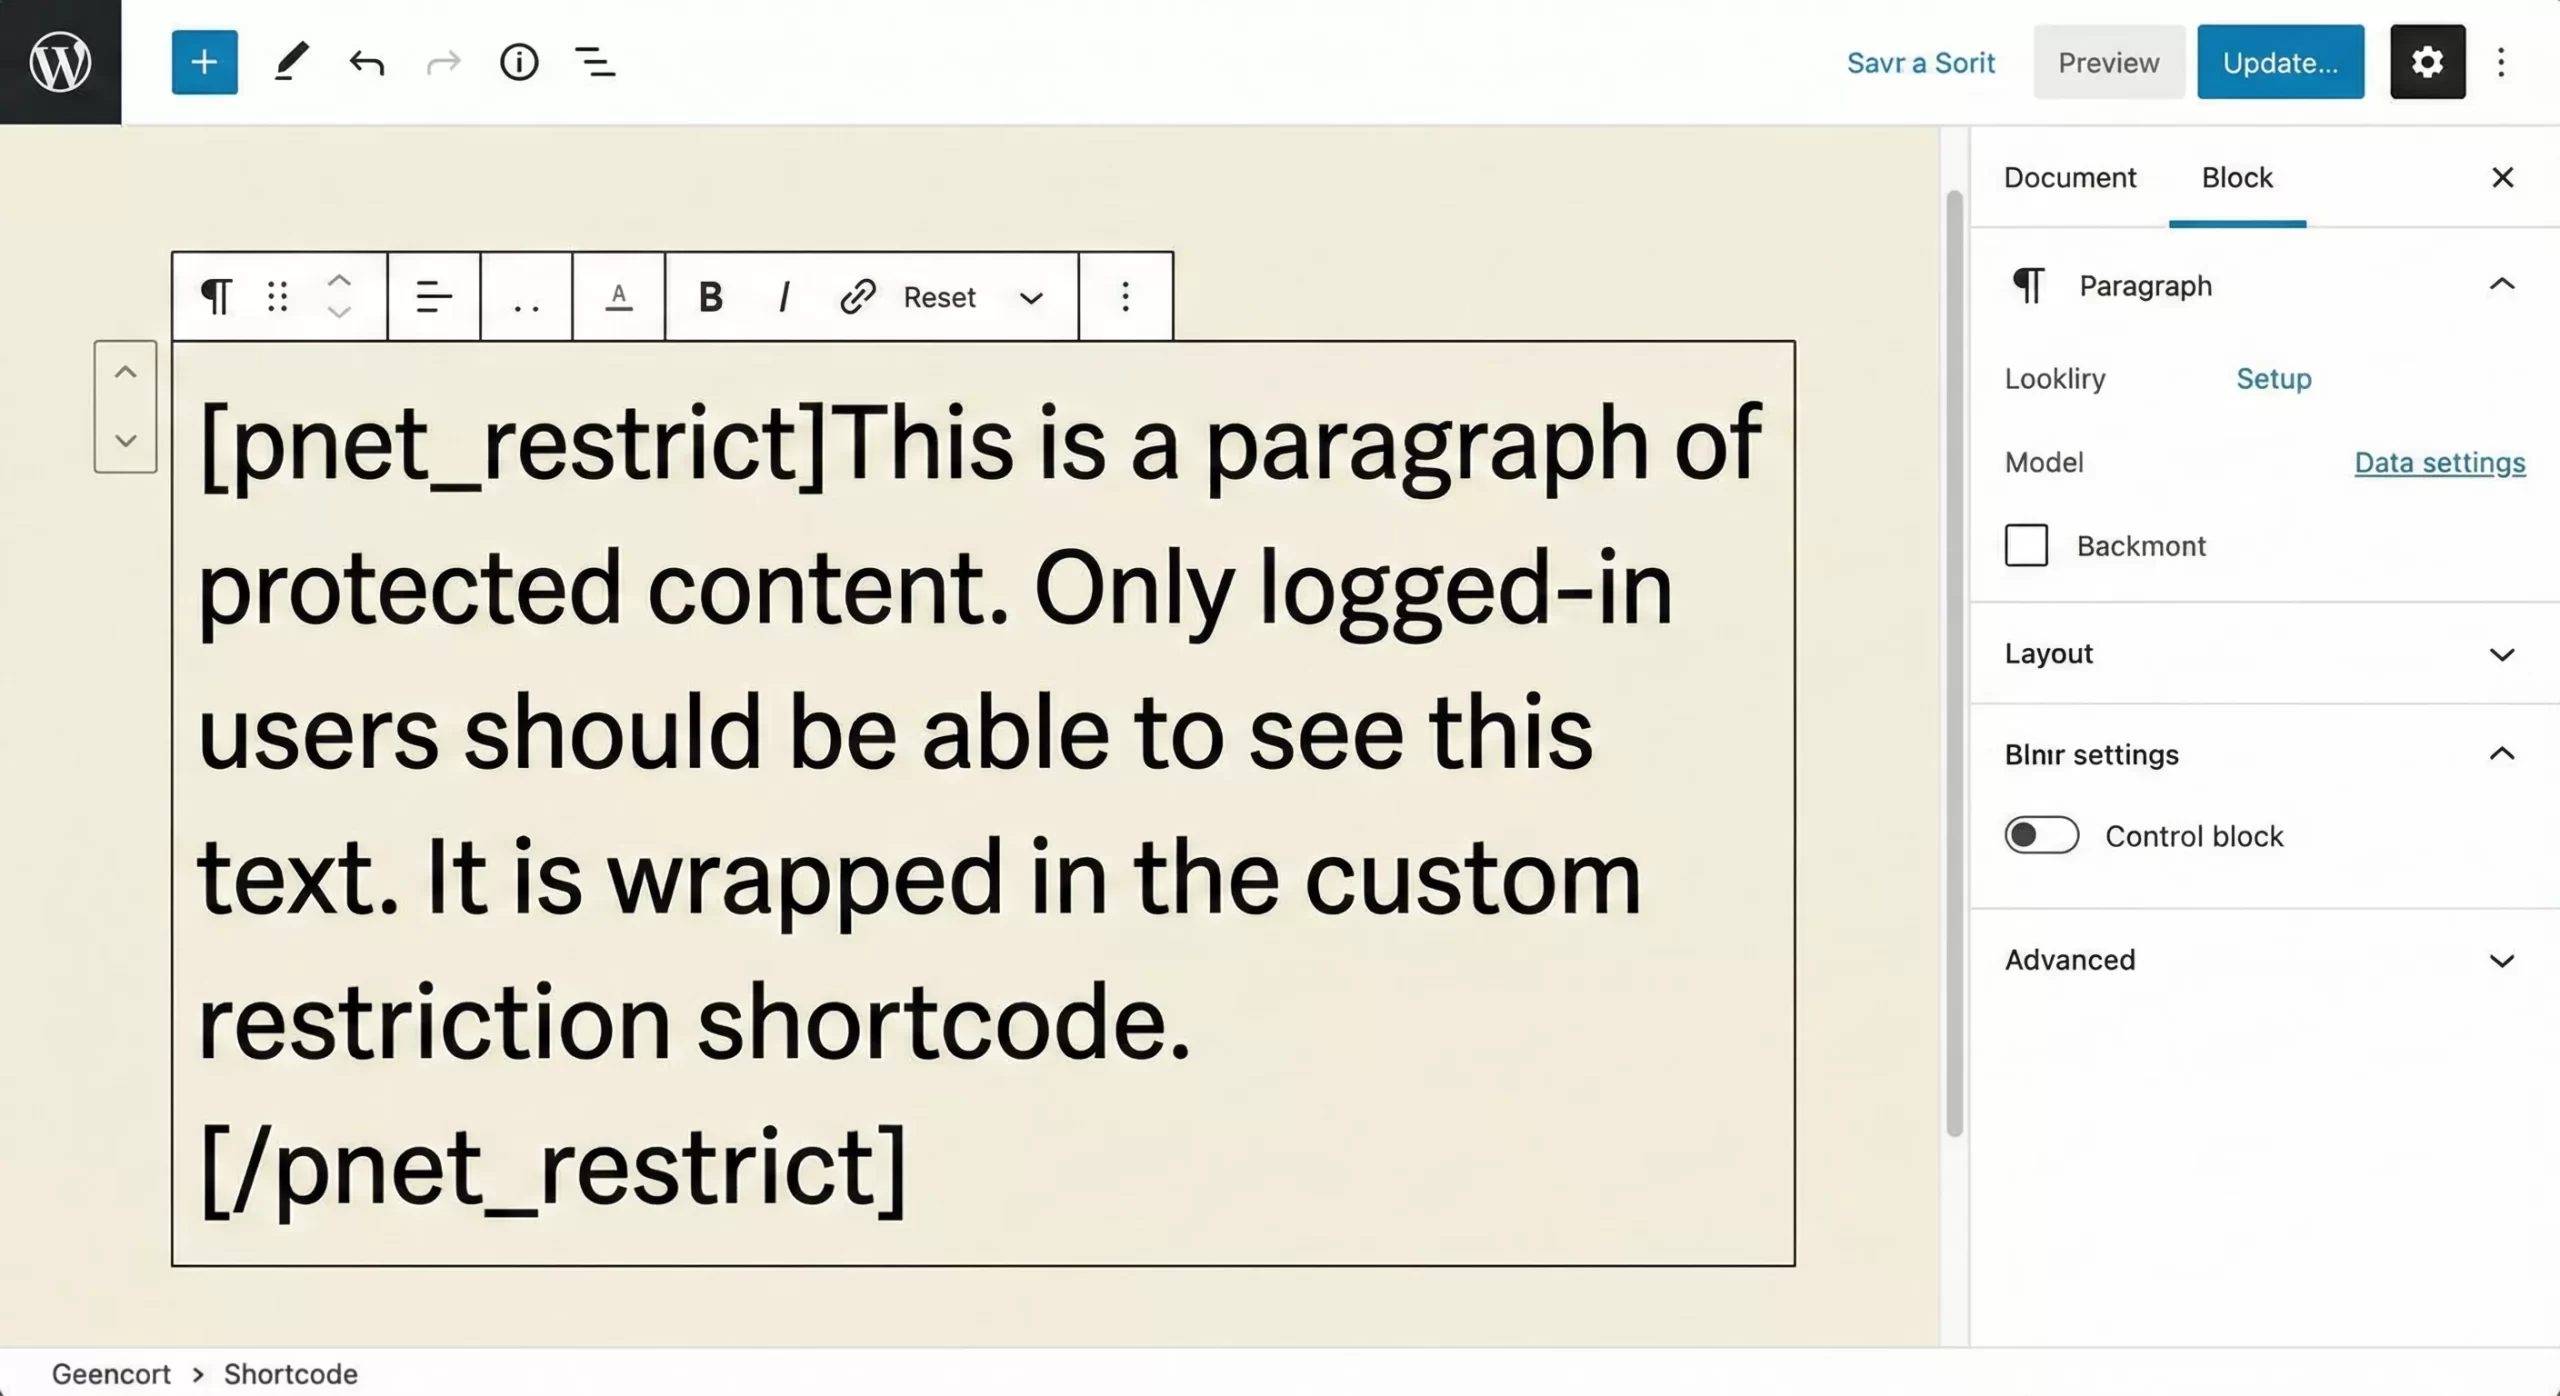
Step 2: Build a ‘Members Only’ Shortcode
The simplest method to restrict content wordpress within a specific post or page is by using a shortcode. This allows content editors to wrap specific paragraphs or images in a protection block without needing to lock the entire page. This is ideal for “teaser” content strategies where the intro is public, but the deep dive is private.
We will create a shortcode [pnet_restrict] that checks if the user is logged in. If they are, it shows the content. If not, it displays a login message. This granular approach is often preferred for high-conversion landing pages.
/**
 * Shortcode to restrict content wordpress for non-logged-in users.
 * Usage: [pnet_restrict]Protected Content Here[/pnet_restrict]
 */
function pnet_restrict_content_shortcode($atts, $content = null) {
    // Check if the user is logged in
    if ( is_user_logged_in() ) {
        // Return the content if authorized
        return do_shortcode($content);
    }

    // Define the message for unauthorized users
    $message = '<div class="pnet-alert">You must be logged in to view this content. <a href="' . wp_login_url() . '">Login here</a>.</div>';

    return $message;
}
add_shortcode('pnet_restrict', 'pnet_restrict_content_shortcode');
Enhancing the Shortcode with User Roles
To make this more robust, we can add a parameter to check for specific roles. This allows you to restrict content wordpress not just to members, but to specific *types* of members, such as ‘Editors’ or ‘Subscribers’. By parsing the attributes passed to the shortcode, we can compare the current user’s role against the required role defined in the editor.
Must Read: Easily Add Breadcrumbs in WordPress: The Ultimate Guide (Yoast vs. Custom Code)
Step 3: Automate Restriction via the_content Filter
Shortcodes are great, but they require manual entry. For a more scalable solution, you might want to automatically restrict content wordpress on all posts within a specific category (e.g., “Premium Tutorials”). We can achieve this by hooking into the the_content filter. This function processes the post content before it is displayed on the screen.
Using filters allows you to enforce rules globally. For example, you can decide that any post tagged “Members Only” automatically hides its content after the first 100 words, appending a “Read More” paywall. This is a common pattern for news sites and highly effective for SEO, as Google can still index the teaser text.
/**
 * Automatically restrict content wordpress based on category.
 */
function pnet_filter_premium_content($content) {
    // Check if we are inside the main loop and on a single post
    if ( is_singular('post') && in_the_loop() && is_main_query() ) {

        // Check if post is in the 'Premium' category ID 5
        if ( has_category(5) ) {

            // If user is NOT logged in
            if ( !is_user_logged_in() ) {
                // Return a teaser + login prompt
                $teaser = wp_trim_words($content, 40, '...');
                return $teaser . '<p class="pnet-locked">To read the full article, please log in.</p>';
            }
        }
    }

    // Return content normally if conditions aren't met
    return $content;
}
add_filter('the_content', 'pnet_filter_premium_content');
Step 4: Redirecting Non-Members Away
Sometimes, hiding the content isn’t enough; you want to prevent unauthorized users from even accessing the URL. This is critical for downloadable assets or private documentation. To restrict content wordpress at the routing level, we use the template_redirect hook. This hook fires before the page header is sent, making it the perfect place to trigger a PHP header redirect.
Implementing a redirect is a “hard” restriction. Unlike the content filter which shows the page shell (header/footer) with a message, a redirect sends the user to a completely different page, such as a sales page or login form. This is often the best user experience for strictly private pages.
/**
 * Redirect users away from specific pages to restrict content wordpress.
 */
function pnet_redirect_protected_pages() {
    // Check if it is a specific page ID (e.g., 42)
    if ( is_page(42) ) {

        // If user is not logged in
        if ( !is_user_logged_in() ) {

            // Redirect to login page with redirection back to current page
            auth_redirect();
            exit; // Always exit after a redirect
        }
    }
}
add_action('template_redirect', 'pnet_redirect_protected_pages');
Handling Caching with Redirects
One major pitfall when you restrict content wordpress via PHP redirects is server-side caching. If your hosting provider uses aggressive page caching (like Varnish or Nginx FastCGI), the server might serve a cached “unrestricted” version of the page to a guest, or a cached “restricted” version to a member. Always exclude membership pages from your caching plugin or server configuration to ensure the PHP logic executes on every page load.
You might also like:
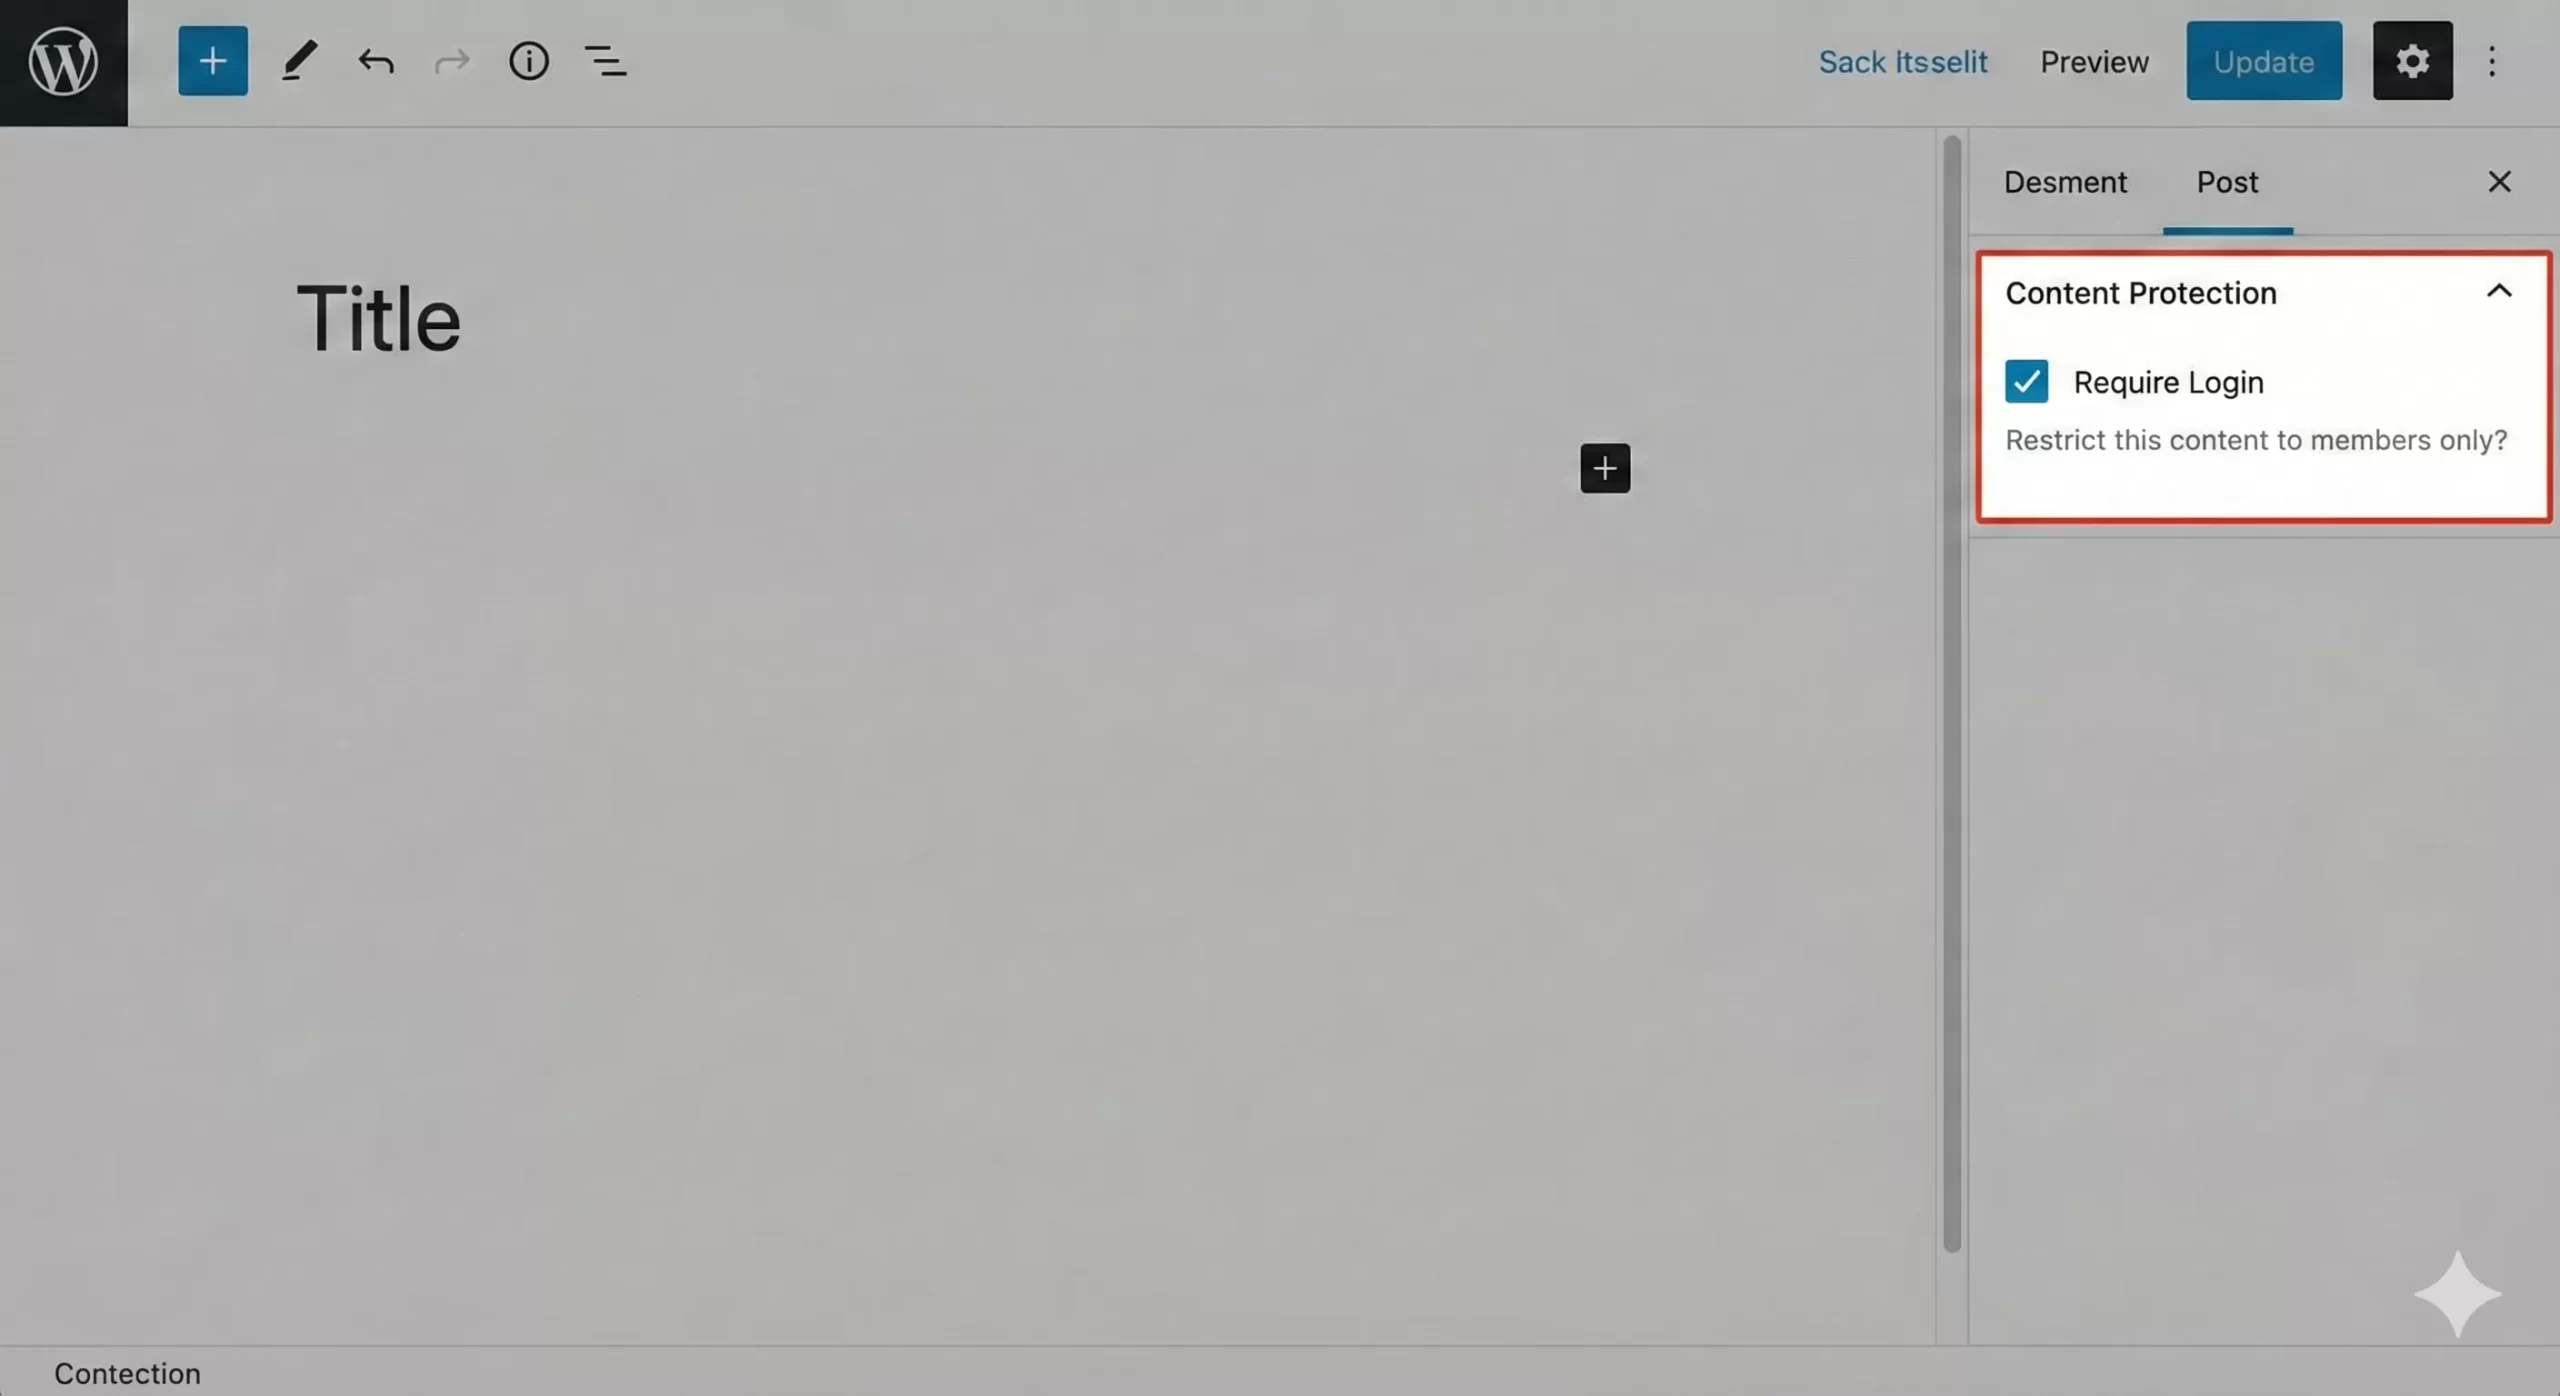
Step 5: Adding a UI for Client Control
As a developer, you are comfortable with IDs, but your clients are not. To make it easy for them to restrict content wordpress, we should add a custom meta box to the post editor. This creates a simple checkbox saying “Require Login” on the editing screen.
This step bridges the gap between raw code and user experience. By storing the restriction status in post meta, we can revisit our previous the_content filter and update it to check for this specific meta key instead of hard-coded category IDs. This makes your system dynamic and client-friendly.
/**
 * Register a meta box to toggle restriction.
 */
function pnet_add_restriction_metabox() {
    add_meta_box(
        'pnet_restriction_box',
        'Content Protection',
        'pnet_render_metabox',
        'post',
        'side'
    );
}
add_action('add_meta_boxes', 'pnet_add_restriction_metabox');

/**
 * Render the checkbox HTML.
 */
function pnet_render_metabox($post) {
    $value = get_post_meta($post->ID, '_pnet_is_restricted', true);
    ?>
    <label>
        <input type="checkbox" name="pnet_restrict_checkbox" value="1" <?php checked($value, '1'); ?> />
        Restrict this content to members only?
    </label>
    <?php
}

/**
 * Save the meta box data.
 */
function pnet_save_restriction_data($post_id) {
    if ( array_key_exists('pnet_restrict_checkbox', $_POST) ) {
        update_post_meta($post_id, '_pnet_is_restricted', '1');
    } else {
        delete_post_meta($post_id, '_pnet_is_restricted');
    }
}
add_action('save_post', 'pnet_save_restriction_data');
Common Errors When You Restrict Content
Even seasoned developers run into issues when implementing custom access control. Here are the most frequent problems you might face when attempting to restrict content wordpress manually.
Why is my restricted content still visible?
This is almost always a caching issue. Plugins like WP Rocket or server-side layers (Cloudflare) cache the HTML output. If a logged-in user visits the page first, that “unlocked” version is cached and shown to everyone. To fix this, ensure you define exclusion rules in your caching setup for any URL where you restrict content wordpress.
Why am I getting an “Infinite Redirect Loop”?
This happens if you configure the redirection logic incorrectly. For example, if you redirect a user to a “Login” page, but you also accidently applied the restriction logic to that Login page, the system will loop indefinitely. Always check !is_page('login') in your conditions.
Admin Ajax and REST API Leaks
Remember that hiding the front-end content doesn’t always secure the data. Tech-savvy users might query the WordPress REST API (/wp-json/wp/v2/posts) to read the content raw. If you are building a highly secure system, you must also filter the REST API responses to truly restrict content wordpress comprehensively.
By following these steps, you have created a robust system. You can now use shortcodes for flexibility, global filters for automation, and meta boxes for client control. This approach gives you the power to restrict content wordpress exactly how you need it, without the overhead of heavy membership plugins.