We all love the convenience of WordPress plugins. Tools like CPT UI are fantastic for beginners, but as you advance in your development journey, you might find yourself asking: “Do I really need a plugin for this?”
When it comes to creating content structures, the answer is often no. Learning to register custom post type WordPress manually is a rite of passage for developers. It gives you cleaner code, one less plugin to update, and total control over your site’s data structure.
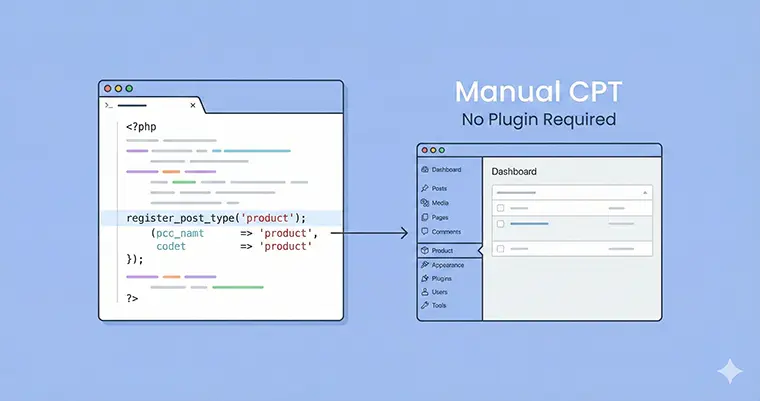
In this guide, we will ditch the user interface and dive into the code. I will show you exactly why you should code your own CPTs and provide the snippet you need to register custom post type WordPress setups in seconds.
Why You Should Code Your CPTs (Instead of Using Plugins)
Before we look at the how, let’s look at the why. If plugins are so easy, why bother opening your functions.php file?
- Performance and Bloat: Plugins often load extra scripts or CSS files that you don’t need on every page. When you manually register custom post type WordPress code, you are loading strictly what is necessary—nothing more, nothing less.
- Portability: If you rely on a plugin and accidentally deactivate it, your custom posts disappear from the admin dashboard. When you code it into your theme (or a site-specific plugin), your structure is permanent.
- Version Control: For developers using Git, having your CPT registration in code means you can track changes. You can’t “version control” database settings inside a UI plugin easily.
How to Register Custom Post Type WordPress Manually
To register custom post type WordPress functionalities, we rely on a core WordPress function called register_post_type(). This function should be hooked into the init action.
You can place the following code in your theme’s functions.php file, but the best practice is to create a site-specific plugin or use a child theme. This ensures that if you update your parent theme, you don’t lose your hard work.
The Code Snippet
Here is a complete, ready-to-use code block. In this example, we are creating a “Portfolio” post type.
function pn_custom_portfolio_cpt() {

    // 1. Define the labels for the UI
    $labels = array(
        'name'                  => _x( 'Portfolios', 'Post Type General Name', 'text_domain' ),
        'singular_name'         => _x( 'Portfolio', 'Post Type Singular Name', 'text_domain' ),
        'menu_name'             => __( 'Portfolio', 'text_domain' ),
        'name_admin_bar'        => __( 'Portfolio', 'text_domain' ),
        'archives'              => __( 'Item Archives', 'text_domain' ),
        'attributes'            => __( 'Item Attributes', 'text_domain' ),
        'parent_item_colon'     => __( 'Parent Item:', 'text_domain' ),
        'all_items'             => __( 'All Portfolios', 'text_domain' ),
        'add_new_item'          => __( 'Add New Portfolio', 'text_domain' ),
        'add_new'               => __( 'Add New', 'text_domain' ),
        'new_item'              => __( 'New Portfolio', 'text_domain' ),
        'edit_item'             => __( 'Edit Portfolio', 'text_domain' ),
        'update_item'           => __( 'Update Portfolio', 'text_domain' ),
        'view_item'             => __( 'View Portfolio', 'text_domain' ),
        'view_items'            => __( 'View Portfolios', 'text_domain' ),
        'search_items'          => __( 'Search Portfolio', 'text_domain' ),
        'not_found'             => __( 'Not found', 'text_domain' ),
        'not_found_in_trash'    => __( 'Not found in Trash', 'text_domain' ),
        'featured_image'        => __( 'Featured Image', 'text_domain' ),
        'set_featured_image'    => __( 'Set featured image', 'text_domain' ),
        'remove_featured_image' => __( 'Remove featured image', 'text_domain' ),
        'use_featured_image'    => __( 'Use as featured image', 'text_domain' ),
        'insert_into_item'      => __( 'Insert into item', 'text_domain' ),
        'uploaded_to_this_item' => __( 'Uploaded to this item', 'text_domain' ),
        'items_list'            => __( 'Items list', 'text_domain' ),
        'items_list_navigation' => __( 'Items list navigation', 'text_domain' ),
        'filter_items_list'     => __( 'Filter items list', 'text_domain' ),
    );

    // 2. Define the arguments
    $args = array(
        'label'                 => __( 'Portfolio', 'text_domain' ),
        'description'           => __( 'Post Type Description', 'text_domain' ),
        'labels'                => $labels,
        'supports'              => array( 'title', 'editor', 'thumbnail', 'excerpt', 'custom-fields' ),
        'taxonomies'            => array( 'category', 'post_tag' ), // Add standard cats/tags
        'hierarchical'          => false,
        'public'                => true,
        'show_ui'               => true,
        'show_in_menu'          => true,
        'menu_position'         => 5,
        'menu_icon'             => 'dashicons-art', // Use Dashicons for the menu icon
        'show_in_admin_bar'     => true,
        'show_in_nav_menus'     => true,
        'can_export'            => true,
        'has_archive'           => true,
        'exclude_from_search'   => false,
        'publicly_queryable'    => true,
        'capability_type'       => 'page',
        'show_in_rest'          => true, // IMPORTANT: Set to true for Gutenberg editor support
    );

    // 3. The actual registration function
    register_post_type( 'portfolio', $args );

}

// 4. Hook into the 'init' action
add_action( 'init', 'pn_custom_portfolio_cpt', 0 );
Breaking Down the Code
To successfully register custom post type WordPress structures, you need to understand what the arguments in the array actually do.
$labels: This array handles the text you see in the WordPress dashboard. Instead of generic “Add New Post,” your client will see “Add New Portfolio.”supports: This controls what fields appear on the editing screen. If you want the block editor (Gutenberg), the editor support is required.public&show_ui: These are the switches that make your post type visible on the front end and the back end.show_in_rest: This is arguably the most important line for modern WordPress. If you register custom post type WordPress code without setting this to true, you will be forced to use the Classic Editor. Setting it to true enables the Block Editor.menu_icon: You can grab any icon class from the WordPress Dashicons library to make your menu look professional.
Common Issues: The 404 Error
A very common issue developers face when they first register custom post type WordPress snippets is the “404 Not Found” error. You add the code, you see the menu item, you create a post, and when you view it… Page Not Found.
Don’t panic! This is a permalink issue.
Whenever you add a new post type to your functions.php file, WordPress doesn’t automatically know about the new URL structure. You must flush your permalinks.
How to fix it:
- Go to Settings > Permalinks in your dashboard.
- Click the Save Changes button.
- You don’t need to change anything; just clicking save resets the rewrite rules.
Bonus: Categorize Your Content with Custom Taxonomies
Now that you have successfully used code to register custom post type WordPress structures, you might notice something missing. The standard “Categories” and “Tags” usually apply to blog posts. What if you want to categorize your Portfolios by “Project Type” (e.g., Web Design, Branding, SEO)?
For that, we need a Custom Taxonomy.
Just like the CPT, we can register this manually. Below is the snippet to create a “Project Types” taxonomy that functions exactly like standard WordPress categories (hierarchical) and attaches itself to your new Portfolio post type.
The Taxonomy Code Snippet
Paste this code into your functions.php file, ideally right below your CPT code.
function my_custom_portfolio_taxonomy() {

    // 1. Define Labels
    $labels = array(
        'name'              => _x( 'Project Types', 'taxonomy general name', 'text_domain' ),
        'singular_name'     => _x( 'Project Type', 'taxonomy singular name', 'text_domain' ),
        'search_items'      => __( 'Search Project Types', 'text_domain' ),
        'all_items'         => __( 'All Project Types', 'text_domain' ),
        'parent_item'       => __( 'Parent Project Type', 'text_domain' ),
        'parent_item_colon' => __( 'Parent Project Type:', 'text_domain' ),
        'edit_item'         => __( 'Edit Project Type', 'text_domain' ),
        'update_item'       => __( 'Update Project Type', 'text_domain' ),
        'add_new_item'      => __( 'Add New Project Type', 'text_domain' ),
        'new_item_name'     => __( 'New Project Type Name', 'text_domain' ),
        'menu_name'         => __( 'Project Type', 'text_domain' ),
    );

    // 2. Define Arguments
    $args = array(
        'hierarchical'      => true, // Set to 'false' if you want it to act like Tags
        'labels'            => $labels,
        'show_ui'           => true,
        'show_admin_column' => true,
        'query_var'         => true,
        'rewrite'           => array( 'slug' => 'project-type' ),
        'show_in_rest'      => true, // Critical for Gutenberg Sidebar
    );

    // 3. Register and attach to 'portfolio' CPT
    register_taxonomy( 'project_type', array( 'portfolio' ), $args );
}

// 4. Hook into init
add_action( 'init', 'my_custom_portfolio_taxonomy', 0 );
Key details to watch out for:
hierarchical: I set this to true, which means you will have checkboxes and parent/child relationships (like Categories). If you want it to work like Tags (where you type and hit enter), change this to false.array( 'portfolio' ): This is the second argument inregister_taxonomy. It tells WordPress exactly which Post Type this taxonomy belongs to. This must match the slug you used in your CPT registration.show_admin_column: I set this to true so that when you are looking at the list of all your Portfolios in the backend, you can see a column showing which “Project Type” they belong to. It’s a huge time saver!
Conclusion
Taking the manual route provides you with a deeper understanding of how the CMS core works. While plugins are helpful for prototyping, the ability to register custom post type WordPress functions via code is a skill that separates the hobbyists from the professionals.
It keeps your site lightweight, ensures your data structure is version-controlled, and gives you the flexibility to customize every single label and argument.
Copy the snippets above, tweak the names to fit your project, and start building!


