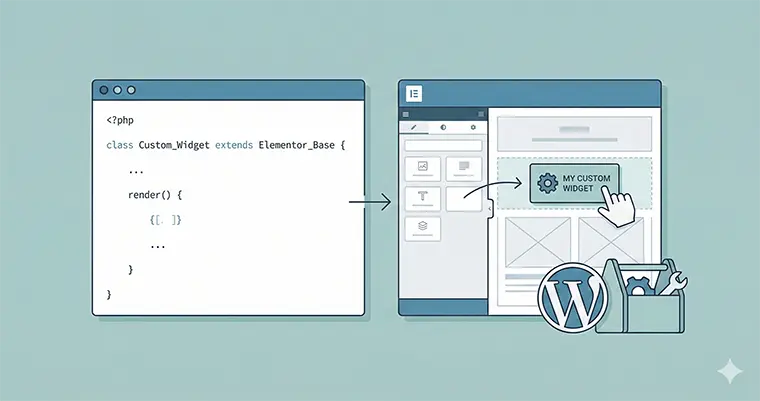
Elementor is arguably the most powerful page builder for WordPress, but sometimes the default library just isn’t enough. You hit a wall where you need a specific feature, a unique layout, or a specialized data display. This is where learning to build a Custom Elementor Widget becomes a superpower for any WordPress developer.
In this guide, we are going to move beyond drag-and-drop. We will dive into the code to create a lightweight, functional Custom Elementor Widget using PHP. Whether you are building a client site or developing your own addons, this boilerplate guide will give you the foundation you need.
Why Code Your Own Custom Elementor Widget?
Before we open our code editor, you might wonder: “Why not just use a plugin?”
While third-party addon packs are great, they often come with “bloat”—loading CSS and JS assets you don’t actually use. When you code a Custom Elementor Widget yourself, you ensure:
- Performance: Zero unnecessary code.
- Control: It behaves exactly how you want it to.
- Scalability: You can extend it with your own logic and hooks.
Let’s get your hands dirty and build a widget that outputs a simple heading with a customizable color and text setting.
Prerequisites
To successfully create a Custom Elementor Widget, you should have:
- A local or staging WordPress environment.
- Elementor (Free or Pro) installed and active.
- Basic knowledge of PHP and Object-Oriented Programming (OOP).
- Access to your site’s file structure (via FTP or a code editor).
Step 1: Setting Up the Plugin Structure
While you can add widgets via your theme’s functions.php file, the best practice is to wrap your Custom Elementor Widget into a standalone plugin. This ensures your widget survives theme changes.
Navigate to your wp-content/plugins folder and create a new folder named pnet-elementor-addon. Inside, create a file named pnet-elementor-addon.php.
Paste the following header code to register the plugin:
<?php
/**
 * Plugin Name: PNET Custom Elementor Widget
 * Description: A boilerplate plugin to demonstrate how to create a custom Elementor widget.
 * Version: 1.0.0
 * Author: Your Name
 * Text Domain: pnet-elementor
 */

if ( ! defined( 'ABSPATH' ) ) {
	exit; // Exit if accessed directly.
}
Step 2: Loading the Widget Manager
Elementor provides a specific action hook elementor/widgets/register which we must use to load our widget classes. We need to ensure that Elementor is actually loaded before we try to extend it to avoid fatal PHP errors.
Add this code to your pnet-elementor-addon.php file:
/**
 * Register the Custom Elementor Widget.
 *
 * @param \Elementor\Widgets_Manager $widgets_manager Elementor widgets manager.
 * @return void
 */
function pnet_register_custom_widgets( $widgets_manager ) {

	// We will create this file in the next step
	require_once( __DIR__ . '/widgets/pnet-boilerplate-widget.php' );

	// Register the widget class
	$widgets_manager->register( new \Pnet_Boilerplate_Widget() );

}
add_action( 'elementor/widgets/register', 'pnet_register_custom_widgets' );
Step 3: The Boilerplate Widget Class
Now for the fun part. We need to define the class that tells Elementor how our Custom Elementor Widget looks and behaves.
Create a new folder inside your plugin directory called widgets. Inside that folder, create a file named pnet-boilerplate-widget.php.
Every Elementor widget extends the \Elementor\Widget_Base class. Here is the skeletal structure you need:
<?php
if ( ! defined( 'ABSPATH' ) ) {
	exit; // Exit if accessed directly.
}

class Pnet_Boilerplate_Widget extends \Elementor\Widget_Base {

	// 1. Get Widget Name
	public function get_name() {
		return 'pnet_boilerplate_widget';
	}

	// 2. Get Widget Title
	public function get_title() {
		return esc_html__( 'PNET Custom Widget', 'pnet-elementor' );
	}

	// 3. Get Widget Icon
	public function get_icon() {
		return 'eicon-code';
	}

	// 4. Get Widget Categories
	public function get_categories() {
		return [ 'general' ];
	}

	// 5. Register Controls (Settings)
	protected function register_controls() {
        // We will add controls here in the next step
	}

	// 6. Render Output
	protected function render() {
        // We will output the HTML here
	}
}
Understanding the Methods
get_name(): A unique ID for the widget (used in code).get_title(): The label the user sees in the Elementor panel.get_icon(): The icon displayed in the panel (Elementor uses the eicon library).get_categories(): Where the widget appears (Basic, General, Pro, or a custom category).
Step 4: Adding Controls to Your Custom Elementor Widget
A Custom Elementor Widget is useless without settings. We use the register_controls method to add input fields.
Let’s add a Text Content field and a Color picker. Update the register_controls function in your file:
protected function register_controls() {

    // Start a Content Section
    $this->start_controls_section(
        'pnet_content_section',
        [
            'label' => esc_html__( 'Content Settings', 'pnet-elementor' ),
            'tab' => \Elementor\Controls_Manager::TAB_CONTENT,
        ]
    );

    // Add a Text Control
    $this->add_control(
        'pnet_title_text',
        [
            'label' => esc_html__( 'Title Text', 'pnet-elementor' ),
            'type' => \Elementor\Controls_Manager::TEXT,
            'default' => esc_html__( 'Hello World', 'pnet-elementor' ),
            'placeholder' => esc_html__( 'Type your title here', 'pnet-elementor' ),
        ]
    );

    // Add a Color Control
    $this->add_control(
        'pnet_title_color',
        [
            'label' => esc_html__( 'Text Color', 'pnet-elementor' ),
            'type' => \Elementor\Controls_Manager::COLOR,
            'default' => '#f00',
            'selectors' => [
                '{{WRAPPER}} .pnet-custom-heading' => 'color: {{VALUE}}',
            ],
        ]
    );

    $this->end_controls_section();

}
Notice the selectors array in the color control? This is Elementor magic. It automatically generates the CSS for your Custom Elementor Widget, so you don’t have to write inline styles manually. {{WRAPPER}} targets the specific widget instance.
Step 5: Rendering the Output
Finally, we need to display the data on the front end. We use the render() method to echo HTML based on the settings the user chose.
Update your render function:
protected function render() {
    // Get the settings
    $settings = $this->get_settings_for_display();

    // Get the input value
    $text = $settings['pnet_title_text'];

    // Output the HTML
    if ( ! empty( $text ) ) {
        echo '<h2 class="pnet-custom-heading">' . esc_html( $text ) . '</h2>';
    }
}
And just like that, the logic for your Custom Elementor Widget is complete.
Step 6: Testing Your Widget
- Go to your WordPress Dashboard > Plugins.
- Activate PNET Custom Elementor Widget.
- Open any page with Elementor.
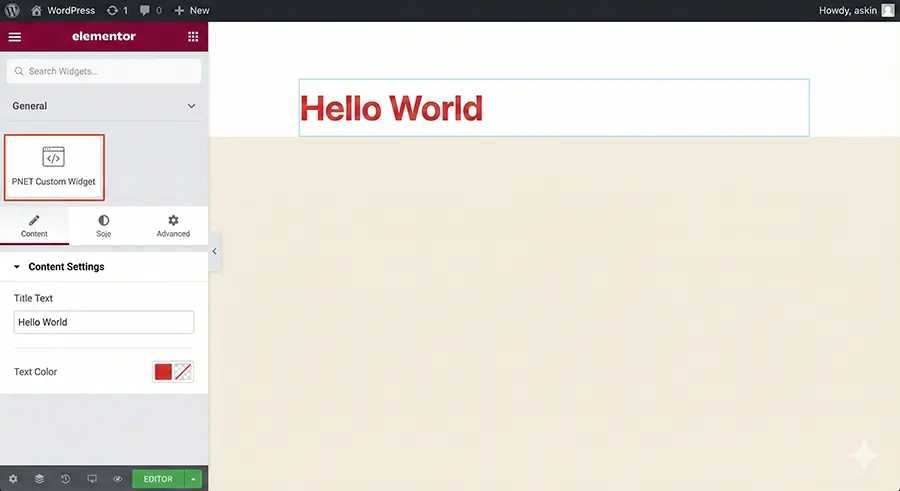
- Search for “PNET” in the widget panel.
- Drag your widget onto the canvas.
You should see “Hello World” in red (our default). Try changing the text and the color. If it updates instantly, congratulations! You have successfully built a fully functional Custom Elementor Widget.
Advanced Tips for Widget Development
Now that you have the boilerplate, here is how you can take your Custom Elementor Widget to the next level:
- Render Content Template: If you are building complex widgets using JavaScript (like sliders), you should also use the
_content_templatemethod to support Elementor’s live JS editing. - Style Tab: We put the color control in the Content tab for simplicity, but in a polished widget, style controls (Color, Typography, Margin) should go into a separate section using
$tab => \Elementor\Controls_Manager::TAB_STYLE. - Query Controls: You can add controls to select posts, categories, or WooCommerce products to make dynamic grids.
Conclusion
Creating a Custom Elementor Widget might seem daunting at first, but once you understand the structure—Class setup, Controls, and Rendering—it becomes incredibly logical. This approach opens up infinite possibilities for customizing client sites without relying on heavy addon packs.
By mastering the Custom Elementor Widget workflow, you transform from a WordPress implementer into a true WordPress developer.
Have you tried building your own widget yet? Let me know in the comments if you ran into any issues with the boilerplate!


