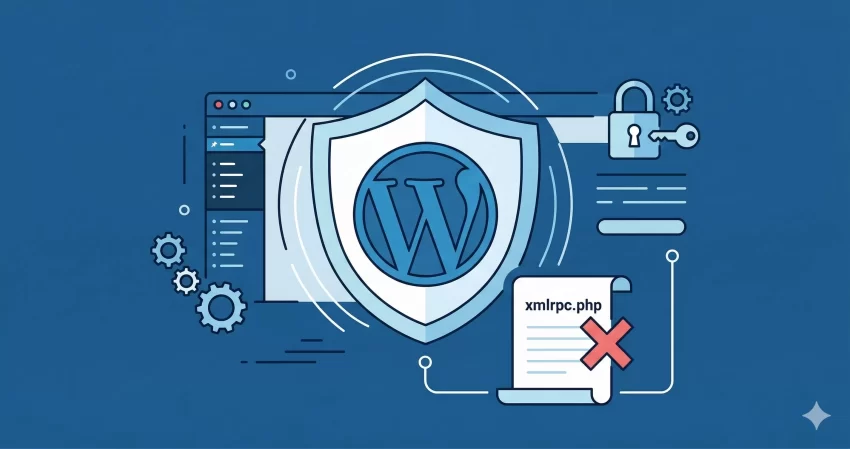
If you are managing a modern website, learning how to disable xml-rpc in WordPress is one of the most critical security enhancements you can implement. Historically, XML-RPC was a highly useful feature that allowed external applications, remote publishing tools, and services like Jetpack to communicate seamlessly with your website. However, in the contemporary web landscape, this legacy protocol has transformed into a massive security liability. Malicious actors frequently exploit the xmlrpc.php file to launch devastating brute force attacks and orchestrate distributed denial-of-service (DDoS) campaigns via pingback amplification. The good news? You do not need to rely on bloated security plugins to resolve this vulnerability. In this comprehensive guide, we will walk you through the exact steps to completely disable xml-rpc in WordPress using clean, efficient code within your theme’s functions.php file.
Before we dive into the codebase and modify your theme files, it is crucial to understand that directly editing core files or live themes without precautions can lead to site downtime. As a developer, ensuring a safe deployment pipeline is paramount when you decide to disable xml-rpc in WordPress.
Backup Required
Prerequisites
- PHP version 8.0 or higher active on your web server.
- Administrative access to your WordPress dashboard.
- SFTP or SSH access to your web hosting environment.
- An active, properly configured Child Theme to prevent code loss during theme updates.
- A recent, verified backup of your WordPress installation.
- A basic understanding of WordPress action and filter hooks.
Step 1: Understand the Risks of XML-RPC
To effectively secure your architecture, you must first comprehend why you need to disable xml-rpc in WordPress. XML-RPC (Extensible Markup Language Remote Procedure Call) was introduced long before the modern WordPress REST API became the standard for external communication. It relies on HTTP as the transport mechanism and XML as the encoding mechanism to transmit data. While it enabled offline editors like Windows Live Writer to publish content remotely, its architecture lacks the robust security controls expected in today’s applications.
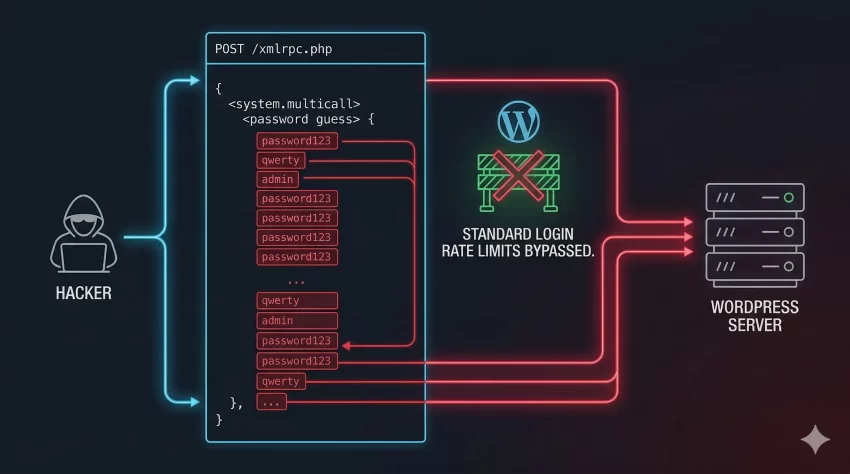
When you fail to disable xml-rpc in WordPress, you leave a highly accessible endpoint (xmlrpc.php) exposed to the public internet. Hackers utilize automated scripts to continuously scan for this file. Because XML-RPC allows multiple commands to be executed in a single HTTP request (a method known as system.multicall), attackers can bypass standard login rate-limiting. They can test thousands of password combinations with just a few requests, significantly increasing the chances of a successful brute force breach.
The Threat of Pingback Amplification (DDoS)
Beyond brute force vulnerabilities, leaving the protocol active exposes your server to Pingback amplification attacks. The Pingback protocol was originally designed to notify bloggers when someone linked to their content. However, attackers exploit this feature by sending forged pingback requests to the XML-RPC endpoint. This forces your server to reach out to a target victim’s website, inadvertently turning your server into a node in a DDoS botnet. This not only consumes your server bandwidth and CPU resources but can also result in your IP address being blacklisted by major network providers. Therefore, learning how to disable xml-rpc in WordPress is essential for maintaining both your site’s integrity and the health of the broader internet ecosystem.
You might also like: Boost Site Speed: How to Lazy Load Images in WordPress Without Plugins
Step 2: Preparing Your WordPress Environment
Before you insert the code to disable xml-rpc in WordPress, setting up a safe development environment is mandatory. Directly editing the parent theme’s functions.php file is a poor practice. When the theme developer releases an update, your custom code will be overwritten, quietly re-enabling the XML-RPC vulnerability without your knowledge.
The standard best practice is to utilize a WordPress Child Theme. If you do not have one active, you must create one. A child theme inherits all the functionality, features, and styling of its parent theme but allows you to safely inject custom PHP functions. By placing your code to disable xml-rpc in WordPress within the child theme, you ensure that the security patch remains permanent, regardless of parent theme updates.
Establishing FTP/SFTP Access
Do not rely on the built-in WordPress Theme File Editor (accessible via Appearance > Theme File Editor). If you make a typographical error while writing the code to disable xml-rpc in WordPress, the Theme File Editor may lock you out, resulting in a White Screen of Death (WSOD). Always use an FTP client (like FileZilla) or an SSH connection to edit the functions.php file directly. This ensures that if a syntax error occurs, you can immediately revert the changes using your code editor and regain access to the site.
For Developers
Step 3: Implementing the Code in Functions.php
Now we arrive at the core execution: applying the PHP snippet to disable xml-rpc in WordPress. WordPress provides a built-in filter hook called xmlrpc_enabled. This filter dictates whether the XML-RPC functionality is turned on or off. By intercepting this filter and forcing it to return a boolean value of false, we can effectively shut down the primary protocol endpoint.
Open your child theme’s functions.php file in your preferred code editor. Navigate to the bottom of the file (or a designated area for security snippets) and add the following code block. Ensure you do not place it inside any other existing functions. This simple hook is the most straightforward method to disable xml-rpc in WordPress programmatically.
// Function to completely disable xml-rpc in wordpress
function pnet_disable_xmlrpc_protocol() {
    add_filter( 'xmlrpc_enabled', '__return_false' );
}
add_action( 'init', 'pnet_disable_xmlrpc_protocol' );
Removing the RSD Link from the Document Head
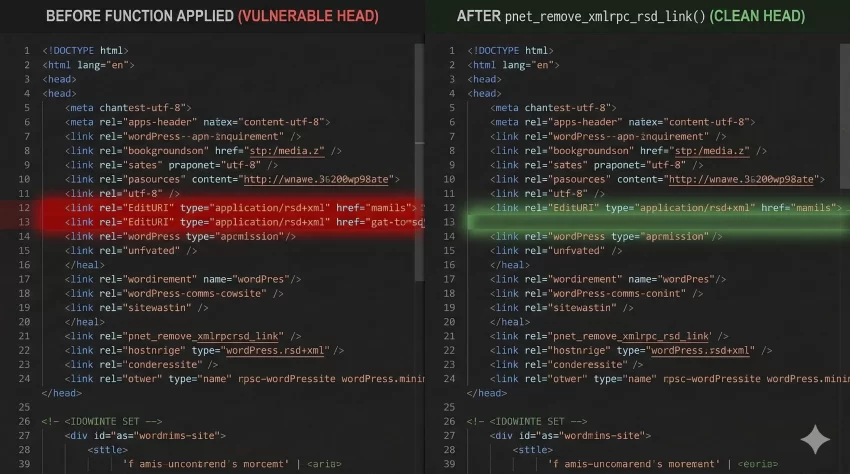
While the above code disables the processing of XML-RPC requests, WordPress still broadcasts the availability of the service by embedding a Really Simple Discovery (RSD) link in the <head> of your HTML documents. Automated bots crawl the web looking for this exact tag. To truly disable xml-rpc in WordPress and hide its footprint from malicious scanners, we must remove this meta tag from the frontend.
The RSD link is injected via the wp_head action hook. We will write a custom function using the remove_action directive to strip it out. Add this snippet directly below your previous code.
// Remove the RSD link to hide XML-RPC footprint
function pnet_remove_xmlrpc_rsd_link() {
    remove_action( 'wp_head', 'rsd_link' );
}
add_action( 'init', 'pnet_remove_xmlrpc_rsd_link' );
Step 4: Disabling Pingbacks and Trackbacks
Even after you disable xml-rpc in WordPress using the boolean filter, it is highly recommended to explicitly sanitize your HTTP response headers. WordPress traditionally sends an X-Pingback HTTP header with every page load. This header points directly to the xmlrpc.php file, signaling to external services that your site accepts pingbacks. If your goal is to completely disable xml-rpc in WordPress, leaving this header intact is counterproductive.
We can intercept and modify the HTTP headers sent by the server using the wp_headers filter. By unsetting the X-Pingback array key, we remove the final trace of the XML-RPC service from your server’s initial handshake with browsers and bots.
Sanitizing the HTTP Headers
Copy and paste the following PHP snippet into your functions.php file. This function grabs the outgoing headers array, checks for the presence of the pingback header, and securely removes it before the server dispatches the response to the client.
// Remove the X-Pingback HTTP header
function pnet_remove_pingback_http_header( $headers ) {
    if ( isset( $headers['X-Pingback'] ) ) {
        unset( $headers['X-Pingback'] );
    }
    return $headers;
}
add_filter( 'wp_headers', 'pnet_remove_pingback_http_header', 10, 1 );
You might also like: How To Register Custom Post Type WordPress: The Ultimate Guide
Furthermore, to be absolutely thorough when you disable xml-rpc in WordPress, you should disable pingbacks and trackbacks at the database level for all future posts. While you can do this globally in the WordPress dashboard via Settings > Discussion, doing it programmatically ensures it cannot be accidentally toggled back on by another administrator.
// Disable pingbacks for new posts programmatically
function pnet_disable_pingbacks_globally( $options ) {
    $options['default_ping_status'] = 'closed';
    return $options;
}
add_filter( 'pre_option_default_ping_status', 'pnet_disable_pingbacks_globally' );
Step 5: Testing and Verifying the Fix
After implementing the code snippets to disable xml-rpc in WordPress, you cannot simply assume the patch is successful. Professional developers must rigorously test their code. Verification ensures that the endpoint is genuinely closed and that no secondary services are forcing it open.
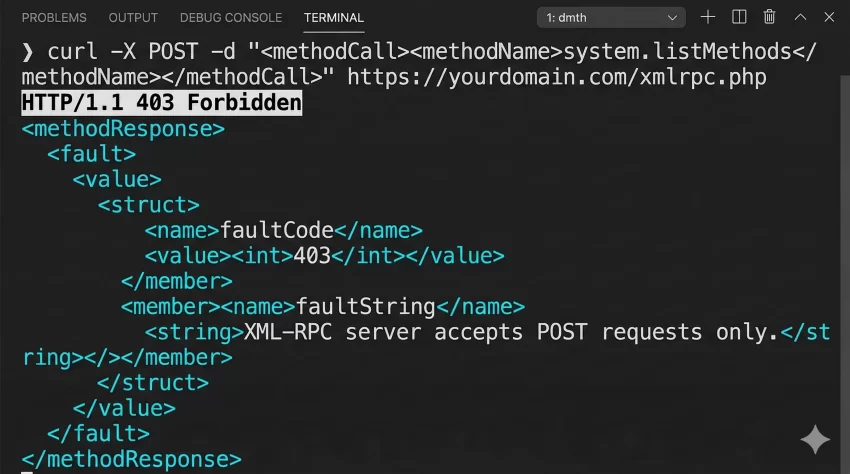
The most reliable method to verify you have successfully managed to disable xml-rpc in WordPress is by using the command-line tool cURL. Open your terminal or command prompt and execute a direct POST request to the xmlrpc.php file on your domain.
Executing the cURL Validation Test
Run the following command, replacing yourdomain.com with your actual website URL. This command simulates a basic XML-RPC payload attempting to list the available methods.
curl -X POST -d "<methodCall><methodName>system.listMethods</methodName></methodCall>" https://yourdomain.com/xmlrpc.php
If you have correctly applied the code to disable xml-rpc in WordPress, the server response should indicate failure. You will likely see a 403 Forbidden error, a 404 Not Found, or an XML response explicitly stating XML-RPC server accepts POST requests only. (which, ironically, occurs when the internal processor is disabled and rejects the payload). If the command returns a long list of XML-RPC methods (like wp.getUsersBlogs or system.multicall), the protocol is still active, and you must review your functions.php file.
Troubleshooting Common Errors
Even with careful execution, attempting to disable xml-rpc in WordPress can sometimes trigger unexpected behavior, especially on complex sites with numerous third-party integrations. Below are some of the most frequent issues developers encounter and how to resolve them.
Jetpack Connection Failures
Problem: After I disable xml-rpc in WordPress, my Jetpack plugin disconnected and refuses to sync.
Solution: Jetpack historically relied heavily on XML-RPC to bridge your local server with WordPress.com servers. While newer versions utilize the REST API for many features, entirely disabling XML-RPC can still break Jetpack’s core connection. If Jetpack is strictly necessary for your business operations, you cannot use the global __return_false filter. Instead, you must use an advanced filter or .htaccess rules to whitelist the specific IP addresses utilized by Automattic (Jetpack’s parent company) while blocking all other traffic.
White Screen of Death (WSOD)
Problem: I added the snippets to disable xml-rpc in wordpress, and now my entire site is a blank white page.
Solution: A WSOD almost universally indicates a fatal PHP syntax error in your functions.php file. You likely missed a closing parenthesis, used curly/smart quotes instead of straight quotes, or placed the code inside an existing function block. Access your server via SFTP, download the functions.php file, remove the newly added code, and re-upload it to restore your site. Ensure you strictly copy the code blocks provided above without modifying the structural syntax.
Mobile App Authentication Issues
Problem: The official WordPress mobile app on my smartphone can no longer connect to my site.
Solution: The legacy WordPress mobile applications utilize XML-RPC to authenticate and publish content remotely. If you disable xml-rpc in WordPress, these legacy apps will fail. You must transition to using the web-based dashboard via your mobile browser or ensure you are using the latest version of the app that fully supports the modern REST API endpoints.
Conclusion
Taking the proactive step to disable xml-rpc in WordPress is an indispensable security measure for any serious developer. By deprecating this outdated protocol, you instantly eliminate the risk of massive brute force login attempts and prevent your server from being weaponized in pingback DDoS attacks. Transitioning away from legacy APIs ensures your architecture remains resilient, performant, and aligned with modern security standards.
Remember, while plugins can achieve this result, adding raw, efficient PHP to your child theme’s functions.php file reduces unnecessary database queries and plugin bloat. Once you test and verify that your endpoints are sealed, you can code with peace of mind, knowing your infrastructure is fortified. Always test your environments thoroughly whenever you implement custom filters to disable xml-rpc in WordPress.