Is your website’s search bar feeling a bit… 2010? We’ve all been there. You type a query, hit enter, wait for a page reload, and only then find out if the content exists. In today’s fast-paced web, that delay can kill your user engagement.
Here is the deal: Users expect instant gratification. They want results as they type. That is where a WordPress AJAX live search comes into play.
By implementing a live search, you aren’t just making your site look cool; you are significantly improving the User Experience (UX) and keeping visitors on your site longer. While there are dozens of plugins that claim to do this, they often come with “bloat”—loading unnecessary scripts and slowing down your site.
In this guide, I’m going to show you exactly how to build a lightweight, custom WordPress AJAX live search using standard WordPress hooks. We will handle everything from the frontend search bar to the backend database queries, giving you full control over the design and functionality.
Why Build a Custom WordPress AJAX Live Search?
Before we dive into the code, you might be wondering why you should code this manually.
- Performance: You only load the scripts you need.
- Customization: You can style the results exactly how you want (grids, lists, adding prices for WooCommerce, etc.).
- Learning: Understanding how
admin-ajax.phpworks is a superpower for any WordPress developer.
Ready to get your hands dirty? Let’s build this.
Step 1: The HTML Search Form
First, we need a standard search form. You can place this in your theme’s header.php, a custom page template, or even inside a shortcode.
For this tutorial, I’ll create a simple HTML structure. We need a text input for the user to type in and a container div where our results will magically appear.
Add the following HTML where you want the search bar to appear:
<div class="pnet-search-wrapper">
    <form role="search" method="get" id="pnet-search-form" action="<?php echo home_url( '/' ); ?>">
        <input type="text" value="" name="s" id="pnet-search-input" placeholder="Type to search..." autocomplete="off" />
        <div id="pnet-search-results"></div>
    </form>
</div>
Note: We set autocomplete="off" to prevent the browser’s default history dropdown from blocking our live results.

Step 2: Enqueue Scripts and Localize Data
Now that we have the form, we need to tell WordPress to load our JavaScript file. But here is the tricky part about a WordPress AJAX live search: JavaScript files don’t know the URL of your site’s AJAX handler by default.
We need to use wp_localize_script() to pass two things from PHP to JavaScript:
- The URL to
admin-ajax.php. - A “Nonce” (Number used ONCE) for security.
Open your theme’s functions.php file and add the following code. Notice I am using the pnet_ prefix to avoid function name conflicts with other plugins or themes.
/**
 * Enqueue scripts and pass data for WordPress AJAX Live Search
 */
function pnet_enqueue_ajax_search_scripts() {

    // Register our JS file (Create this file in your theme's /js/ folder)
    wp_register_script(
        'pnet-ajax-search-js',
        get_template_directory_uri() . '/js/pnet-ajax-search.js',
        array('jquery'),
        '1.0',
        true
    );

    // Localize the script with new data
    $script_data_array = array(
        'ajax_url' => admin_url( 'admin-ajax.php' ),
        'nonce'    => wp_create_nonce( 'pnet_search_nonce' )
    );

    wp_localize_script(
        'pnet-ajax-search-js',
        'pnet_ajax_obj',
        $script_data_array
    );

    // Enqueue the script
    wp_enqueue_script( 'pnet-ajax-search-js' );
}
add_action( 'wp_enqueue_scripts', 'pnet_enqueue_ajax_search_scripts' );
Step 3: The JavaScript (The “Live” Logic)
Create a file named pnet-ajax-search.js inside your theme’s /js/ folder.
This script needs to listen for keystrokes in our search box. However, we don’t want to query the server every single time a user hits a key (that would crash your server!). We will use a “debounce” timer to wait until the user stops typing for 500 milliseconds before sending the request.
Here is the code to make your WordPress AJAX live search responsive and efficient:
jQuery(document).ready(function($) {
    var searchRequest;
    var searchTimeout;

    $('#pnet-search-input').on('keyup', function() {
        var searchTerm = $(this).val();
        var resultsDiv = $('#pnet-search-results');

        // Clear previous timeout to prevent flooding the server
        clearTimeout(searchTimeout);

        // Check if search term is empty or too short
        if (searchTerm.length < 3) {
            resultsDiv.fadeOut();
            return;
        }

        // Set a new timeout (Debounce)
        searchTimeout = setTimeout(function() {

            // Abort previous pending requests
            if(searchRequest) {
                searchRequest.abort();
            }

            // Visual feedback: Show the user we are searching
            resultsDiv.show().html('<div class="pnet-loading">Searching...</div>');

            searchRequest = $.ajax({
                url: pnet_ajax_obj.ajax_url,
                type: 'post',
                data: {
                    action: 'pnet_fetch_search_results', // Matches the PHP action hook
                    term: searchTerm,
                    security: pnet_ajax_obj.nonce
                },
                success: function(response) {
                    resultsDiv.html(response);
                },
                error: function() {
                    resultsDiv.html('An error occurred.');
                }
            });

        }, 500); // Wait 500ms after typing stops
    });

    // Close results if user clicks outside
    $(document).on('click', function(e) {
        if (!$(e.target).closest('.pnet-search-wrapper').length) {
            $('#pnet-search-results').fadeOut();
        }
    });
});
You might also like:

Step 4: The Backend PHP Handler
Now for the heavy lifting. We need to catch that request in functions.php, query the database for posts matching the keyword, and return the HTML.
This is the core of any WordPress AJAX live search implementation.
/**
 * Handle the AJAX search request
 */
function pnet_handle_ajax_search() {
    // 1. Check the Nonce for security
    check_ajax_referer( 'pnet_search_nonce', 'security' );

    // 2. Sanitize the input
    $search_term = sanitize_text_field( $_POST['term'] );

    // 3. The Query Arguments
    $args = array(
        's'              => $search_term,
        'post_type'      => 'post', // Change to 'product' for WooCommerce or 'any'
        'post_status'    => 'publish',
        'posts_per_page' => 5, // Limit results to keep it fast
    );

    $query = new WP_Query( $args );

    // 4. The Loop: Generate HTML
    if ( $query->have_posts() ) {
        echo '<ul class="pnet-results-list">';
        while ( $query->have_posts() ) {
            $query->the_post();
            ?>
            <li class="pnet-search-item">
                <a href="<?php the_permalink(); ?>">
                    <div class="pnet-thumbnail">
                        <?php if ( has_post_thumbnail() ) {
                            the_post_thumbnail( 'thumbnail' );
                        } ?>
                    </div>
                    <div class="pnet-content">
                        <span class="pnet-title"><?php the_title(); ?></span>
                        <span class="pnet-date"><?php echo get_the_date(); ?></span>
                    </div>
                </a>
            </li>
            <?php
        }
        echo '</ul>';
        // Add a "View all results" link
        echo '<div class="pnet-view-all"><a href="' . get_search_link( $search_term ) . '">View all results for "' . esc_html( $search_term ) . '"</a></div>';
    } else {
        echo '<div class="pnet-no-results">No results found.</div>';
    }

    // 5. Always die() in WordPress AJAX
    wp_reset_postdata();
    die();
}

// Hook for logged-in users
add_action( 'wp_ajax_pnet_fetch_search_results', 'pnet_handle_ajax_search' );

// Hook for non-logged-in users (guests)
add_action( 'wp_ajax_nopriv_pnet_fetch_search_results', 'pnet_handle_ajax_search' );
Step 5: Styling the Results (CSS)
Finally, we need to make it look presentable. Without CSS, your WordPress AJAX live search results will just push your content down awkwardly. We want them to float on top of the content (absolute positioning).
Add this to your theme’s style.css:
.pnet-search-wrapper {
    position: relative;
    max-width: 400px;
}

#pnet-search-results {
    display: none;
    position: absolute;
    top: 100%;
    left: 0;
    width: 100%;
    background: #fff;
    border: 1px solid #ddd;
    box-shadow: 0 4px 10px rgba(0,0,0,0.1);
    z-index: 999;
}

.pnet-results-list {
    list-style: none;
    margin: 0;
    padding: 0;
}

.pnet-search-item a {
    display: flex;
    align-items: center;
    padding: 10px;
    border-bottom: 1px solid #eee;
    text-decoration: none;
    color: #333;
    transition: background 0.2s;
}

.pnet-search-item a:hover {
    background-color: #f9f9f9;
}

.pnet-thumbnail img {
    width: 40px;
    height: 40px;
    border-radius: 4px;
    margin-right: 10px;
    object-fit: cover;
}

.pnet-title {
    font-weight: bold;
    display: block;
}

.pnet-view-all {
    padding: 10px;
    text-align: center;
    background: #f1f1f1;
}
Common Issues and Troubleshooting
Even with the best code, things can go wrong. Here are two common hiccups when implementing a WordPress AJAX live search:
- The 400 Bad Request Error: This usually happens if the
actionparameter in your JS doesn’t match thewp_ajax_hook name in your PHP. Double-check thatpnet_fetch_search_results matches in both files. - Results Not Loading: Check your browser console (F12). If you see “pnet_ajax_obj is not defined,” your
wp_localize_scriptfunction didn’t run correctly or the handle names don’t match.
Conclusion
Congratulations! You have just implemented a fully functional WordPress AJAX live search without relying on a heavy third-party plugin. You now have a search feature that is faster, cleaner, and completely customized to your brand.
Not only does this improve the professional look of your site, but the “instant” feedback loop is a proven way to keep users engaged.
You might also like:
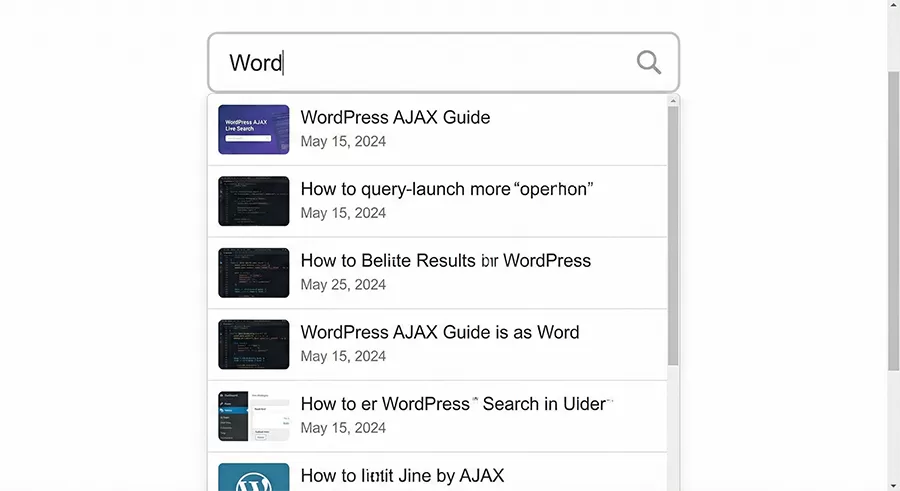
Would you like me to write a follow-up section on how to modify this code to specifically search WooCommerce Products including their product image, prices, reviews and SKUs? Let me know in the comments below.
Here is a video from YouTube specifically about adding AJAX search (using a no-code method) which might be useful for comparing the final output: How To Add an AJAX Live Search Form on Your WordPress Website FOR FREE? This video is relevant because it demonstrates the visual outcome of an AJAX live search on a WordPress site, providing a visual reference for what the code in this guide aims to achieve.


