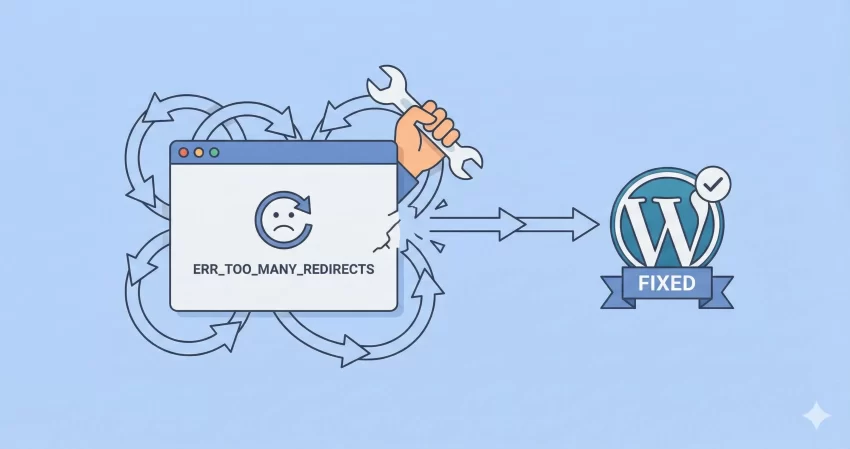
You’ve made the smart choice. You decided to speed up your WordPress site and protect it from attacks by routing it through Cloudflare. You flipped the switch, expected magic, and instead got… broken layouts, “Not Secure” warnings, or the infamous “Too Many Redirects” error.
The culprit? Almost always, it is your Cloudflare SSL settings.
Cloudflare is an incredible tool, but its SSL handling acts as a “middleman” between your visitors and your server. If this middleman isn’t introduced properly to your WordPress installation, they stop talking to each other. In this comprehensive guide, we will demystify the encryption modes, explain exactly why your site crashed, and show you how to configure your Cloudflare SSL settings for a rock-solid, secure WordPress site.
Understanding the “Middleman”: How Cloudflare SSL Works
To configure your Cloudflare SSL settings correctly, you first need to visualize how the traffic flows. Unlike a traditional SSL certificate that sits directly on your server, Cloudflare sits in between.
- Leg 1 (Browser to Cloudflare): The visitor connects to Cloudflare. This is almost always encrypted (HTTPS).
- Leg 2 (Cloudflare to Your Server): Cloudflare connects to your website hosting. This is where the confusion happens. Is it HTTP? Is it HTTPS? Does your server have a certificate?
Your choice of encryption mode tells Cloudflare how to handle that second leg of the journey. If you get this wrong, WordPress gets confused about whether it is secure or not, leading to infinite loops.
The Four Modes of Cloudflare SSL
When you open the SSL/TLS tab in your Cloudflare dashboard, you are presented with four options. Choosing the right one is 90% of the battle.
- Off (Not Recommended): This disables encryption entirely. In 2025, running a website without SSL is a massive SEO penalty and a security risk. Never use this for a live site.
- Flexible SSL (The “Trap”): This is the default setting for many, and it is the single biggest cause of WordPress errors. In Flexible mode, traffic from the visitor to Cloudflare is secure (HTTPS), but traffic from Cloudflare to your server is unencrypted (HTTP).
Why is this bad? WordPress detects the incoming HTTP request and thinks, “Hey, I should be secure!” So, it redirects the user to HTTPS. Cloudflare sees this redirect, forwards it, but still connects to your server via HTTP. Your server redirects again. And again. Welcome to the redirect loop.
- Full SSL: In this mode, the connection from Cloudflare to your server is secure (HTTPS). However, Cloudflare does not validate your server’s certificate. This is useful if you have a self-signed certificate on your server but want the public to see a trusted Cloudflare padlock.
- Full (Strict) SSL (The Gold Standard): This is the correct configuration for any serious WordPress site. It requires a valid SSL certificate installed on your origin server (either a free Let’s Encrypt cert or a Cloudflare Origin Cert). It ensures end-to-end encryption and verifies authenticity.
You might also like:

Step-by-Step: The Perfect Configuration
Let’s walk through the exact process to ensure your Cloudflare SSL settings are bulletproof.
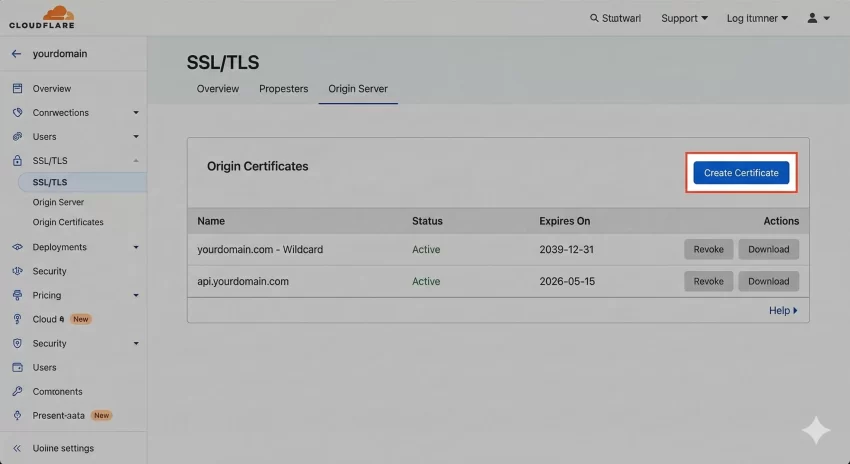
Step 1: Install an Origin Certificate
Before you even touch the Cloudflare settings, your WordPress host needs to be ready to accept HTTPS connections. The best way to do this is using a “Cloudflare Origin Certificate.” These are free certificates issued by Cloudflare that you install on your hosting panel (cPanel, Plesk, etc.). They last for 15 years, meaning you never have to worry about renewals.
- In Cloudflare, go to SSL/TLS > Origin Server.
- Click “Create Certificate”.
- Keep the default settings and click “Next”.
- Copy the “Origin Certificate” and “Private Key”.
- Paste these into your hosting control panel’s SSL section.
Step 2: Set Encryption Mode to Full (Strict)
Now that your server has a certificate, you can tell Cloudflare to fully trust it. Go to the SSL/TLS > Overview tab and select Full (Strict).
This single change in your Cloudflare SSL settings usually resolves the “Too Many Redirects” error immediately, because both Cloudflare and WordPress now agree that the connection is encrypted.
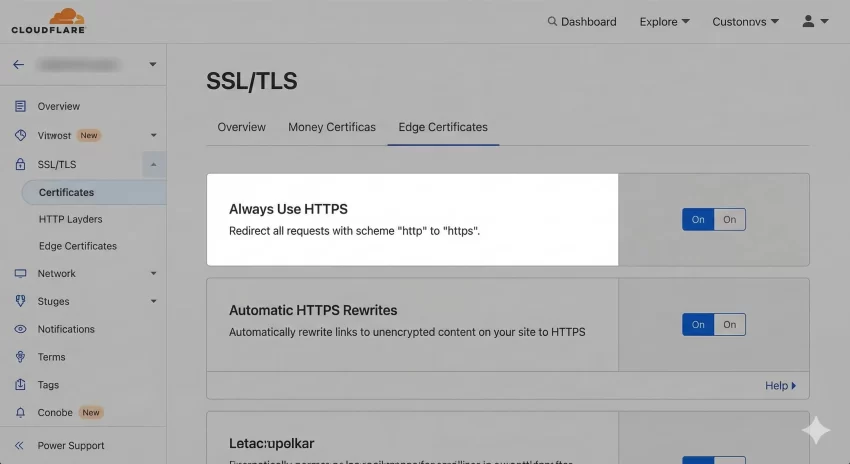
Handling “Mixed Content” Warnings
Even with the correct mode, you might see a “Not Secure” warning or a broken padlock icon in the browser bar. This usually means your site is loading images or scripts over HTTP while the page is on HTTPS. This is called “Mixed Content.”
You can fix this directly in your Cloudflare SSL settings without installing heavy plugins.
- Go to SSL/TLS > Edge Certificates.
- Scroll down to Automatic HTTPS Rewrites.
- Toggle this ON.
Cloudflare will now dynamically rewrite “http” links to “https” for recognized resources like images and scripts as they pass through the network.
Forcing HTTPS via Page Rules
To ensure no one ever accesses the insecure version of your site, you should create a Page Rule. While you can do this with plugins, doing it at the Cloudflare level is faster because the request never hits your server.
- Go to Rules > Page Rules.
- Click “Create Page Rule”.
- In the URL field, enter:
*yourdomain.com/* - In the settings dropdown, choose Always Use HTTPS.
- Click “Save and Deploy”.
The “wp-config.php” Safety Net
Sometimes, despite perfect Cloudflare SSL settings, WordPress still gets confused because it sits behind a reverse proxy (Cloudflare). It might not realize it is being accessed securely because the internal request is different from the external one.
To fix this permanently, you can paste the following code into your wp-config.php file. This code detects the special header Cloudflare sends and explicitly tells WordPress, “Yes, we are secure.”
/**
 * Handle Cloudflare SSL Proxy Headers
 */
if (isset($_SERVER['HTTP_CF_VISITOR'])) {
    $pnet_cf_visitor = json_decode($_SERVER['HTTP_CF_VISITOR']);
    if (isset($pnet_cf_visitor->scheme) && $pnet_cf_visitor->scheme == 'https') {
        $_SERVER['HTTPS'] = 'on';
    }
} else if (isset($_SERVER['HTTP_X_FORWARDED_PROTO']) && $_SERVER['HTTP_X_FORWARDED_PROTO'] == 'https') {
    $_SERVER['HTTPS'] = 'on';
}
We used the pnet_ prefix for our internal variable just to keep things clean, though standard server variables don’t require it.
You might also like:
Testing Your Configuration
Once you have applied these changes, it is time to verify everything. Do not just load the homepage; check your inner pages and your WordPress Admin dashboard.
If you are a developer, you can verify if WordPress recognizes the secure status programmatically. The WordPress function is_ssl() checks if the current request is encrypted. You can create a quick test function to see what WordPress “thinks” is happening:
/**
 * Test SSL Status for Admin Debugging
 * Usage: Add to functions.php temporarily to check status.
 */
function pnet_check_ssl_status() {
    if ( is_ssl() ) {
        echo '<div class="notice notice-success"><p>SSL is Active and Recognized.</p></div>';
    } else {
        echo '<div class="notice notice-error"><p>SSL is NOT Recognized. Check Cloudflare settings.</p></div>';
    }
}
add_action( 'admin_notices', 'pnet_check_ssl_status' );
Common Pitfalls to Avoid
As you fine-tune your Cloudflare SSL settings, watch out for these common mistakes:
- Using Flexible Mode with “Force HTTPS”: This is the most common error. If you force HTTPS in your
.htaccessfile but leave Cloudflare on Flexible, you will crash the site. - Ignoring the TTL (Time to Live): DNS changes are instant with Cloudflare, but your browser cache isn’t. If you change a setting and it doesn’t work, test in Incognito mode before panicking.
- Double Redirects: Avoid having a redirection plugin, `.htaccess` rules, and Cloudflare Page Rules all trying to redirect HTTP to HTTPS. Let Cloudflare handle it at the edge for the best performance.
Conclusion
Configuring Cloudflare SSL settings doesn’t have to be a gamble. By understanding the difference between Flexible and Full (Strict) modes, and by ensuring your origin server has a valid certificate, you can secure your WordPress site without sacrificing uptime.
Don’t settle for “Flexible” solutions. Aim for “Full (Strict)” security to ensure your data—and your visitors—are always safe.