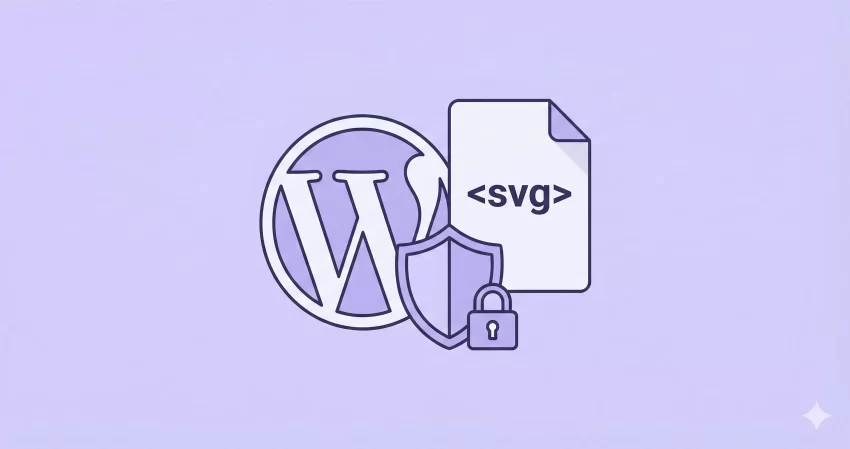
If you have ever tried to upload a vector logo or icon to your media library, you have likely encountered the dreaded error message: “Sorry, this file type is not permitted for security reasons.” It is a frustrating roadblock for developers and site owners who want their sites to look crisp on high-resolution displays. The solution is to enable SVG in WordPress, but doing so requires caution.
Scalable Vector Graphics (SVG) have become the gold standard for web graphics. Unlike JPEGs or PNGs, they remain sharp at any size and are often incredibly small in file size. However, WordPress blocks them by default for valid security concerns. While there are dozens of plugins that claim to fix this, adding another plugin to your stack is not always the best approach for performance or security.
In this comprehensive guide, we will walk you through exactly how to safely enable SVG in WordPress using custom code. We will cover why they are blocked, how to whitelist the file type securely, and how to ensure they display correctly in your media library.
Why Does WordPress Block SVG Files by Default?
Before we dive into the code, it is crucial to understand the “why.” You might be wondering why the world’s most popular CMS does not natively support such a common file format. The answer lies in the architecture of the file format itself.
Standard image files like JPG and PNG are raster graphics—grids of pixels. An SVG, however, is not really an image in the traditional sense; it is an XML document. It is code that tells the browser how to draw the image. Because it is XML-based, it can contain JavaScript and other entities.
This opens the door to potential security vulnerabilities, specifically XML External Entity (XXE) attacks. If you blindly enable SVG in WordPress without restrictions, a malicious user could upload a compromised SVG file that executes scripts on your visitors’ browsers or attempts to access sensitive data on your server.
That is why our approach focuses on safely enabling them. In this enable SVG in WordPress guide, we will implement checks to ensure that only trusted users (like Administrators) can upload these files, minimizing the risk significantly.
You might also like:
Step 1: Preparing to Enable SVG in WordPress via Code
To bypass the default restriction, we need to interact with the WordPress core functionality that handles file uploads. WordPress uses a system of MIME types (Multipurpose Internet Mail Extensions) to identify allowed file formats.
We will be hooking into the upload_mimes filter. This filter allows us to modify the list of allowed file types before WordPress processes an upload. By appending the SVG MIME type to this list, we effectively tell WordPress, “Trust me, this file type is okay.”
The Code Snippet
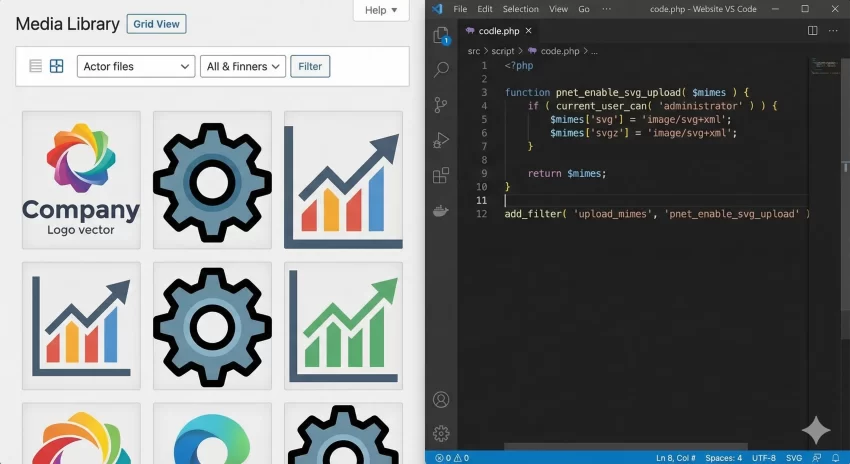
Open your theme’s functions.php file or your site-specific plugin file. We will define a function using the required pnet_ prefix to avoid conflicts with other themes or plugins.
Here is the code to enable SVG in WordPress:
/**
 * Safely enable SVG upload support in WordPress.
 * Restricts upload permission to Administrators only for security.
 */
function pnet_enable_svg_upload( $mimes ) {
    // Check if the current user is an Administrator
    if ( current_user_can( 'administrator' ) ) {
        // Add SVG to the allowed MIME types
        $mimes['svg']  = 'image/svg+xml';
        $mimes['svgz'] = 'image/svg+xml';
    }
    return $mimes;
}
add_filter( 'upload_mimes', 'pnet_enable_svg_upload' );
Code Explanation:
- current_user_can(‘administrator’): This is your safety net. It ensures that authors, contributors, or subscribers cannot upload SVG files. Only you and other admins—people you presumably trust not to attack the site—can upload them.
- $mimes[‘svg’]: This line adds the standard SVG extension and maps it to the
image/svg+xmlMIME type.
Once you save this file, go back to your Media Library and try uploading an SVG. The error should be gone. However, you might notice a new problem immediately after the upload succeeds.
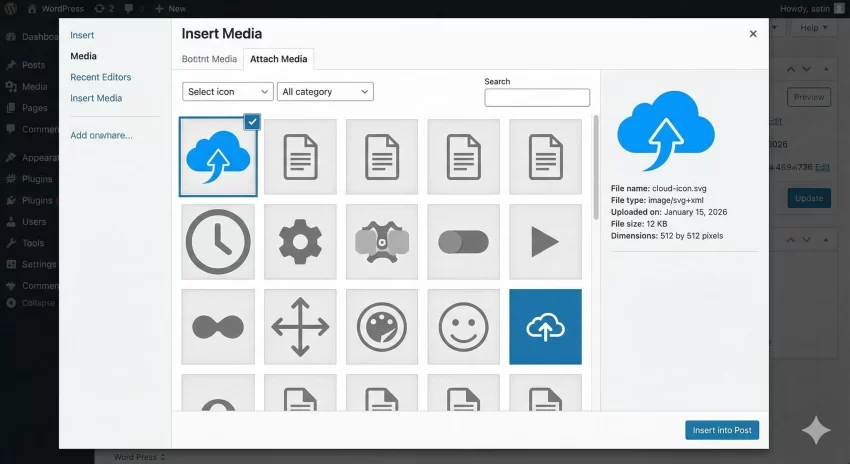
Step 2: Fixing SVG Display Issues in the Media Library
When you successfully enable SVG in WordPress, the file uploads, but WordPress often struggles to generate a thumbnail preview. You might see a blank icon or a generic file symbol instead of your beautiful logo. This happens because WordPress attempts to calculate the dimensions of images, but because SVG is XML code, standard dimension checks often fail.
To fix this, we need to inject some custom CSS into the admin area to force the SVG to render correctly within the Media Library grid. Without this, managing your vector assets becomes difficult because you cannot see what you are selecting.
Add the following code block below your previous snippet:
/**
 * Fix SVG display in the WordPress Media Library.
 * Forces the dimensions to display correctly in the admin dashboard.
 */
function pnet_fix_svg_media_display() {
     echo '<style>
        .attachment-266x266, .thumbnail img {
            width: 100% !important;
            height: auto !important;
        }
        </style>';
}
add_action( 'admin_head', 'pnet_fix_svg_media_display' );
This simple CSS injection ensures that any image inside the media grid expands to fill its container, making your SVGs visible.
Step 3: Advanced Sanitization (Optional but Recommended)
While restricting uploads to administrators is a strong security measure, true security involves sanitization—stripping the SVG file of any malicious code (like JavaScript tags) before it is saved to the server.
Implementing a full XML parser and sanitizer in functions.php is complex and can be prone to errors if not maintained. If you are developing a solution for a high-traffic site or one with multiple editors, I highly recommend using a lightweight library for this part. However, for most single-admin DIY sites, the permission check in Step 1 is the most critical defense.
If you absolutely need raw code sanitization, you would need to inspect the file contents during the wp_handle_upload_prefilter. Here is a basic example of how you might check for script tags, though this is not a replacement for a full XML parser.
/**
 * Basic check to reject SVGs containing script tags.
 */
function pnet_check_svg_for_scripts( $file ) {
    $filetype = wp_check_filetype( $file['name'] );

    if ( 'svg' === $filetype['ext'] ) {
        $svg_content = file_get_contents( $file['tmp_name'] );

        // Simple check for script tags or event handlers
        if ( strpos( $svg_content, '<script' ) !== false || strpos( $svg_content, 'onmouseover' ) !== false ) {
            $file['error'] = 'Invalid SVG: Script tags or event handlers detected.';
        }
    }
    return $file;
}
add_filter( 'wp_handle_upload_prefilter', 'pnet_check_svg_for_scripts' );
You might also like:
Common Issues When You Enable SVG in WordPress
Even with the correct code, you might run into a few hiccups. Here are the most common troubleshooting steps if things do not work immediately.
1. The “Security Reasons” Error Persists
If you added the code but still see the error, clear your browser cache and your site cache. Additionally, ensure you are testing with an Administrator account. If you are testing as an “Editor,” the code we wrote in Step 1 will deliberately block you. To allow Editors, you would change administrator to editor in the code, though this increases your risk profile.
2. SVG Uploads but Shows as 0px Dimensions
This is a known quirk. Since SVGs are scalable, they often lack defined height and width attributes in the root XML tag. When you embed the SVG in your posts, you may need to manually add CSS classes to control the size, or ensure your SVG file has width="100%" and height="100%" set in the file itself before uploading.
3. JSON Errors on Upload
Sometimes the Gutenberg block editor throws a JSON error when uploading a new file type. This is often a permalink issue. Go to Settings > Permalinks and simply click “Save Changes” to flush your rewrite rules. This often resolves obscure upload conflicts.
Tip: WordPress Reading Time Progress Bar.
Why Not Use a Plugin?
You might ask, “Why go through this trouble when I can install a plugin?” It is a valid question. Plugins like “Safe SVG” or “SVG Support” are excellent. However, as a developer, relying on third-party plugins for simple functionality introduces dependency.
- Performance: Every plugin adds a slight overhead to your database and load time.
- Control: When you enable SVG in WordPress via code, you know exactly what is happening. You control the permissions and the sanitization logic.
- Maintenance: Plugins can be abandoned. Your custom code lives as long as your theme (or site-specific plugin) does.
The Benefits of Using SVG
Once you successfully enable SVG in WordPress, you unlock several design advantages:
- Infinite Scalability: Your logo looks crisp on an iPhone, a 4K monitor, or a billboard.
- Small File Size: Complex illustrations that would be 500KB as a PNG might be only 15KB as an SVG. This significantly improves your Core Web Vitals and SEO scores.
- Styling with CSS: Because SVGs are code, you can use CSS to change the color of icon fills on hover—something impossible with JPEGs.
Conclusion
Taking control of your WordPress development environment means understanding how to manage file types securely. When you enable SVG in WordPress using the code snippets provided above, you gain the ability to use high-quality vector assets without relying on extra plugins.
Remember, with great power comes great responsibility. Always restrict SVG upload permissions to trusted users, and consider implementing sanitization checks if your site accepts content from multiple sources. By following this enable SVG in WordPress guide, you have taken another step toward a faster, sharper, and more professional website.