Clients can unintentionally delete a carefully assembled layout, branded call to action, or required legal notice while editing an otherwise routine page. To prevent those accidents, Lock Blocks In WordPress by applying Gutenberg’s built-in movement and removal locks only to the blocks that need protection, then restrict client accounts from changing those lock settings. This targeted approach preserves ordinary editing where clients need it instead of making an entire page difficult to update.
Block locking is an editor-level guardrail, not a security boundary: it helps prevent unwanted changes through the normal WordPress editing interface, but it cannot stop someone with direct database access, access to site code, or sufficiently powerful API permissions. Make changes on staging or after a backup, and test with an account that matches the role and capabilities your clients actually use. Before you begin, gather the following:
- A WordPress site using the block editor and a recent release that supports block locking.
- A staging site or a current backup of both the site files and database.
- Administrator access to install or edit a small site-specific plugin.
- A test client account with the same role and capabilities as the intended editors.
- The target page, post, or template, plus a list of the specific blocks that must not be removed, moved, or both.
Prerequisites and safety checks
Before changing anything, confirm where the content you want to protect is stored. A page or post has its own block content; a synced pattern may supply shared content in multiple places; and a template can control the structure of many pages. Identify the exact editing screen and target blocks first, because a lock on one page does not automatically protect a separate copy or a shared template.
Open the target in the block editor and confirm that the Lock option is available in the block’s options menu. If it is missing, check that the site is using the block editor and a WordPress release that supports block locking. Review the List View hierarchy as well: a selected container may include nested blocks, so locking the parent can affect more content than intended.
Use staging for the initial change whenever possible. If you must work on production, confirm the backup includes both the database and site files, and know how to restore it. Record the target page and the blocks you intend to protect, including whether each needs removal protection, movement protection, or both. This makes it easier to review the result and reverse an overly broad restriction.
Finally, treat editor locks as protection against accidental changes through the normal editing interface—not as authorization or server-side validation. Keep client roles limited to the capabilities they need, and test the result using a separate account with the same role and capabilities as the real client. Do not assume an administrator’s view accurately represents what a client can change.
Step 1: Identify the blocks that need protection
Start with the smallest set of blocks that would cause a problem if a client accidentally removed or repositioned them. Common candidates include a legal disclaimer, a branded call to action, a layout wrapper that keeps related content together, or required instructions beside a form. Protecting only these structural or compliance-critical elements keeps the rest of the page straightforward to edit.
Separate blocks that must remain intact from content clients are expected to maintain. For example, a call-to-action block might need removal protection while its heading or button label should remain editable; an image caption may also need routine updates. Use List View to identify the exact blocks and their parent-child relationships. A container can hold several nested blocks, so selecting the parent may affect more content than selecting one child.
Before applying locks, make a brief inventory for the target page, post, or template. Record the block name or purpose and whether it needs protection from removal, movement, or both. These are separate requirements: a block may need to stay on the page but be allowed to move, or it may need to remain in a specific position as part of the layout. This inventory gives you a clear scope to verify during testing and makes future handoffs easier to maintain.
- Protect from removal: use for required notices, approved brand elements, or essential instructions.
- Protect from movement: use when the block’s position in the page structure matters.
- Leave editable: keep routine copy, images, captions, and other client-maintained content outside the lock unless there is a specific reason to restrict it.
Pro Tip
Step 2: Lock selected blocks in the WordPress editor
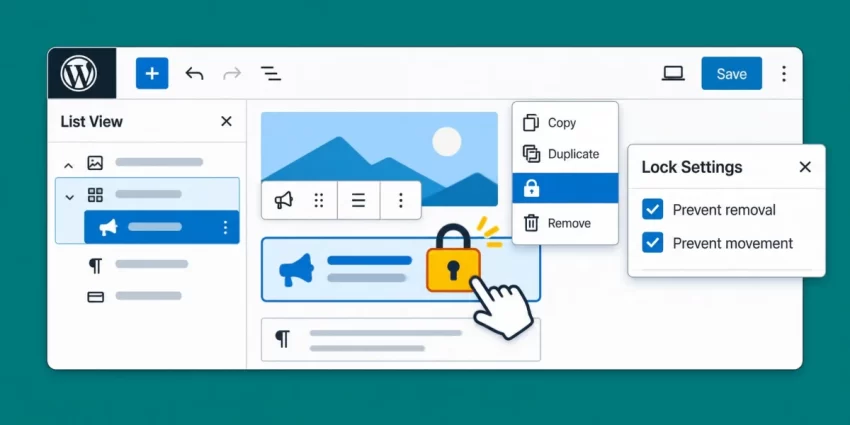
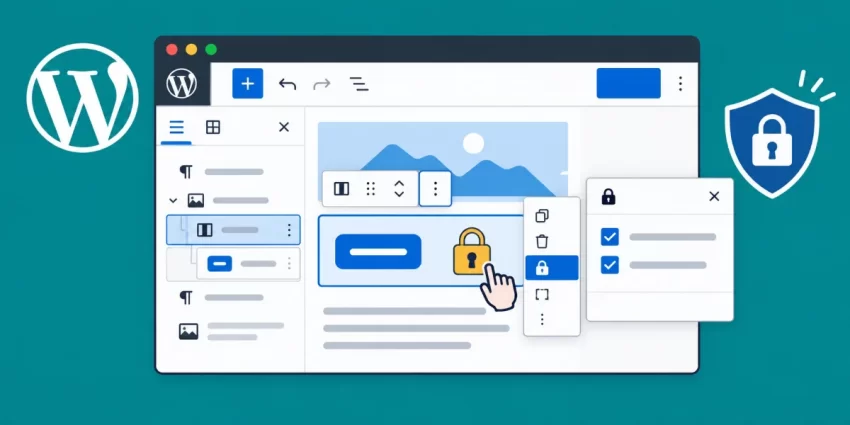
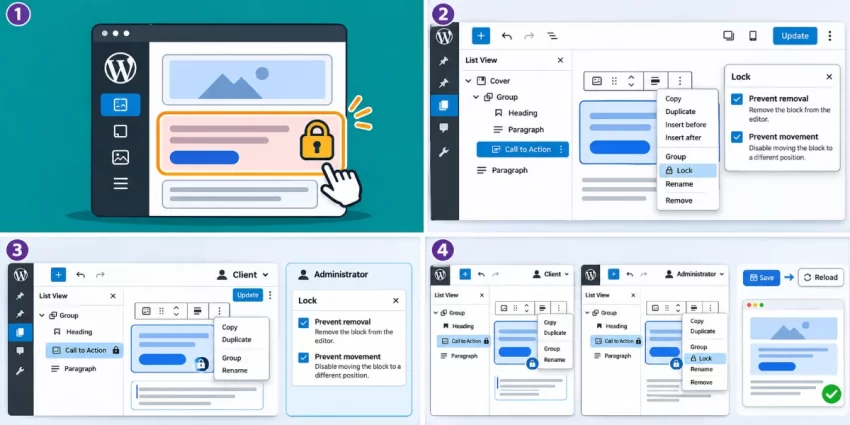
Open the target page or post in the WordPress block editor, then select the exact block you identified in Step 1. If it is difficult to select on the canvas, open List View and choose the block from the document hierarchy. Open the block’s three-dot options menu, choose Lock, and enable the restriction that matches your requirement. The menu labels can vary slightly between WordPress versions, but the controls distinguish preventing removal from preventing movement.
Enable removal protection when the block must remain on the page. Enable movement protection only when its position is also important—for example, when a notice must stay beside a form or a CTA must remain within a particular layout. These restrictions are independent, so choosing one does not automatically apply the other. Before locking a group, columns block, or other parent container, inspect its children in List View: a parent-level lock can affect the nested content as well as the container. Avoid locking a larger structure when protecting one child block is sufficient.
After selecting the appropriate options, confirm the lock and save or update the page. Reopen the editor and select the same block to verify the lock remains in place. WordPress stores block attributes with the serialized block content, so reopening the saved content is a useful check that the change persisted. For the official overview of editor locking, see WordPress documentation on locking blocks.

Step 3: Prevent client accounts from changing lock settings
A block lock protects the selected block only while the person editing it cannot change that lock. If a client can access the editor’s lock controls, they may be able to unlock the block before removing or moving it. Restrict those controls for client accounts with a small site-specific plugin, while allowing trusted administrators to manage locks.
Create wp-content/plugins/pnet-block-lock-controls/pnet-block-lock-controls.php, paste in the following code, and activate PixelNet Block Lock Controls from the WordPress Plugins screen. A site-specific plugin keeps this behavior separate from the theme, so a theme update will not remove it.
The filter checks the current user’s capabilities whenever block-editor settings are prepared. Users with manage_options retain the lock controls; users without it receive editor settings that disable changing block locks. On a standard site, this usually limits lock management to administrators. If a trusted editor role should also manage locks, replace manage_options with a custom capability assigned only to trusted users, rather than granting a broad capability without reviewing its other effects.
Editor-Level Safeguard
After activation, verify the behavior with both a client-role test account and a trusted administrator. The client should not be able to alter block locks in the editor, while authorized staff should still be able to maintain them.
Did you know: You can Create Gutenberg Block with ACF to build reusable Gutenberg components with custom fields and dynamic PHP rendering, eliminating the need to develop complicated React interfaces for every custom block.
Step 4: Test the client editing experience
Test with a separate account that has the same role and capabilities as your clients; an administrator’s view is not a reliable substitute. Log in as that user, open the exact page you configured, and check the protected blocks in both the editor canvas and List View. Confirm each block cannot be removed or moved according to the restrictions you selected. Then try editing ordinary text, images, or other content that should remain available to the client.
Inspect the selected block’s options menu and lock controls as well. The client account should not be able to change the settings that protect the block. If the lock controls are still available, confirm the site-specific plugin is active and compare the test user’s capabilities with the capability check in the plugin. Avoid testing by changing the actual protected content; use a staging copy when you need to verify how an attempted edit behaves.
Save the page, reload the editor, and confirm the restrictions persist. Visit the published page in a separate browser session to check that the editor settings have not changed the front-end layout or content. Finally, repeat the relevant checks with an authorized administrator account. That user should be able to manage the locks, while the client should retain access to the intended editable content. If a test reveals an overly broad restriction, adjust only the affected block or setting, then repeat the client test.
You might also like:

Step 5: Choose the right lock scope for patterns and templates
Use individual block locks when a specific block on one page or post must not be moved or removed. A synced pattern is more suitable when you want shared content—such as a standard call to action—to stay consistent across multiple pages. Editing the synced pattern updates its shared content wherever it is used, so decide who should be allowed to change the source pattern as well as what clients can edit in each page.
A lock on a block instance and a pattern’s shared status address different needs: the former limits particular editing actions on that block, while the latter helps maintain common content across uses. Don’t assume a synced pattern alone prevents authorized users from changing its content. Keep the editing workflow clear for clients, and test changes on a staging copy if the pattern is used in several places.
For a custom block that uses InnerBlocks, the separate templateLock setting can control editing within its inner-block template. Depending on the chosen value, it can prevent insertion, removal, or movement of inner blocks. This is useful when a reusable block structure should remain fixed, but it is broader than locking a single block on a page. Review the official WordPress developer reference for block templates and template locking before applying it to a custom block.
Choose the narrowest scope that meets the requirement:
- One block: use its built-in movement or removal lock.
- Shared content: use a synced pattern and control access to editing the shared source.
- Fixed inner structure: consider
templateLockfor the relevantInnerBlocksarea.
Broader restrictions can prevent mistakes, but they can also block legitimate updates. Lock only the structure that needs to stay stable, and verify both client and trusted-editor workflows.
Common Errors
If a block appears unprotected or the editor behaves differently than expected, check the lock itself, the user’s capabilities, and the block’s position in the hierarchy before changing the site-wide setup. Work through these checks with a test account and, when possible, on staging so troubleshooting does not put production content at risk.
- The client can still remove a block: Select the exact block and confirm its removal restriction is enabled, then save and reopen the page to verify the lock persisted. Also confirm the client cannot change lock settings; otherwise, they may be able to unlock it before deleting it.
- The client can move a protected block: Removal and movement are separate restrictions. Enable movement protection if the block must stay in its current position, then save and test again.
- An administrator cannot find the Lock option: Check that the current account has the capability allowed by the plugin condition. If it does, temporarily test with other editor customizations or plugins disabled on staging; another customization may be changing the editor controls.
- Clients cannot edit content they should be able to change: Inspect List View for a lock on a parent container or a template-level restriction that affects nested blocks. Loosen only the unnecessary restriction, and retest both the parent and its children.
- Different accounts see different behavior: Compare their roles and capabilities, confirm they are editing the same post and editor context, and review any role-management plugins. Do not assume that accounts with similar role names have identical permissions.
- Lock changes disappear after saving: Confirm you updated the intended page or post, check its revisions, and investigate custom code or plugins that filter or rewrite saved content. Reapply the lock only after identifying why it was lost.
Finally, remember the boundary of this safeguard: block locks control actions in the normal editor interface. They do not prevent direct database changes, code edits, or an authorized REST/API workflow from changing stored content. If an account can make changes through those routes, review its permissions and server-side controls rather than relying on editor locks alone.
Conclusion: Protect only what clients should not change
Clients need room to update useful page content, but a routine edit should not accidentally remove a required notice, branded call to action, or carefully arranged layout. The safest workflow is selective: identify the specific blocks that must stay, apply removal protection and movement protection only where each is needed, and avoid locking an entire page when a smaller restriction will do. This keeps the editing experience practical while protecting important structure.
For a reliable handoff, also restrict the block editor’s lock controls for client accounts using a site-specific plugin and an appropriate capability check. Then test the complete workflow with a representative client account: verify the protected blocks cannot be changed as intended, confirm ordinary content remains editable, and check that trusted administrators can still manage locks. Reopen the saved page and review the front end so you know both the editor state and published result are correct.
Keep a current backup and document which blocks are protected so future updates do not remove safeguards or make them confusing to maintain. Most importantly, remember that Gutenberg locks are an interface-level guardrail against accidental edits, not protection against direct database or code changes, or sufficiently privileged API access. Use suitable roles and stronger controls for high-risk content. Applied narrowly and tested properly, Lock Blocks In WordPress helps clients work confidently without making the whole page difficult to maintain.